BASIC FUNCTIONS AND OPERATIONS: Using the COPY Function
5-8
4
Use the (
▲▼
)
POSITION
keys to increase or decrease the copy space after the
COPY SPACE menu appears. The copy space can be set in the range from 1
to 10 mm. This setting is retained in the plotter’s internal memory even when
the power is turned off.
5
Press the
ENTER
key to register your settings. The following menu appears.
If the effective cutting area is smaller than the area required for copying, the
following message will appear. Either increase the size of the effective cutting
area, or load media of a sufficient size for the data. If CANCEL is selected, the
plotter returns to Ready status.
6
Use the (
▲▼
)
POSITION
keys to increase or decrease the number of copies.
The number can be increased up to the maximum number of copies that can be
cut out of the currently loaded media.
7
Press the
ENTER
key to register your settings. “COPY” is displayed on the
LCD and the specified number of copies cut. Since the copy data is retained in
the buffer even when the media is replaced, copying can be performed as
many times as required until the data in the buffer is cleared. After the media
has been replaced, press the
COPY
key to continue cutting additional copies.
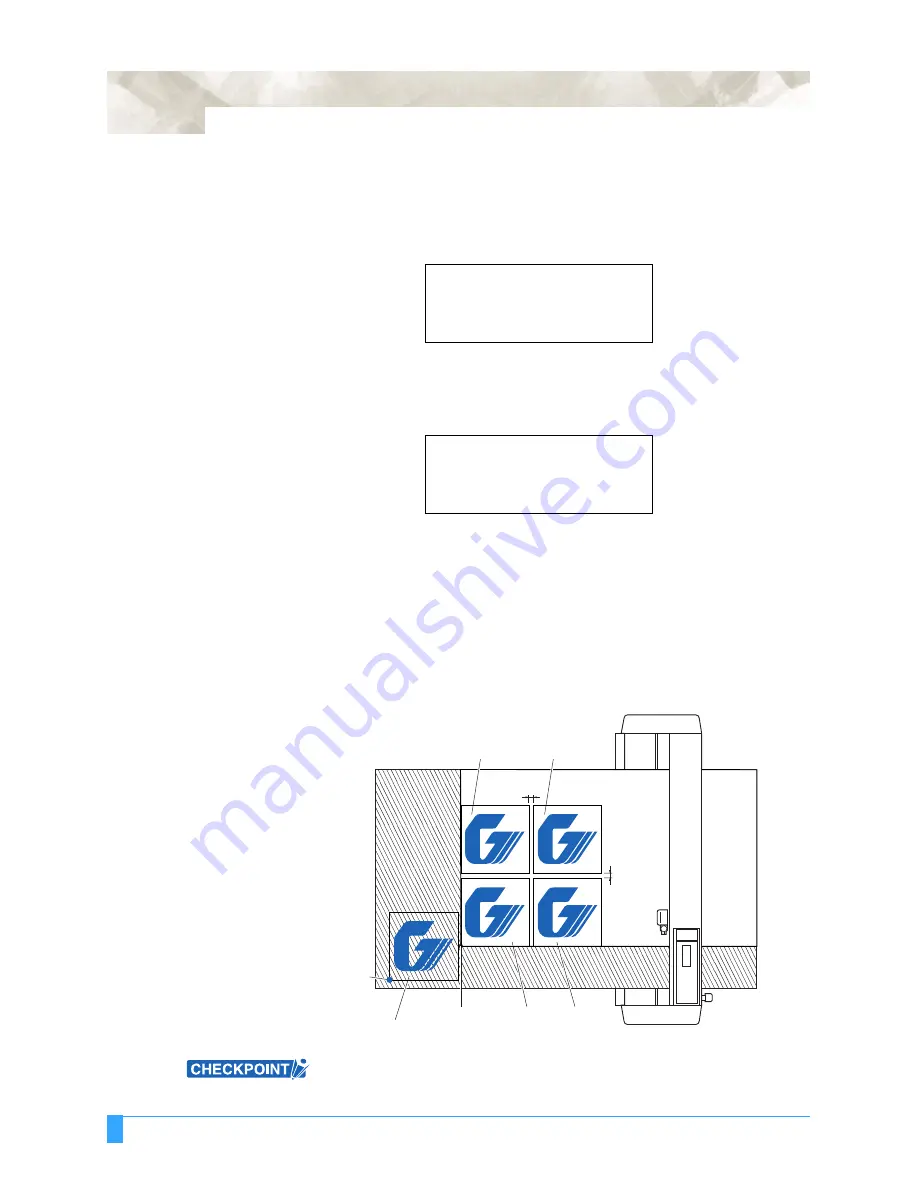
The following figures illustrate the sequence in which copies are cut.
For the front loading model, rotate the above figure 180 degrees.
COPY MODE
NUMBER OF COPIES
[
1]
CANNOT COPY
CUT AREA TOO SMALL
OK>
Origin
Copy origin
Original cut/plot
3rd copy
1st copy
2nd copy
4th copy
Copy space
Copy space
<When a cut sheet is loaded in the rear loading model>
Summary of Contents for Q100
Page 34: ...Cutter Blades and Cutter Pens Adjusting the Blade Length 2 6 ...
Page 64: ...Pen Setting Conditions Adjusting the Blade Length 4 12 ...
Page 140: ...ADVANCED FUNCTIONS AND OPERATIONS Selecting the Type of Perforated Line 6 62 ...
Page 148: ...OPTIONS Pen Offset for 2 pen models only 7 8 ...
Page 174: ...INTERFACES COMMAND Settings 10 8 ...


