STREAM User Manual
54
Settings
Using the built-in settings, you can configure the STREAM to create optimal video in every shooting situation,
maximize battery life, select
Record Modes
, and set the time and date.
The STREAM is shipped with default settings that create great HD video under most normal conditions, so you
can choose to shoot without worrying about the settings at all, and if you do change the settings, you can
return to the default values in a single step using the
reset to defaults
command.
Adjusting settings
1.
Power up the STREAM if it’s not already on and go to the Integrator’s HTML Web Page as described
above.
2.
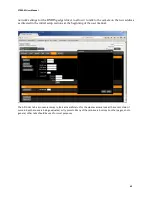
Select the /API link near the top of the page. This command will give a response that details all of the
current settings.
3.
Use the other hyperlinks on the page to change other settings, or enter the specific commands
through a browser window or application.
4.
Each setting change will indicate success or failure in the response window.
5.
Settings will only be in effect until the next power cycle unless you save the changes by sending the
save settings command.
Settings Summary
Here’s a quick reference list of all the STREAM settings. Detailed information about the settings as well as tips
and guidelines for their use are provided in the following section
,
Tips and Guidelines for Getting the
Most out of Your STREAM
.
The STREAM is set to default settings values out of the box. These are also the values that are set if
Restore
All Default Settings
is used.
Key Setting Guidelines
There are two key pieces of information to remember when changing the settings:
1.
To change sensor settings, including frame rate, data rates, and resolutions, the video stream,
recording, and the sensor must ALL be turned OFF. If these functions are running, the camera
may attempt to make the settings changes, however, the end result may not be the desired
result.
2.
To create video, you must settle on what combinations of functionality you desire. Settings for all
resolutions, data rates, and frame rates must all be changed prior to turning the sensor on. A
video pipeline is then set up, and you can start/stop recording or start/stop streaming, at will,
but you cannot start recording and then change the streaming resolution (for instance). Even if
the two don’t seem connected, there is only one video pipeline and it must be set up prior to
turning on the sensor.
There are a few settings that are tied to the sensor or video pipeline that can be manipulated
while the sensor is running. These are the exposure settings (exposure zone, exposure time,
noise filter, and sharpener) and the overlay settings. In addition, settings that do not affect the
video pipeline may change during sensor operation, such as the microphone volume, power off
timeout, etc.


