

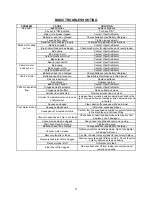
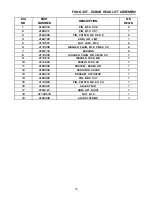
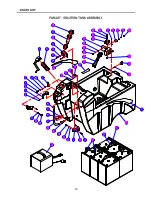


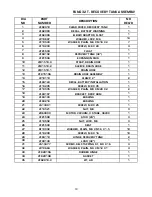
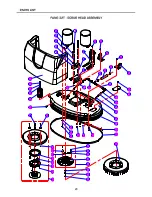
PREVENTITIVE MAINTENANCE
: Before performing any maintenance
on the machine, be sure that the power is
turned off, or the batteries disconnected.
: Repairs are to be completed by an
authorized Viper service center only. Any
repairs completed by unauthorized persons will
void the warranty.
DAILY MAINTENANCE
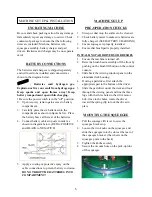
1. Remove pad driver / brush and clean with
approved cleaner.
2.
Drain recovery and solution tanks completely
and rinse out with clean water. Visually check
the recovery tank for debris and clean out as
necessary.
3.
Raise squeegee assembly off the floor and
wipe it down with a damp towel. Be sure to
store the squeegee in the up position.
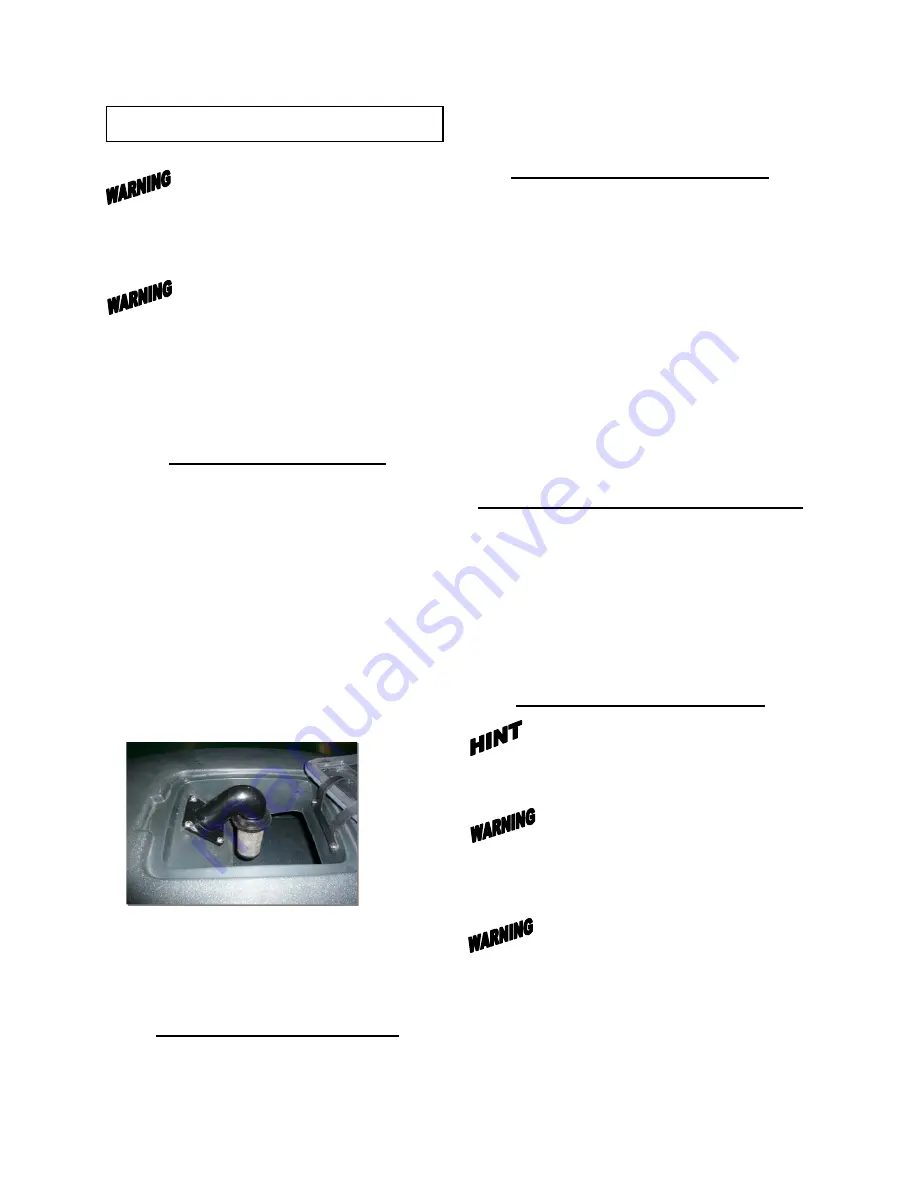
4.
Remove the float shut-off assembly and rinse
it out with clean water.
5.
Clean machine with an approved cleaner and a
damp towel.
6.
Recharge batteries.
WEEKLY MAINTENANCE
1.
Check fluid level in batteries.
2.
Check batteries for loose or corroded cables.
3.
Keep battery tops clean from corrosion.
MONTHLY MAINTENANCE
1.
Check machine for leaks and lose fasteners.
2.
Lubricate all grease points and pivot points
with silicon spray and approved grease.
3.
Place machine over a floor drain. Flush
solution system by pouring 3 gallons of hot
water and approved alkaline detergent into the
solution tank and running machine (with
solution control on) for 45 seconds. Turn
machine off and let it sit over-night. The
following day, drain the remaining solution
and rinse the solution tank out with clean
water.
VACUUM MOTOR MAINTENANCE
1.
Contact your local Viper Distributor for any
motor maintenance.
2.
Vacuum motor should have the brushes
checked every 250 hours. Brushes should be
replaced when they are worn to a length of
10mm or less.
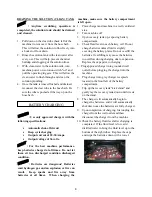
BATTERY MAINTENANCE
: For the best machine performance,
keep batteries charged at all times. Do not let
them sit in a discharged condition.
: Batteries are dangerous! Batteries
emit hydrogen gas and an explosion or fire can
result. Keep sparks and fire away from
batteries at all time.
: Whenever servicing batteries, be
sure to wear protective gloves. Avoid contact
with battery acid at all times!
1.
Always follow the battery charging directions
as outlined in the BATTERY CHARGING
section of this manual.
9


