background image

©  2008  Directed  Electronics-  All  rights  reserved.

27

Transmitter/Receiver Learn Routine

The  system  comes  with  two  transmitters  that  have  been  taught  to  it.  The 

system can store up to four different transmitter codes in memory. Use the 

following learn routine to add transmitters to the system or to change button 

assignments if desired. 

If the system was previously programmed using the 998T Bitwriter, the learn 

routine may be locked. If the siren generates one long chirp when attempting 

to program the unit, the learn routine is locked and must be unlocked using 

the 998T Bitwriter before proceeding.

1. 

Open  a  door.  (The  GREEN  wire,  H1/5,  or  the 

VIOLET, H1/7 must be connected.)

2. 

Turn the ignition on. (The YELLOW wire, H1/9 must 

be con nect ed.)

3.  

Select the receiver channel:

 Press and release the  


Valet/Program button the number of times nec es sary  


to access the desired channel.

NOTE: If adding a remote, a button must be taught to the unit in the Channel 

1 or Channel 5 position prior to programming other channels.

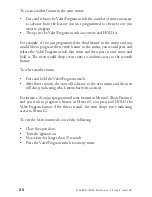
Press  and  hold  the  Valet/Program  button  once  more.  The  siren  will  chirp 

and  the  LED  will  blink  the  number  of  times  corresponding  to  the  channel 

accessed.

Summary of Contents for Responder 350

Page 1: ...nal installer only Any attempt to install this product by any person other than a trained professional may result in severe damage to a vehicle s electrical system and components Responder 350 Install...

Page 2: ...te Lite Nuisance Prevention Circuitry NPC Revenger Silent Mode Soft Chirp Stinger Valet Vehicle Recovery System VRS and Warn Away are all Trademarks or Registered Trademarks of Directed Electronics In...

Page 3: ...Flash Jumper 16 Bypassing Sensor Inputs 17 System Features Learn Routine 18 System Features Menus 21 Menu 1 Basic Features 21 Menu 2 Advanced Features 22 Feature Descriptions 22 Menu 1 Basic Features...

Page 4: ...put Primary Harness Wiring Instructions This guide describes in detail the connection of each wire Also included are possible applications of each wire This system was designed with the ultimate in fl...

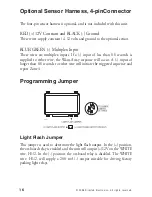
Page 5: ...ion of this installation guide this wire supplies a 200 mA output Note For parking light systems that draw 10 amps or more the jumper must be switched to a light flash output see the Programming Jumpe...

Page 6: ...nel three button s is pressed and released The signal will continue until channel three is pressed again A latched reset with ignition output works similar to the latched output but will also reset ou...

Page 7: ...NT This output is only intended to drive a relay It cannot be connected directly to the domelight circuit as the output cannot support the current draw of one or more bulbs H1 5 GREEN door trigger inp...

Page 8: ...e circuit is used in many Ford products Connect the violet wire to a wire that shows 12V when any door is opened This wire will report Zone 3 NOTE If using a door trigger wire that has a delay Advance...

Page 9: ...he starter kill relay and must show 12 volts with the key in RUN position and during cranking Take great care that this wire cannot be shorted to the chassis at any point H1 10 BROWN siren output Conn...

Page 10: ...e This fuse protects the module itself H1 12 RED WHITE 200 mA channel 2 output When the system receives the code controlling channel 2 for longer than 1 5 seconds the RED WHITE will supply an output a...

Page 11: ...portant The door lock outputs are low current and should not be attached directly to any high current device they are only to be used to activate relays For detailed instructions about connecting to t...

Page 12: ...lt DC and plugs into the two pin WHITE port Make sure the LED wires are not shorted to ground as the LED will be damaged Multiple LED s can be used but they must be wired in series The LED fits into a...

Page 13: ...g a mounting location Check for rear clearance before drilling a 9 32 inch hole and mounting the button The GRAY wire in the two pin plug may also be used as a ghost switch input and can be connected...

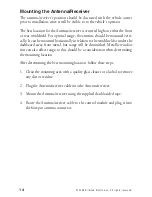
Page 14: ...ontally in relation to the windshield or under the dashboard away from metal but range will be diminished Metallic window tint can also affect range so this should be a consideration when determining...

Page 15: ...ual stage shock sensor inside the control unit Adjustments are made via the rotary control as indicated in the diagram Since the shock sensor does not work well when mounted firmly to metal we do not...

Page 16: ...input of less than 0 8 seconds is supplied to either wire the Warn Away response will occur A input of longer than 0 8 seconds to either wire will initiate the triggered sequence and report Zone 4 Pro...

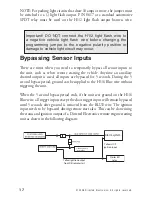
Page 17: ...ch as when remote starting the vehicle Anytime an auxiliary channel output is used all inputs are bypassed for 5 seconds During the 5 second bypass period ground can be supplied to the H1 6 Blue wire...

Page 18: ...ter If the system was previously programmed using the 998T Bitwriter the learn routine may be locked If the siren generates one long chirp when attempting to program the unit the learn routine is lock...

Page 19: ...ature While holding the Valet Program switch you can toggle the feature on and off using the remote transmitter Pressing will select the one chirp setting Pressing will select the two chirp setting Se...

Page 20: ...en press it once more and hold it The siren would chirp seven times to confirm access to the seventh feature To select another menu Press and hold the Valet Program switch After three seconds the unit...

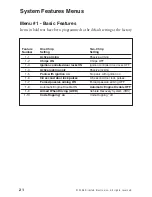
Page 21: ...2 Chirps ON Chirps OFF 1 3 Ignition controlled door locks ON Ignition controlled door locks OFF 1 4 Active locking only Passive locking 1 5 Panic with ignition on No panic with ignition on 1 6 0 8 sec...

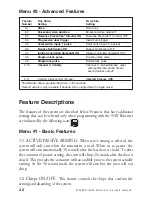
Page 22: ...rt Closure Off The Bitwriter allows programming from 1 180 seconds Second unlock is only available if Feature 2 8 is programmed to single pulse Feature Descriptions The features of the system are desc...

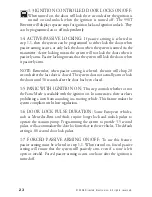
Page 23: ...20 seconds after the last door is closed The system does not actually arm or lock the doors until 30 seconds after the door has been closed 1 5 PANIC WITH IGNITION ON This step controls whether or not...

Page 24: ...change its code each time the transmitter and receiver communicate This makes the group of bits or word from the transmitter very long The longer the word is the easier it is to block its transmissio...

Page 25: ...hirp 10 times prior to the full triggered sequence The door trigger is still treated as an instant trigger and closing the door quickly will not prevent a full triggered sequence from occurring If the...

Page 26: ...tead of a single pulse At the same time the GREEN H2 A wire will supply two negative pulses instead of a single pulse This makes it possible to directly interface with double pulse vehicles without an...

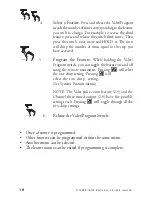
Page 27: ...mpting to program the unit the learn routine is locked and must be unlocked using the 998T Bitwriter before proceeding 1 Open a door The GREEN wire H1 5 or the VIOLET H1 7 must be connected 2 Turn the...

Page 28: ...successful programming It is not possible to teach a transmitter button to the system more than once Channels 2 5 6 Channels 2 5 and 6 are used to assign the arm disarm and panic functions to separate...

Page 29: ...ram button can be released To exit the learn routine One long chirp indicates that Learn Routine has been exited Learn Routine will be exited if any of the following occurs Ignition is turned off Door...

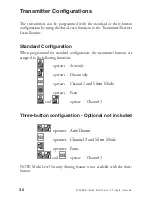
Page 30: ...figuration When programmed for standard configuration the transmitter buttons are assigned to the following functions operates Arm only operates Disarm only operates Channel 2 and Silent Mode operates...

Page 31: ...tus Arm Disarm Diagnostics The number of siren chirps will indicate the status of the alarm when arming and disarming For information on which zone is active or has been violated refer to the Table of...

Page 32: ...econdswilltrigger aWarnAwayresponse whileinputslongerthan 0 8 seconds will instantly trigger a full alarm sequence and report Zone 4 5 Two stage similar to doors Ignition input H1 9 YELLOW NOTE The Wa...

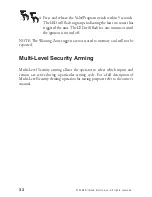
Page 33: ...flash for one minute or until the ignition is turned off NOTE The Warning Zone triggers are not stored to memory and will not be reported Multi Level Security Arming Multi Level Security arming allow...

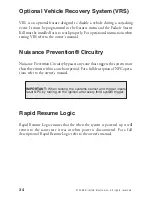
Page 34: ...revention Circuitry Nuisance Prevention Circuitry bypasses any zone that triggers the system more than three times within a one hour period For a full description of NPC opera tions refer to the owner...

Page 35: ...this turn the ignition key on and off to clear the NPC from memory and then retest the shock sensor For a detailed description of NPC see Owner s Guide Door input does not immediately trigger full al...

Page 36: ...t the impact sensor caused the trigger the sensor may be detecting the door opening Reducing the sensitivity or relocating the sensor can often solve this problem If the LED indicates that the door ca...

Page 37: ...2008 Directed Electronics All rights reserved 37...

Page 38: ......

Page 39: ......

Page 40: ...N3305V 2008 12 Vista CA 92081 www directed com 2008 Directed Electronics All rights reserved...

Reviews: