3. Mount the system using the chamber mounting legs. Flange type connecting
unions must be used to connect the water source. The symmetric design of
the chamber allows the water connections to the inlet and outlet ports to be
interchangeable.
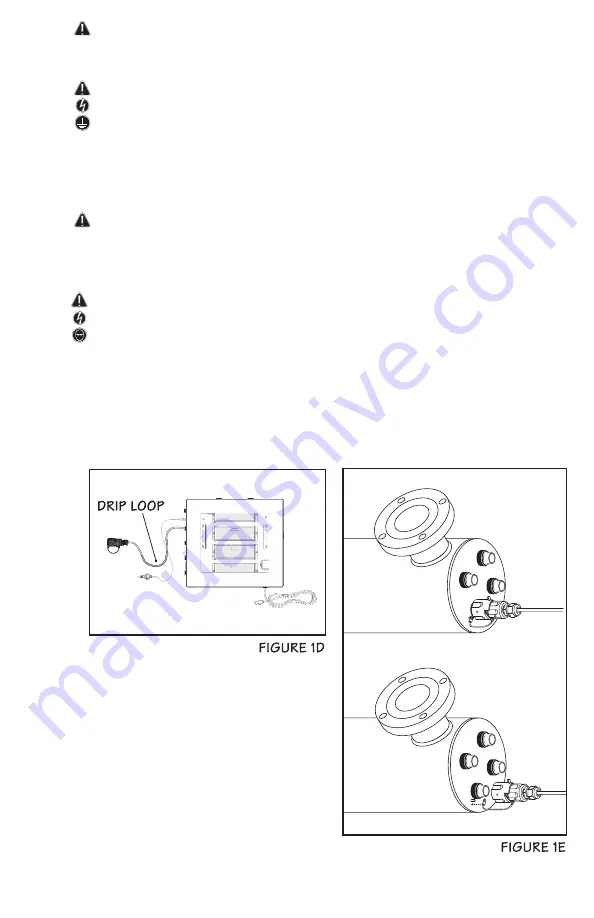
4. Mount the Hi-Flo enclosure to the wall, near the reactor chamber. Ideally
place the enclosure above the reactor and away from any water connection
point, to prevent any water from potentially leaking onto the enclosure by
means of a leak at a connection point or a “sweating” system. Make sure
you allow for a “drip-loop” (Figure 1D) on the lamp, sensor and power cord,
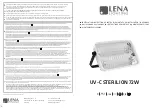
again, to prevent any water from potentially entering the enclosure. Affix the
green ground wires to the grounding lug at the end of the reactor vessel and
securely fasten with the lugnut provided (Figure 1E).
5. Install the UV lamps and UV sensor as outlined on pages 8-10.
6. When all plumbing connections are made, slowly turn on the water supply
and check for leaks. The most likely cause for leaks is from the o-ring seal. In
case of a leak, shut water off, drain cell, remove the retaining nut, wipe the
o-ring and threads clean and re-install.
7. Once it is determined that there are no leaks, plug the system into the ground
fault interrupter, and view the LED displays through the enclosure window to
ensure the system is operating properly. The controller is designed to detect
both power to the system and lamp illumination.
It is important to NEVER LOOK DIRECTLY AT THE GLOWING UV LAMPS.
8. Allow the water to run for a few minutes to clear any air or dust that may be in
the chamber.
PLEASE NOTE:
When there is no flow, the water in the chamber
will become warm, as the UV lamps are always on. To remedy this, run a cold
water tap anywhere in the facility to flush out the warm water.
6


