Brush Replacement Procedure
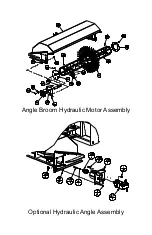
Remove the 4 nuts (Item #1, see
“Angle Broom Hydraulic Motor
Assembly
” section) holding the Hydraulic Motor Assembly and remove
the Hydraulic Motor Assembly.
Remove the 4 nuts (Item #1, see
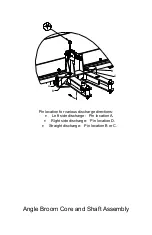
“Angle Broom Core and Shaft
Assembly
” section) holding the Angle Broom Shaft Assembly and
remove the Angle Broom Shaft Assembly.
The core should be free from the brush head. Lift brush head and
remove to expose core.
Remove the retaining plate from one end of the core (See
“Angle Broom
Core and Shaft Assembly
” section).
Remove old brush sections. Inspect drive bars for indentations or
excessive wear. Replace core cage if damage is evident.
Stand core on end with retaining plate still attached and install the new
brush sections making sure the drive pins of the wafer engage one of the
core drive bars. For a snug fit, install consecutive wafers so that the
drive pins are 180° apart.
Reinstall the retaining plate and lay core on ground. When handling the
core, do not use the wafers to move the core.
Lower brush head over core with new brush sections.
Reinstall Angle Broom Shaft Assembly into core and secure with nuts.
Before reinstalling motor, remove the 3/8” bolt (Item #45, see “Angle
Broom Hydraulic Motor Assembly
” section) holding the Drive Adapter
(Item #48) on the Hydraulic Motor (Item #47) and apply a thin layer of
grease to the splines of the motor. Reinstall Drive Adapter to the
Hydraulic Motor.
Reinstall Hydraulic Motor Assembly and secure with nuts.


