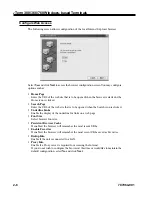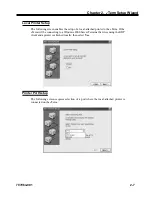
background image

707064-001

2-5

Chapter 2.  

e

Term Setup Wizard

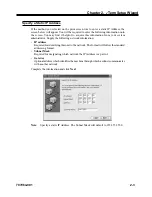
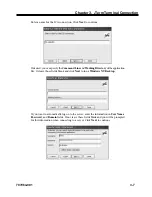
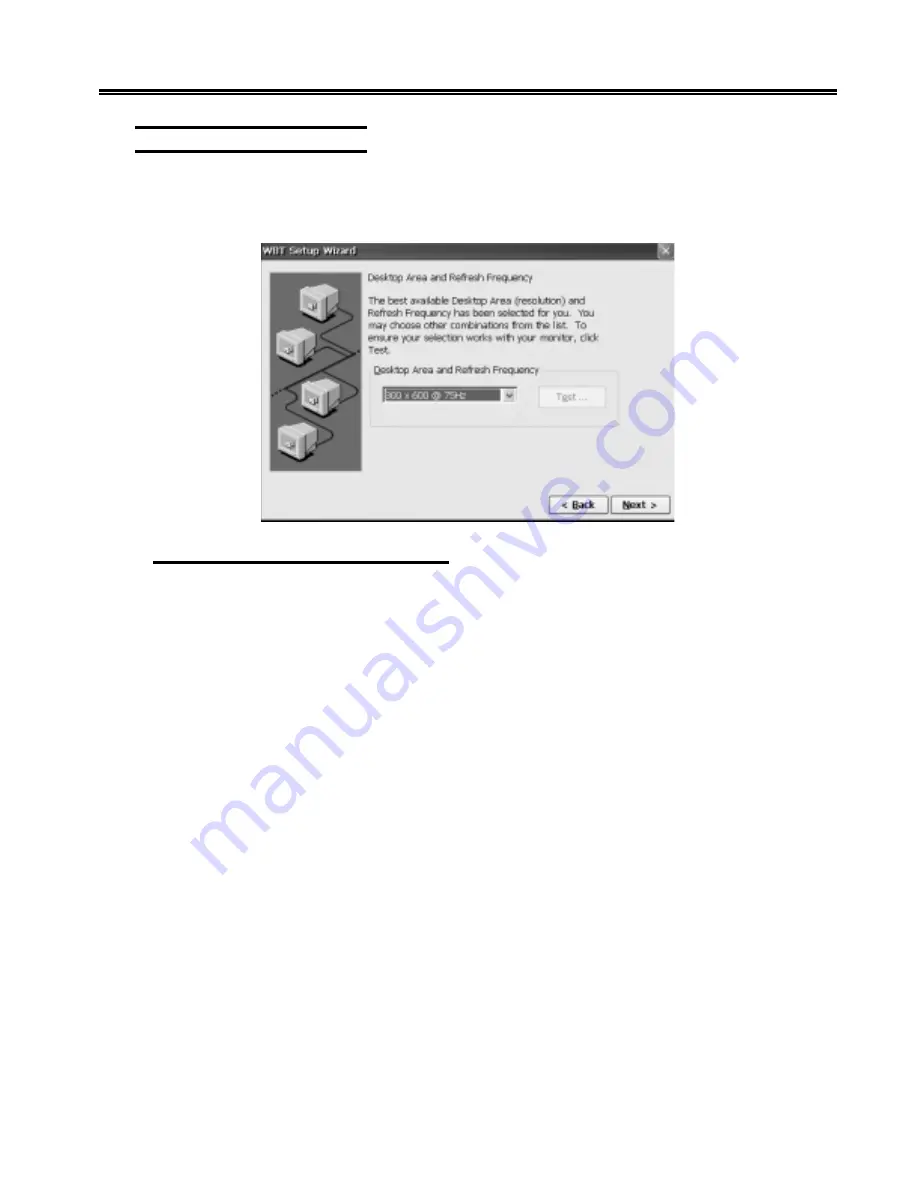
Choose Display Resolution

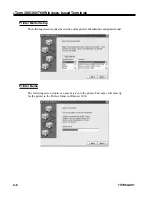
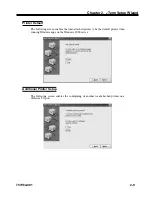
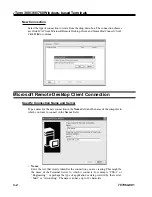
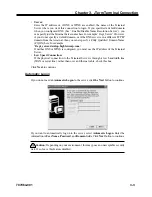
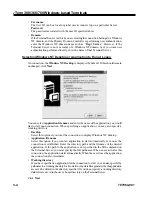
The following screen lets you choose a display resolution.

Select the desktop area and refresh frequency and click 

Next

.

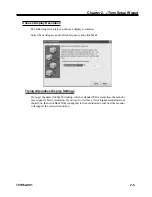
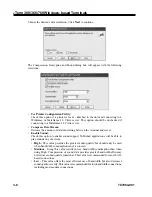
Trying Alternative Display Settings

If you get the default 640x480 desktop, which is standard VGA resolution, the monitor
may support a better resolution. If you want to test this, select a higher resolution from
the list box, then click 

Test

. If the rectangular test is not distorted or skewed, the monitor

will support the selected resolution.

Summary of Contents for eterm 300

Page 1: ...eTerm 300 360 760 Windows based Terminals User s Manual P N 707064 001...

Page 2: ...ncluding interface that may cause undesired operation This apparatus complies with the CDoC CLASS B limits for radio interference as specified in the Canadian Department of Communications Radio Interf...

Page 3: ...dification or merged portion in whole or in part except as expressly provided for in this Agreement 4 TERM The license granted under this Agreement is effective until terminated You may terminate it a...

Page 4: ......

Page 5: ...6 Specifications eTerm 300 1 6 Specifications eTerm 360 1 7 Specifications eTerm 760 1 8 Chapter 2 eTerm Setup Wizard 2 1 Configuring the Unit 2 1 Welcome Screen 2 1 License Agreement Screen 2 1 Enab...

Page 6: ...ct Client Connection 3 14 Configuring Host Connections 3 15 New Connection 3 15 Connection Name 3 15 Connection Type 3 15 Host Name Address 3 15 Terminal Type 3 16 Timeout 3 17 Additional Connection C...

Page 7: ...cautions Follow all warnings and precautions as recommended in this user s manual to maximize the life of your unit Do Turn off the product before cleaning Use a soft cloth moistened with mild deterge...

Page 8: ...of the unit are listed as follows Windows CE with RDP ICA Up to 1280 x 1024 display resolution Terminal emulator support Remote software upgrade capability 16 bit stereo audio output Modular design m...

Page 9: ...yboard optional PS 2 Mouse optional Quick Start Card Power Cord Power Supply Mounting Brackets Rubber Feet Note Rubber feet are provided with the eTerm 360 so that the unit may be placed horizontally...

Page 10: ...el Port Ethernet Audio Out eTerm 360 DC 5V Power Ethernet Parallel Port Line In PS 2 Mouse PS 2 Keyboard Serial Ports COM1 COM2 VGA Connector USB Ports Line Out Front View Rear View eTerm 760 USB MOUS...

Page 11: ...onnectors can be used for pointing devices or other serial devices such as a mouse or a modem PS 2 Mouse Connector This connector is for a mouse using a PS 2 plug mini DIN VGA Connector This connector...

Page 12: ...dministrator Problem Network server cannot be logged on Ensure that the related network setting is correct Contact your system administrator Specifications eTerm 300 Processor Sis 550 200MHz Main Memo...

Page 13: ...input Networking TCP IP with DNS WINS and DHCP 10 100BaseT Ethernet twisted pair RJ 45 Point to Point Protocol PPP I O Ports One 2 pin power connector One 15 pin female VGA compatible connector One 8...

Page 14: ...in power connector One 15 pin female VGA connector One 8 pin female RJ 45 connector One 6 pin female PS 2 mouse connector One 6 pin female PS 2 keyboard connector Two 9 pin male serial connectors One...

Page 15: ...reset to factory defaults This section explains each screen of this unit s Setup Wizard in sequential order After you finish the Setup Wizard you can change any configuration setting through the Contr...

Page 16: ...ocol service by default provided the DHCP service is available and the unit is properly connected to the network The DHCP will automatically assign an IPAddress which is drawn from a pool of available...

Page 17: ...tion from your system administrator Supply the following network information IP address Required for identifying this unit to the network The format will follow the standard addressing format Subnet M...

Page 18: ...oxes enter the following information as appropriate for each Default Domain This refers to the name identifying the TCP IP domain in which the DNS server resides Specifying a Default Domain and Primar...

Page 19: ...frequency and click Next Trying Alternative Display Settings If you get the default 640x480 desktop which is standard VGA resolution the monitor may support a better resolution If you want to test th...

Page 20: ...web site that is to be opened when the Search icon is clicked Underline Links Enable the display of the underline for links on a web page Font Size Select browser font size Persistent Browser Cache If...

Page 21: ...ocal attached printer to the eTerm If the eTerm will be connecting to a Windows 2000 Server Terminal Services using the RDP client and a printer is attached locally then select Yes Printer Port Setup...

Page 22: ...nter Model Setup The following screen requires the selection of the printer s Manufacturer and printer model Printer Name The following screen requires a name be given to the printer This name will sh...

Page 23: ...he following screen enables the local attached printer to be the default printer when running Windows apps on the Windows 2000 server Additional Printer Setup The following screen enables the configur...

Page 24: ...ngs made on previous pages click Back To apply the settings click Finish To change these settings after you have finished the SetupWizard select Start Settings Control Panel See Chapter 4 Control Pane...

Page 25: ...al client software If so you can select alternate clients for creating a connection in either of the following ways shown in this chapter Configuring Connection Manager Begin Connection Manager config...

Page 26: ...p Client Connection Specify Connection Name and Server Type a name for the new connection in the Name field and the name of the computer to which you want to connect in the Server field Name Enter the...

Page 27: ...FQDN here for example Dept_server develop bigblewcorp com If neither DNS or WINS is configured you must use the IP address of the Terminal Server Low Speed Connection If the physical connection to th...

Page 28: ...ion you would like to start upon connection When specifying an application you may also specify a working directory Desktop Select this option if you want the connection to display Windows NT desktop...

Page 29: ...ger Deleting a Connection To delete an existing connection complete the following steps Select the connection you want to delete Click Delete The Confirm Connection Delete dialog box will appear Click...

Page 30: ...ate a new connection The Specify Connection Type dialog box will appear Choose Network Connection or Dial In Connection for the remote application Creating a Network Connection This type of connection...

Page 31: ...d Working Directory of the application file Or leave those fields blank and click Next to run a Windows NT Desktop If you want to automatically log on to the server enter the information in User Name...

Page 32: ...between the terminal and server Enable Sound Check this option to enable sound support Published applications will be able to play sounds on your client High This value provides the greatest audio qua...

Page 33: ...tomatic logon to the Citrix server Click Next to continue to the Firewall Settings dialog box Configuring the ICA Client to Use a SOCKS Proxy If you are using a SOCKS proxy server to limit access to y...

Page 34: ...ttributes of an existing connection complete the following steps Insure that the connection is not active prior to modification Select the connection you wish to modify Click Edit The client s utility...

Page 35: ...nd Working Directory of the application file Or leave those fields blank and click Next to run a Windows NT Desktop If you want to automatically log on to the server enter the information in User Name...

Page 36: ...ublished applications will be able to play sounds on your client High This value provides the greatest audio quality but should only be used when bandwidth consumption is not a concern Medium Using th...

Page 37: ...s you must configure a SOCKS proxy server to handle connections between clients and the server You can place the proxy server on either side of the firewall or in some situations on both sides of the...

Page 38: ...Term is started or you can start sessions as needed from the HostConnect Desktop or the menu bar in an emulation session HostConnect session types include TN5250 TN5250 is a full featured emulation of...

Page 39: ...pe is dependent upon the host system to which you will connect AS 400 hosts typically use TN5250 or TN5250E IBM mainframes use TN3270 and TN3270E UNIX and most non IBM computers use ASCII emulation To...

Page 40: ...80 5291 1 24 x 80 5250 Printer For 5250 printer emulation select connection type TN5250E and terminal type 3812 For additional printer setup information see the section titledAdditional Connection Cap...

Page 41: ...ut will be displayed The default is 10 seconds Depending upon the Connection Type you select additional configuration capabilities may be available Additional Connection Capabilities Display Parameter...

Page 42: ...are required as defined below Device Name This field entry is required The name is arbitrary but must be unique The name will usually be supplied by the System Administrator Message Queue Not require...

Page 43: ...n You can override the default action for theAttention or System Request Key while connected to a host system This would be necessary if the host stops responding to HostConnect and the host also igno...

Page 44: ...lowing options Device LU Name or Device Pool Select this option to allow entry of a device name LU name or device pool in the corresponding field Associated TN3270E Connection Name Select this option...

Page 45: ...el To access the Control Panel select the Start button on the desktop From the menu select Settings and then Control Panel Through the Control Panel you can perform the following configuration tasks C...

Page 46: ...rt the selected resolution If the settings are satisfactory click OK to close the Display window FTPUpdate Select the desired upgrade information in the fields defined below Server Enter the FTP serve...

Page 47: ...unctions Consult your SystemAdministrator before modifying any of these selections Preferences Tab Serial Number This is the serial number of the ICA software This serial number is used when connectin...

Page 48: ...ation sets Backup server groups provide business recovery for your client in the event that you cannot contact any servers in your primary group You can define up to three groups of Citrix servers to...

Page 49: ...CA connection mode that enables the CE client to connect to applications available on a Citrix server without having to configure connections for each published application To enable PNLite check the...

Page 50: ...ring numbers after bootup Use the Locale scroll list to select the desired language of the keyboard Character Repeat Use the Repeat slider to adjust the repeat delay of keyboard characters Use the Rep...

Page 51: ...is to be opened when the browser is started or the Home icon is clicked Search Page Enter the URL of the web site that is to be opened when the Search icon is clicked Use Lan Select if the terminal i...

Page 52: ...receive secured information through Secure Sockets Layer 2 0 protocol Allow SSL 3 0 security Specifies whether to send and receive secured information through Secure Sockets Layer 3 0 protocol Warn wh...

Page 53: ...style printer server protocol This screen indicates the settings that will allow remote computers to send print jobs to the printer connected at the selected printer port The queue name is the name of...

Page 54: ...t will follow the standard addressing format Subnet Mask Required for designating which network the IP Address is a part of Gateway Optional address that identifies the machine through which a subnet...

Page 55: ...707064 001 4 11 Chapter 4 eTerm Terminal Properties Select the printer port click Next Select the printer s manufacturer and model Click Next to continue...

Page 56: ...12 707064 001 eTerm 300 360 760 Windows based Terminals Enter a name to identify the printer Click Next to continue To enable this printer to be the default printer select Yes and click Next to contin...

Page 57: ...ter select Yes and click Next to add another printer If no further printers are to be configured select No and click Next to continue This is the final screen of the Printer Wizard To review or change...

Page 58: ...nds from the remote desktop on your terminal Local devices Devices that can be used by the application running on the server RDP Colors Choose the number of colors to be displayed when viewing the rem...

Page 59: ...kbox will require the user to enter a password before making any changes to terminal properties Type the password and then reenter to confirm SNMP SNMP Description displays the unique identifier for t...

Page 60: ...information for the unit This unit is provided with factory default configuration values which can be restored by selecting the checkbox Click OK and restart the terminal to restore to default settin...

Page 61: ...t lists the available printers their ID and port information If Default at server is checked the current printer will be the default printer for the session Enter the bandwidth value and the port numb...

Page 62: ...the checkbox to automatically adjust the time for daylight savings SNTP SNTP Simple Network Time Protocol is utilized to synchronize computer clocks by accessing a time server on the internet Synchro...

Page 63: ...1 5 Connection Types 3 14 Connector Introduction 1 5 Control Panel Display 4 2 FTPUpdate 4 2 ICA Setting 4 3 Internet Options 4 7 LPD 4 9 Manually Assigning a Static IP Address 4 10 Network 4 9 Networ...

Page 64: ...arameters TN3270E 3 20 Printer Parameters TN5250E 3 18 Printers 4 10 Product Overview 1 4 1 5 R Restarting after Setup Wizard 2 10 S SNTP 4 18 Specifications eTerm 300 1 6 eTerm 360 1 7 eTerm 760 1 8...

Reviews: