background image

                                               BW-108P AW 


11- 

 
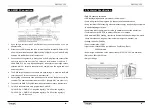
4.4 DMX512 Connection   


1.  If you using a controller with 5 pins DMX output, you need to use a 5 to 3 pin 

adapter-cable. 

2.  At last unit, the DMX cable has to be terminated with a terminator. Solder a 120 

ohm 1/4W resistor between pin 2(DMX-) and pin 3(DMX+) into a 3-pin XLR-plug 

and plug it in the DMX-output of the last unit. 

3.  Connect the unit together in a `daisy chain` by XLR plug from the output of the 

unit to the input of the next unit. The cable can not branched or split to a `Y` 

cable. DMX 512 is a very high-speed signal. Inadequate or damaged cables, 

soldered joints or corroded connectors can easily distort the signal and shut 

down the system. 

4.  The DMX output and input connectors are pass-through to maintain the DMX 

circuit, when one of the units’ power is disconnected. 

5.  Each lighting unit needs to have an address set to receive the data sent by the 

controller. The address number is between 0-511 (usually 0 & 1 are equal to 1). 

6.  The end of the DMX 512 system should be terminated to reduce signal errors. 

7.  3 pin XLR connectors are more popular than 5 pin XLR. 

3 pin XLR: Pin 1: GND, Pin 2: Negative signal (-), Pin 3: Positive signal (+)   

5 pin XLR: Pin 1: GND, Pin 2: Negative signal (-), Pin 3: Positive signal (+),   

Pin 4/5: Not used 


                                               BW-108P AW 


4- 


  2. Technical Specification   
 

y

 DMX 2/2 channels selectable 

y

 LED display with password protection at the rear panel 

y

 Come with great built-in programs (16 chases) and 3 editable chases 

y

 Using the latest LED technology makes important energy (cost) savings compared 

to traditional halogen fixtures. 

y

 Completely silent, the projector is cooled by natural air convection without fan 

y

 Thermal sensor in LED PCB to protect LEDs from over heated. 

y

 With waterproof IP66 housing, it perfect to illuminate all kinds buildings like: hotels, 

shops, discotheques, stage, amusement parks, fairground, museum, etc. 

y

 Voltage:100-240V~50/60Hz 

y

 Power consumption: 150W 

y

 Light source: 108×1W LEDs (Amber:36pcs, Cool White: 72psc) 

                        50,000hrs rated 

y

 Beam Angle: as indicated on the product label (10°/25°/30° x 65° are available) 

y

 Dimension: 582×188×251 mm 

y

 Weight: 18.4 kgs 


Summary of Contents for BW-108P AW

Page 1: ...NO 011 Building Wash BW 108P AW User Guide Advanced LED Technology ...

Page 2: ...BW 108P AW 1 TABLE OF CONTENTS 1 Safety Instruction 2 Technical Specification 3 Main Function 4 How To Control The Unit 5 Troubleshooting 6 Fixture Cleaning ...

Page 3: ...emale Signal cables for linking fixtures available length 1m CCT 1 2m CCT 2 5m CCT 5 or 10m CCT 10 1 Safety Instruction WARNING y Please keep this User Guide for future consultation If you sell the unit to another user be sure that they also receive this instruction booklet y Unpack and check carefully there is no transportation damage before using the unit y Before operating ensure that the volta...

Page 4: ...ket Always ensure that the unit is firmly fixed to avoid vibration and slipping while operating Always ensure that the structure to which you are attaching the unit is secure and is able to support a weight of 20 times of the unit For power supply do not connect in series much more than 4 units use another mains supply for next 4 units BW 108P AW 12 5 Troubleshooting Following are a few common pro...

Page 5: ...ual to 1 6 The end of the DMX 512 system should be terminated to reduce signal errors 7 3 pin XLR connectors are more popular than 5 pin XLR 3 pin XLR Pin 1 GND Pin 2 Negative signal Pin 3 Positive signal 5 pin XLR Pin 1 GND Pin 2 Negative signal Pin 3 Positive signal Pin 4 5 Not used BW 108P AW 4 2 Technical Specification y DMX 2 2 channels selectable y LED display with password protection at the...

Page 6: ...TER button and the display will blink Use DOWN and UP button to change the mode Once the required mode has been selected press the ENTER button to setup or it will automatically return to the main functions without any change after idling 8 seconds To go back to the functions without any change press the MENU button The main functions are showing below Once you set to after running in show mode fo...

Page 7: ...rol the units you have to set DMX address from 1 to 512 channel so that the units can receive DMX signal Press the MENU button up to when the is showing on the display Pressing ENTER button and the display will blink Use DOWN and UP button to change the DMX512 address Once the address has been selected press and keep ENTER button up to when the display stops blinking or storing automatically 8 sec...

Page 8: ...40 181 Slow open fast close 248 255 Open BW 108P AW 8 Display Inversion Press the MENU button up to when the is showing on the display Pressing ENTER button and the display will blink Use DOWN and UP button to select the normal or inversion mode Once the mode has been selected press the ENTER button to setup or automatically return to the main functions without any change after 8 seconds To go bac...

Reviews: