background image

4

Safety and Care

To get the most life from your Freedom Machine, please review 
these safety and care measures carefully.

The Freedom Machine video magnifi er is designed for enlarging and 
enhancing images to improve the quality of life for people who have 
low vision.  The level to which the Freedom Machine can improve the 
ability to see images and text depends on a person’s individual
condition and level of vision degeneration. 

Freedom Machine is not designed to restore vision, correct eye 
conditions or stop vision loss.  A low vision specialist can best 
diagnose the Freedom Machine for a patient’s specifi c condition.

Safety Measures:

Freedom Machine is only to be used on a level surface, like a  


desk or table.

Do not set Freedom Machine on a fl imsy or unstable table. This    


could result in the Freedom Machine falling causing 

 serious 

damage.

Only use Freedom Machine indoors.  Exposing the Freedom 


Machine to extreme changes in temperature may cause 


damages to the eletronics and glass optics.

Place the power cords behind Freedom Machine and away from  

 foot 

traffi

  c to avoid a person tripping on the cord causing 

 damage.

Do not use Freedom Machine near water to prevent electrical    

 shock.

Only use Freedom Machine power supplies. Using diff erent  


power supplies may cause serious damage to the electrical

 components.

Summary of Contents for Freedom Machine

Page 1: ...User sManual freedom M A C H I N E tm...

Page 2: ......

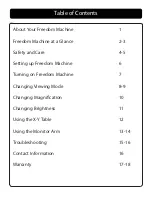
Page 3: ...Care 4 5 Setting up Freedom Machine 6 Turning on Freedom Machine 7 Changing Viewing Mode 8 9 Changing Magnification 10 Changing Brightness 11 Using the X Y Table 12 Using the Monitor Arm 13 14 Troubl...

Page 4: ......

Page 5: ...ow vision to read write view photos enjoy hobbies and more View in color or enhanced high contrast viewing modes Freedom Machine also includes 8 different color combinations for text and background to...

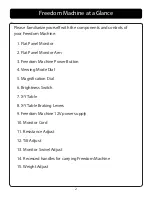
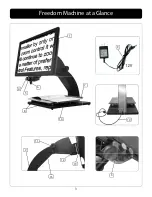
Page 6: ...ication Dial 6 Brightness Switch 7 X Y Table 8 X Y Table Braking Levers 9 Freedom Machine 12V power supply 10 Monitor Cord 11 Resistance Adjust 12 Tilt Adjust 13 Monitor Swivel Adjust 14 Recessed hand...

Page 7: ...3 Freedom Machine at a Glance 1 3 4 5 6 7 8 10 12V 2 11 12 9 13 14 15...

Page 8: ...t diagnose the Freedom Machine for a patient s specific condition Safety Measures Freedom Machine is only to be used on a level surface like a desk or table Do not set Freedom Machine on a flimsy or u...

Page 9: ...d handles on the sides of the base unit pickup from behind Freedom Machine Do not carry Freedom Machine by its monitor or monitor arm Place the Freedom Machine in its new location before reassembling...

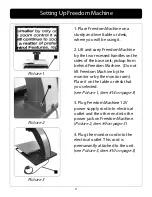
Page 10: ...lift Freedom Machine by the monitor or by the monitor arm Place it on the table or desk that you selected see Picture 1 item 14 on page 3 3 Plug Freedom Machine 12V power supply cord into electrical o...

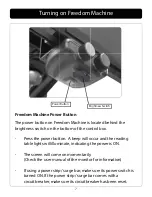
Page 11: ...ccur and the reading table lights will illuminate indicating the power is ON The screen will come on momentarily Check the user manual of the monitor for information If using a power strip surge bar m...

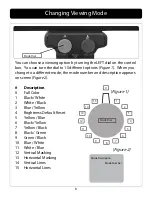
Page 12: ...igure 2 Description 0 Full Color 1 Black White 2 White Black 3 Blue Yellow 4 Brightness Default Reset 5 Yellow Blue 6 Black Yellow 7 Yellow Black 8 Black Green 9 Green Black 10 Blue White 11 White Blu...

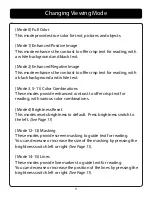
Page 13: ...enhanced contrast to offer crisp text for reading with various color combinations Mode 4 Brightness Reset This modes resets brightness to default Press brightness switch to the left See Page 11 Mode 1...

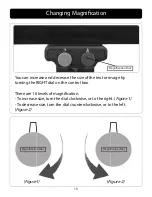
Page 14: ...xt or image by turning the RIGHT dial on the control box There are 16 levels of magnification To increase size turn the dial clockwise or to the right Figure 1 To decrease size turn the dial countercl...

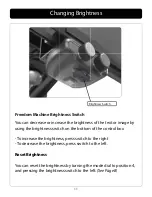
Page 15: ...ess switch on the bottom of the control box To increase the brightness press switch to the right To decrease the brightness press switch to the left Reset Brightness You can reset the brightness by tu...

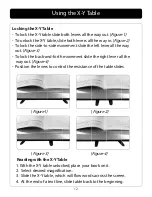
Page 16: ...lock the back and forth movement slide the right lever all the way out Figure 4 Position the levers to control the resistance of the table slides Locking the X YTable Figure1 Figure 2 Figure 3 Figure...

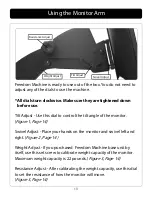
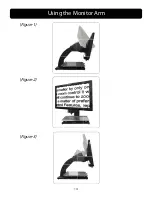
Page 17: ...he monitor Figure 1 Page 14 Swivel Adjust Place your hands on the monitor and swivel left and right Figure 2 Page 14 Weight Adjust If you purchased Freedom Machine base unit by itself use this set scr...

Page 18: ...Using the Monitor Arm 14 Figure 2 Figure 1 Figure 3...

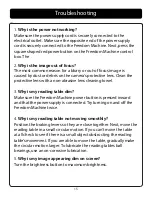
Page 19: ...ge out of focus Make sure the Freedom Machine power button is pressed inward and that the power supply is connected Try turning on and off the Freedom Machine twice 3 Why is my reading table dim Posit...

Page 20: ...e free service LED s are highly energy effecient and rated for over 150 000 hours of usage 7 Will I ever need to replace the light bulbs If you have questions or require technical assistance call 1 80...

Page 21: ...ge for parts or labor during the warranty period Replacement parts and units may be new or recertified at Vision Technology Inc option and sole discretion Replacement parts and units are warranted for...

Page 22: ...Warranty Registration Card Warranty CUT HERE Warranty Registration Card 2 Year Warranty Extension 349 00 This section completed by Vision Technology Staff...

Page 23: ...Notes...
Page 24: ...individual condition and level of vision degeneration Freedom Machine is not designed to restore vision correct eye conditions or stop vision loss A low vision specialist can best diagnose the Freedom...

Reviews: