Vision Phoenix 1212 S5 User Manual
128
© 2018 Vision Engraving & Routing Systems
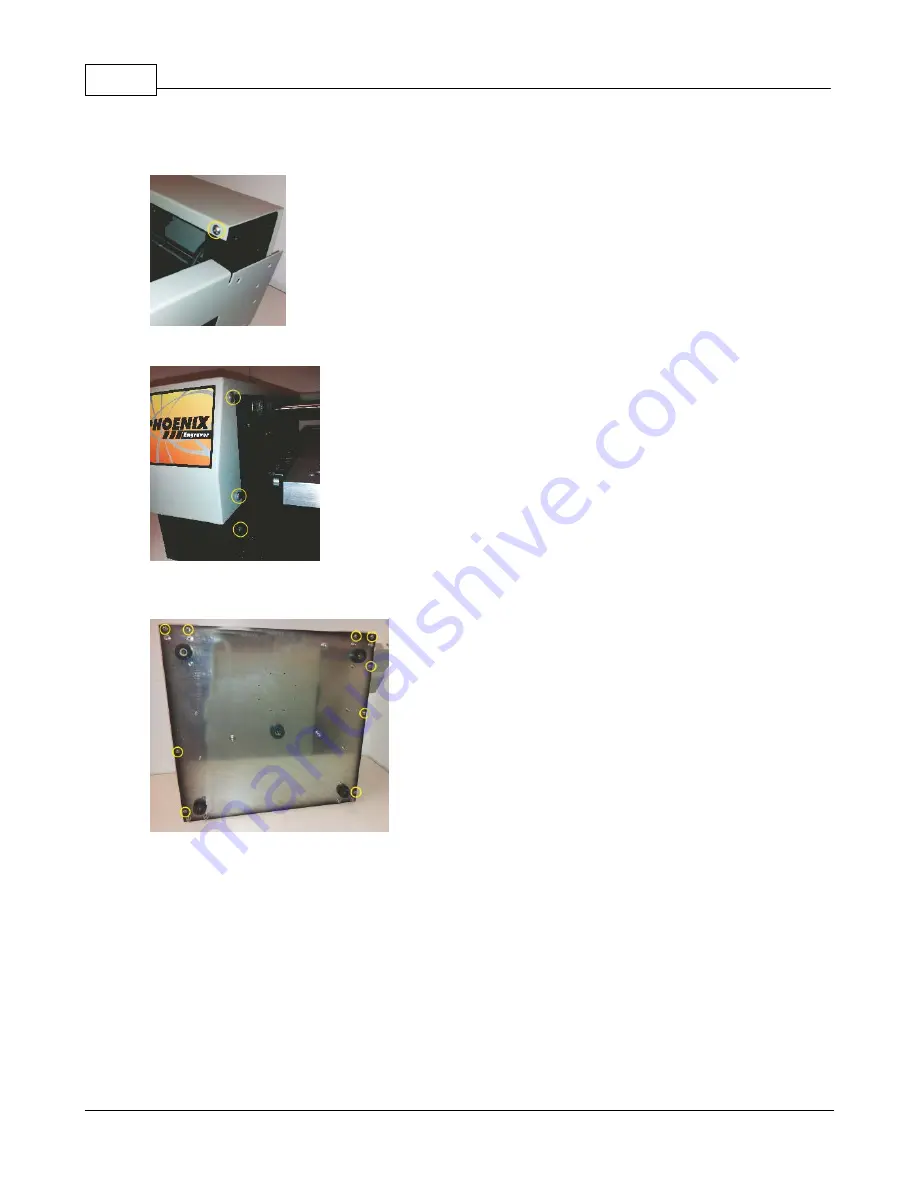
Then remove the 2 Allen Head Button screws under the back cover on each side of the machine. (Right
side not shown).
Remove the 3 Allen Head Button screws on the inside-front of each side cover. (Right side not shown).
Remove the 9 Phillips Head screws on the bottom of the machine baseplate. Do NOT remove the Allen
Head Cap screws!
The covers can then slide forward and up.
6.5
Motion System Cleaning & Lubrication
Lubricating the X-Axis, Y-Axis and Z-Axis Leadscrews and Linear Rails
A light lubrication of the X, Y and Z-Axis leadscrews should be performed after every month of usage.
Use Teflon-Free Silicone lubricant spray only. Spray a light coating along the entire leadscrew. Note: A
nozzle extender attached to the aerosol spray can help facilitate this procedure and may eliminate the
need to remove the side covers. DO NOT use any lubricant other than Teflon-Free Silicone, as it may
become sticky and cause a buildup that will cause mechanical failure.
Summary of Contents for Phoenix 1212 S5
Page 1: ... 2018 Vision Engraving Routing Systems Vision Phoenix 1212 S5 User Manual Revised 12 7 2018 ...
Page 16: ...Vision Phoenix 1212 S5 User Manual 16 2018 Vision Engraving Routing Systems ...
Page 44: ...Vision Phoenix 1212 S5 User Manual 44 2018 Vision Engraving Routing Systems ...
Page 113: ...Step by Step Operation 113 2018 Vision Engraving Routing Systems ...
Page 121: ...Step by Step Operation 121 2018 Vision Engraving Routing Systems ...
Page 123: ...Step by Step Operation 123 2018 Vision Engraving Routing Systems ...
Page 147: ...Optional Accessories 147 2018 Vision Engraving Routing Systems ...
Page 148: ......


