background image


1.


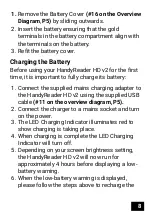
Remove the Battery Cover 

(#16


on the Overview 

Diagram

P5)

 by sliding outwards.


2.


Insert the battery ensuring that the gold 

terminals in the battery compartment align with 

the terminals on the battery.  

3.


Refit the battery cover. 

Charging the Battery 

Before using your HandyReader HD v2 for the first 

time, it is important to fully charge its battery: 

1.


Connect the supplied mains charging adapter to 

the HandyReader HD v2 using the supplied USB 

cable 

(#11 on the overview diagram, P5).


2.


Connect the charger to a mains socket and turn 

on the power. 

3.


The LED Charging Indicator illuminates red to 

show charging is taking place. 

4.


When charging is complete the LED Charging 

Indicator will turn off. 

5.


Depending on your screen brightness setting, 

the HandyReader HD v2 will now run for 

approximately 4 hours before displaying a low-

battery warning. 

6.


When the low-battery warning is displayed, 

please follow the steps above to recharge the 

Summary of Contents for HandyReader HD v2

Page 1: ...HandyReader HD v2 3 5 Handheld Video Magnifier User Manual v1 0 ...

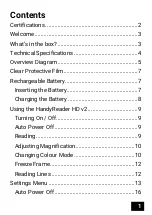
Page 2: ...Diagram 5 Clear Protective Film 7 Rechargeable Battery 7 Inserting the Battery 7 Charging the Battery 8 Using the HandyReader HD v2 9 Turning On Off 9 Auto Power Off 9 Reading 9 Adjusting Magnification 10 Changing Colour Mode 10 Freeze Frame 12 Reading Lines 12 Settings Menu 13 Auto Power Off 16 ...

Page 3: ...ngs 17 Flip Out Stand 17 TV Connection 17 Important Precautions 18 Troubleshooting 19 Warranty 21 Support and Assistance 22 Your Local Distributor 22 Manufacturer 23 Certifications This product confirms to the following certifications ...

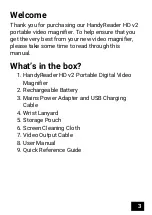
Page 4: ... your new video magnifier please take some time to read through this manual What s in the box 1 HandyReader HD v2 Portable Digital Video Magnifier 2 Rechargeable Battery 3 Mains Power Adapter and USB Charging Cable 4 Wrist Lanyard 5 Storage Pouch 6 Screen Cleaning Cloth 7 Video Output Cable 8 User Manual 9 Quick Reference Guide ...

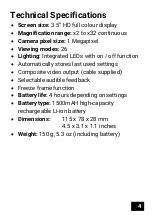
Page 5: ...ng Integrated LEDs with on off function Automatically stores last used settings Composite video output cable supplied Selectable audible feedback Freeze frame function Battery life 4 hours depending on settings Battery type 1500mAH high capacity rechargeable Li ion battery Dimensions 115 x 78 x 28 mm 4 5 x 3 1 x 1 1 inches Weight 150 g 5 3 oz including battery ...

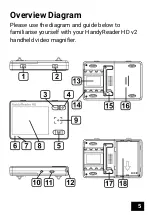
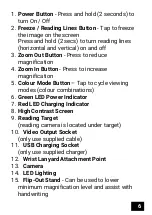
Page 6: ...5 Overview Diagram Please use the diagram and guide below to familiarise yourself with your HandyReader HD v2 handheld video magnifier ...

Page 7: ... increase magnification 5 Colour Mode Button Tap to cycle viewing modes colour combinations 6 Green LED Power Indicator 7 Red LED Charging Indicator 8 High Contrast Screen 9 Reading Target reading camera is located under target 10 Video Output Socket only use supplied cable 11 USB Charging Socket only use supplied charger 12 Wrist Lanyard Attachment Point 13 Camera 14 LED Lighting 15 Flip Out Stan...

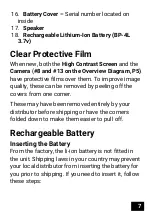
Page 8: ...uality these can be removed by peeling off the covers from one corner These may have been removed entirely by your distributor before shipping or have the corners folded down to make them easier to pull off Rechargeable Battery Inserting the Battery From the factory the li ion battery is not fitted in the unit Shipping laws in your country may prevent your local distributor from inserting the batt...

Page 9: ...supplied mains charging adapter to the HandyReader HD v2 using the supplied USB cable 11 on the overview diagram P5 2 Connect the charger to a mains socket and turn on the power 3 The LED Charging Indicator illuminates red to show charging is taking place 4 When charging is complete the LED Charging Indicator will turn off 5 Depending on your screen brightness setting the HandyReader HD v2 will no...

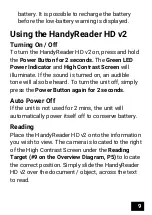
Page 10: ...ible tone will also be heard To turn the unit off simply press the Power Button again for 2 seconds Auto Power Off If the unit is not used for 2 mins the unit will automatically power itself off to conserve battery Reading Place the HandyReader HD v2 onto the information you wish to view The camera is located to the right of the High Contrast Screen under the Reading Target 9 on the Overview Diagr...

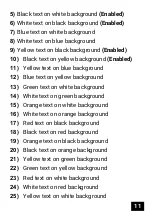
Page 11: ... enabled colour combinations and select the desired viewing mode The HandyReader HD v2 has 26 viewing modes that drastically improve contrast when reading text There are 5 colour modes enabled by default To enable or disable particular colour modes please see Enabled Colour Modes contrast icon on page 15 in the Settings Menu The complete list of available colour modes is shown below 1 Full colour ...

Page 12: ... Blue text on yellow background 13 Green text on white background 14 White text on green background 15 Orange text on white background 16 White text on orange background 17 Red text on black background 18 Black text on red background 19 Orange text on black background 20 Black text on orange background 21 Yellow text on green background 22 Green text on yellow background 23 Red text on white backg...

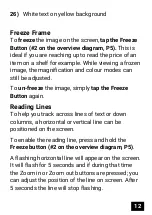
Page 13: ...n freeze the image simply tap the Freeze Button again Reading Lines To help you track across lines of text or down columns a horizontal or vertical line can be positioned on the screen To enable the reading line press and hold the Freeze button 2 on the overview diagram P5 A flashing horizontal line will appear on the screen It will flash for 5 seconds and if during that time the Zoom in or Zoom o...

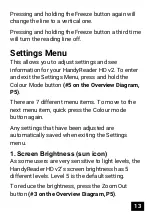
Page 14: ...and hold the Colour Mode button 5 on the Overview Diagram P5 There are 7 different menu items To move to the next menu item quick press the Colour mode button again Any settings that have been adjusted are automatically saved when exiting the Settings menu 1 Screen Brightness sun icon As some users are very sensitive to light levels the HandyReader HD v2 s screen brightness has 5 different levels ...

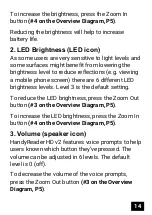
Page 15: ...one screen there are 6 different LED brightness levels Level 3 is the default setting To reduce the LED brightness press the Zoom Out button 3 on the Overview Diagram P5 To increase the LED brightness press the Zoom In button 4 on the Overview Diagram P5 3 Volume speaker icon HandyReader HD v2 features voice prompts to help users known which button they ve pressed The volume can be adjusted in 6 l...

Page 16: ...verview Diagram P5 buttons to adjust the highlighted option To change the highlighted option e g move from year to month month to day etc press the Freeze button 2 on the overview diagram P5 5 Enabled Colour Modes contrast icon This is used to enable and disable colour modes as detailed in Enhanced Colour Modes on pages 10 11 To enable or disable the currently highlighted mode press the Freeze but...

Page 17: ...s an automatic power off function to save battery If there is no operation for 1 minute the screen will display the battery status date and time The Battery Indicator LED will also flash green If there is no operation for another 2 minutes the HandyReader HD v2 will automatically power off Low Battery Just before the battery runs out Battery Low will be displayed on the screen Please charge the un...

Page 18: ...ndex finger into the small recess on one side of the stand and lift outwards This can be used for reducing the minimum magnification and can aid when handwriting under the unit To close the Flip Out Stand simply push it back in TV Connection HandyReader HD v2 features the ability to connect to the Composite Video Input socket on your television set Simply connect the small end of the supplied TV c...

Page 19: ...mportant Precautions In order to keep your HandyReader HD v2 digital video magnifier in good working order please read and carefully follow these precautions When not in use return the magnifier to the supplied storage pouch Do not expose the magnifier to high temperatures or direct sunlight Keep the magnifier away from moisture rainwater liquid and chemicals Do not use the magnifier near electron...

Page 20: ...s of the camera Do not hit vibrate squeeze or drop the unit If being used by children please follow guidance from a guardian to avoid accidents Before cleaning the magnifier please disconnect the charger and remove the battery Only use the supplied lens cloth to clean the magnifier or a similar soft dry cloth Never use cleaning materials such as solvents or detergents to clean the magnifier Troubl...

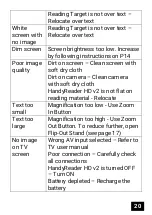
Page 21: ... cloth Dirt on camera Clean camera with soft dry cloth HandyReader HD v2 is not flat on reading material Relocate Text too small Magnification too low Use Zoom In Button Text too large Magnification too high Use Zoom Out Button To reduce further open Flip Out Stand see page 17 No image on TV screen Wrong AV input selected Refer to TV user manual Poor connection Carefully check all connections Hand...

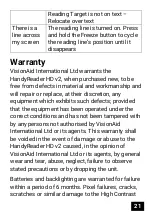
Page 22: ...h exhibits such defects provided that the equipment has been operated under the correct conditions and has not been tampered with by any persons not authorised by VisionAid International Ltd or its agents This warranty shall be voided in the event of damage or abuse to the HandyReader HD v2 caused in the opinion of VisionAid International Ltd or its agents by general wear and tear abuse neglect fa...

Page 23: ...ntial damages the original user s remedies being limited to repair or replacement VisionAid International Ltd makes no other or further warranty express or implied including and warranty of fitness for a specific purpose or warranty of merchantability This warranty is valid for a period of 2 years effective from the date of delivery to the customer Support and Assistance For support and assistance...

Page 24: ...23 Manufacturer VisionAid International Ltd Bridge Lodge Spalding Common Spalding Lincolnshire PE11 3AU United Kingdom Tel 44 0 1775 711 977 Email support visionaid com ...

Reviews: