S
CANNING
AND
C
ONFIGURING
O
NE
T
OUCH
101
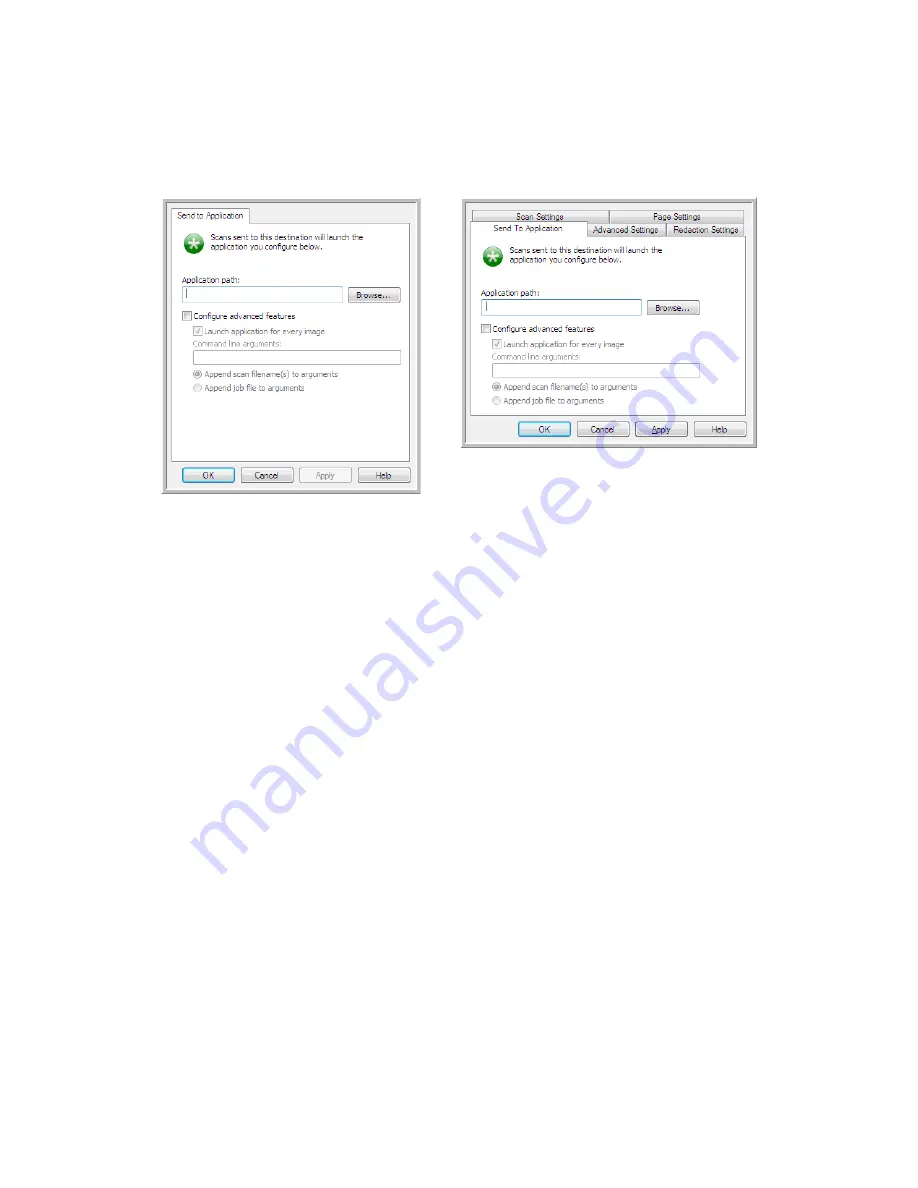
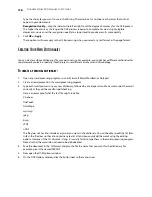
To configure a destination application for the Send to Application link:
1.
Click
Browse
to open the Windows file browser and navigate to the location of the application’s executable
(*.exe) file.
In most cases, the application’s directory is located in the programs directory on the C:\ drive. Because you
can select any executable file, make sure you select an application that can receive image or text files.
2.
Select the application’s *.exe file then click on
Open
.
The application’s *.exe file path will now show in the Application path field.
3.
Click on
OK
to close the window.
For basic scanning, you do not need to adjust any of the other settings in this window. The default settings
will work with most applications. The advanced settings are described below.
4.
Select a file format and scan configuration in the OneTouch Properties window.
If you select a text file format, the scanned image is converted into editable text before being sent to your
selected application.
5.
Click on
OK
to close OneTouch.
6.
Put the document(s) in the scanner and start scanning with the button you set to use the Send to
Application destination.
7.
The scanner starts scanning and, when finished, sends the scanned file to the application you selected.
Technical note
•
After configuring this link, you may need to click
Refresh
in the OneTouch Properties window to show the
correct application icon in the
Select destination
list.
Send to Application OneTouch Link
Properties window
Send to Application Scan Configuration
Properties window
Summary of Contents for PaperPort Strobe 500
Page 1: ...User s Guide Strobe 500 ...
Page 13: ...VISIONEER STROBE 500 SCANNER USER S GUIDE 12 ...
Page 41: ...VISIONEER STROBE 500 SCANNER USER S GUIDE 40 ...
Page 129: ...VISIONEER STROBE 500 SCANNER USER S GUIDE 128 ...
Page 179: ...VISIONEER STROBE 500 SCANNER USER S GUIDE 178 ...
Page 199: ...INDEX 198 W White Level 171 Word Document 111 X xls file format 111 ...


