S
CANNING
AND
C
ONFIGURING
O
NE
T
OUCH
79
•
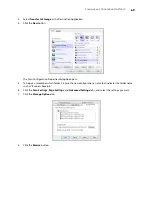
The Destination folder would be shared documents
•
User account
—input the user account name that has privileges to save files to the specified SharePoint site
and Destination folder.
•
Password
—input the password for the user account name you specified.
•
Use Windows Integrated Authentication
—select this option to use the Windows current user’s login
name and password to access the SharePoint site.
•
Destination folder
—this is the folder where the final scanned document(s) are transferred to when
scanning is complete.
•
Filename format
—select a file naming format, for the scanned document, from the list. Select “Use custom
file naming” to use the file you set on the Options tab in the OneTouch Properties window.
Count
—this field will enable when the selected Filename format contains {seq}. Input the number you want
the sequential count to start from.
Filename prefix
—this field will enable when the selected Filename format contains {prefix}. Input the name
or value you want as the prefix in the final file name.
Because the destination configuration is done through the scan configuration, you can set each configuration to
scan to different SharePoint site, folder, filename format, using different user credentials, and so on. This is the
same process used as when scanning to different folders using the Transfer to Storage destination, as described in
detail starting on page 68.
Click on the Help button, in this configuration tab, to launch the SharePoint help file. The help file contains
detailed information about the settings in this window and technical implementation notes.
S
HARE
P
OINT
L
INK
L
OG
V
IEWER
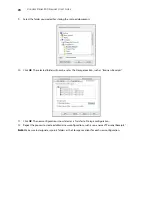
The OneTouch Link Log Viewer opens automatically when scanning is complete. Click on the menu arrow next to
View logs for and select SharePoint Link from the list to display the transfer history for the SharePoint link only.
Double-click on any of the line items to open the selected log file in the Log File Detail View. If you open a failed
transfer, the log file may contain the information you need to determine why the transfer failed. After you address
the failure indicated in this log file, you can click the Retry button to resend the document to the server.
Summary of Contents for PaperPort Strobe 500
Page 1: ...User s Guide Strobe 500 ...
Page 13: ...VISIONEER STROBE 500 SCANNER USER S GUIDE 12 ...
Page 41: ...VISIONEER STROBE 500 SCANNER USER S GUIDE 40 ...
Page 129: ...VISIONEER STROBE 500 SCANNER USER S GUIDE 128 ...
Page 179: ...VISIONEER STROBE 500 SCANNER USER S GUIDE 178 ...
Page 199: ...INDEX 198 W White Level 171 Word Document 111 X xls file format 111 ...

