C
ONFIGURING
THE
O
NE
T
OUCH
B
UTTONS
75
documents you plan to scan. To add new fonts to that list, select a
font in the
Fonts on System
list and click
Add
. Note that when
you select a font, a sample appears in the text box so you can
compare it with the fonts in your document to see if that’s the right
font. To remove a font, select it and click
Remove
. To return the
lists to their defaults, click
Use Defaults
. Click
OK
when you’re
finished.
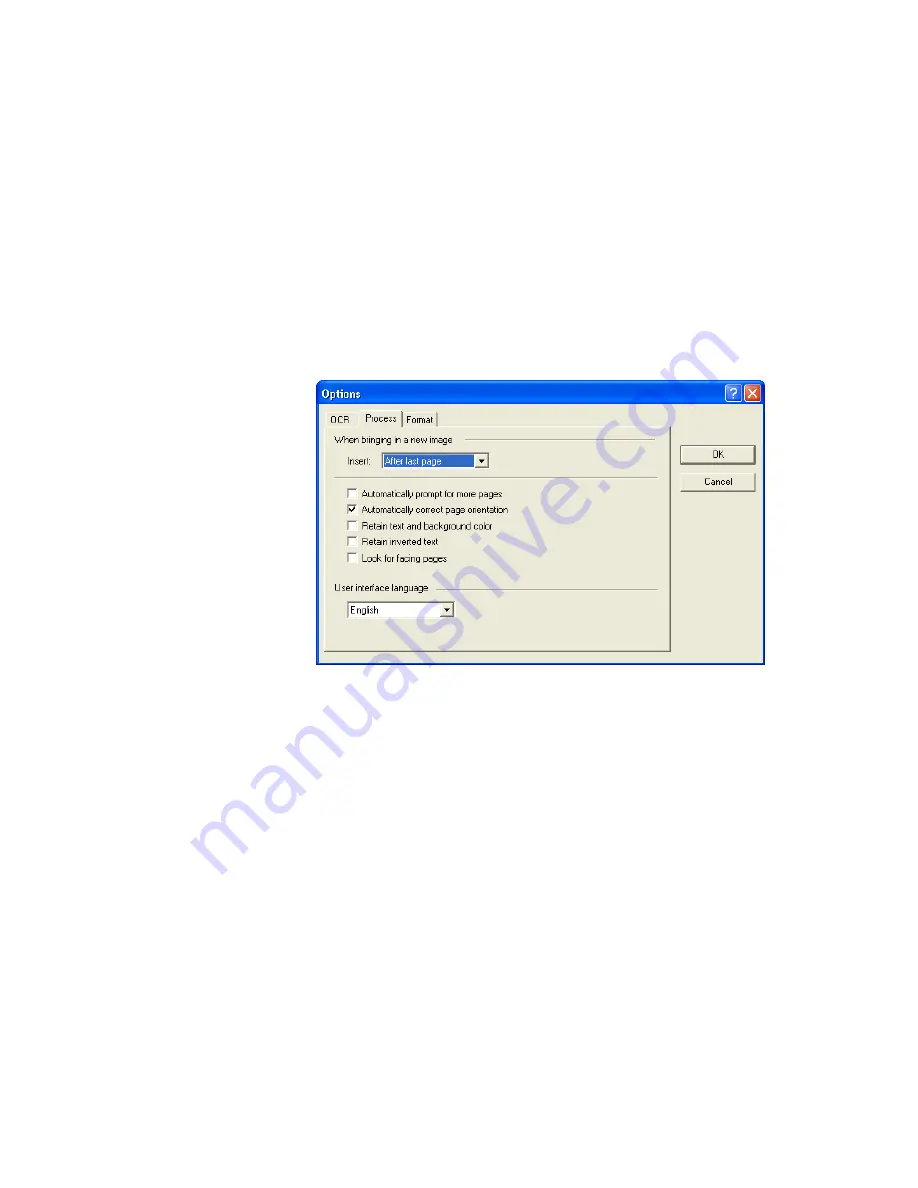
7. Click the
Process
tab and choose the options from the Process
window.
When bringing in a new image
—Click the menu arrow and select
where you want new pages added to your current document. The
choices are
After last page
,
After current page
,
Before current
page
, and
Before first page
.
Automatically prompt for more pages
—Select this option if the
document is too big to fit into the scanner’s paper guide.
Automatically correct page orientation
—Select this option to have
the OCR process check orientation and automatically rotate an
improperly oriented page image by 90, 180 or 270 degrees prior to
recognition. All pages are automatically straightened (de-skewed) if
necessary.
Summary of Contents for Strobe XP 470
Page 1: ...for Windows Visioneer Strobe XP 470 USB Scanner User s Guide...
Page 2: ...Visioneer Strobe XP 470 USB Scanner User s Guide F O R W I N D O W S...
Page 7: ...iv TABLE OF CONTENTS...
Page 143: ...136 VISIONEER STROBE XP 470 SCANNER USER S GUIDE...
Page 147: ...INDEX 140...
Page 148: ...Copyright 2005 Visioneer Inc 05 0687 000 visioneer...


