Document: CL140072
L2174 Manual Issue 2.0
Page 17 of 26
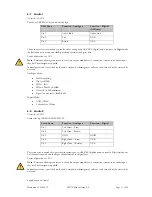
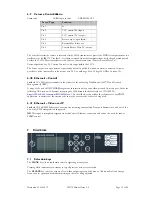
Note that the Receiver frequency will not change according to the downconverter type, unlike
previous Link products. This greatly simplifies setting up the unit to work with multiple
downconverter types, and also when switching between downconverters that cover the required
frequency range.
9.1.4
Deinterleaving
The Lynx Receiver has a licensable deinterleaving option, to match the interleaving option in the
L1500 transmitter. This option adds an extra layer of error correction to the ASI data steam that allows
long breaks in RF reception to be corrected. In the transmitter, the user can select the amount of FEC
used and the duration of RF break that can be corrected. When Enabled, the Receiver automatically
detects these settings and adjusts the deinterleaving appropriately. The settings are displayed for
information but cannot be altered. Adding interleaving to an ASI stream reduces the ASI bit rate
available for video/audio etc. and adds a delay to the signal. The additional delay is shown in the
menu. For more details see section 10.5.
9.2
Decoder Menus (L2174, L2170)
9.2.1
Services
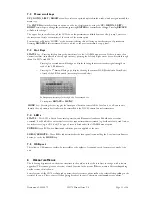
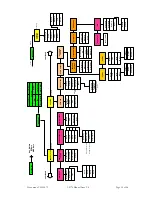
Number of Services:
Displays the number of services in a particular incoming multiplex.
SERVICE:
In Auto mode, displays the currently selected service. In Manual mode, allows the
decoded service to be selected as follows:
Press ENTER on this menu item followed by UP/ DOWN arrow keys; the
service “
NAME
” of each service available in the incoming multiplex will be
displayed on the line below. When the desired service is shown press ENTER.
This will then be decoded in to video / audio outputs
provided
the signal is of the
correct format (SD/HD), and is not scrambled or a valid descrambling key has
been entered.
Once selected, this service name will become the “preferred” (or Default) service,
such that on power / signal interruption this particular service will be the only one
that is decoded, on restoration of power / signal. If the preferred service name
appears in a particular multiplex, this is the one that will be decoded unless another
is chosen.
If the Default service name is not present then no service will be decoded.
NB
This means that if the service name is altered in the encoder, then decoding will
stop.
If a service has not been given a name (some encoders default to this mode), then
the decoder will create a name of the format “Prog00001”, which will allow it to
be selected.
Auto:
When ON will always select the first service in the multiplex. Once a service has
been selected in this way, it will remain selected even if other services are added to
the multiplex. Auto mode defaults to ON.
Default:
Displays the current Default service name. It is only valid, and can only be edited,
when Auto Mode is Off.
9.2.2
Video Output
Output 1/2:
Select the output mode of the two rear panel connectors. In HD mode this is fixed
to SDI; for SD it can be switched between SDI and CV (Composite Video).
In both modes a Status overlay can be added to the video output which gives an
at-a-glance update on the status of the link.
Overlay Type:
This is only displayed if the overlay is turned on. There are 2 types, Basic and
Service. In Basic mode, the following information is displayed: Frequency, Guard
Interval, Mode, Constellation, FEC, Camera Volts (when used with a Link L1500
Wireless Camera Transmitter). In Service mode, just the selected service name and
the Camera Volts are displayed. In both modes there is also a bar across the screen
that represents the MER from the best RF input.

