UltraDecoder Operators Manual
Quick Start Guide
Issue : 3 (23/12/2015)
3
Ref : ULTD-ASUM-7001
Copyright © Vislink plc
3.
Quick Start Guide
3.1.
Connectivity Configuration
It is recommended to configure the unit using the Web Interface. The procedure for configuring the
web interface is as follows:
•
The direct Ethernet connections must first be made on the rear panel using the supplied
cables, as described in the previous section.
•
The Ethernet Control port must then be configured with the appropriate IP Address, Mask
and Gateway to match your network settings. The settings for this can be found by selecting
Menu | System | Remote Interfaces | Ethernet Port from the front panel.
•
The IP Video port can then be similarly configured by selecting Menu | Unit Setup | IP
Options | IP Port Setup if the IP Video port and Eth. 1 are to be connected to your network,
or can be left as default if a direct connection is to be used. Note that if a direct connection
is used between the IP Video and Eth. 1 ports then the unit can only be used in ASI input
mode.
•
The unit can now be powered off and supplied cables safely removed. Be sure to connect
the Ethernet ports to your network before powering back on.
The Web Interface accessed using the IP address of the Ethernet Control port.
3.2.
Input Configuration
•
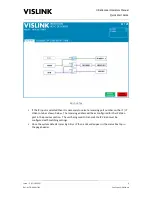
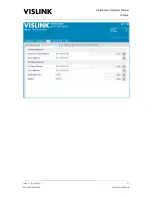
To select the correct source signal for the decoder use the switches on the routing page
shown below to select either the ASI input or the IP input. Press “Accept Changes” to save.
Only one change can be made at a time.
•
If the ASI input is selected then no further input configuration is required.


