background image


23 

Vista QXTRA User and installation manual V1.0 


Click on the Date and time search icon to display the following selection window: 


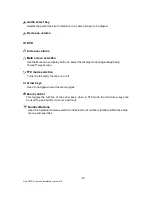
Review screen 

 
Playback  of  recordings  will  be  displayed  in  this  window,  in  either  full  screen  or  split  screen 
format, format is chosen using icons below the screen. 
 

Playback time 

 
The time at which the recorded images were made is displayed in this box 
 

Bookmark toggle arrows 

 
Click on the right arrow to display the Bookmark search screen, see Book marks below. 
 

Calendar / Date and time searches 

 
Time Line 

 
When a specific date is chosen in the calendar search box, cameras with recordings will be 
graphically displayed in the this box, 
 

Blue


– Time-lapse recording 

Red


– Alarm recording 

Yellow


– Motion recording 

Time line 

Calendar search, 
days with recording 
shown in blue 

Date and Time 
selection 

Date and Time / 
Event search 
and log selection 
bar 

Toggle to 
Bookmark 
search 

Review screen split 
selection 

Review screen 

Playback time 

Archive button 

Summary of Contents for Quantum XTRA

Page 1: ...Vista QXTRA User and installation manual V1 0 User and configuration manual for the Quantum XTRA range of real time D1 digital recorders Quantum XTRA Installation and User manual ...

Page 2: ...2 Vista QXTRA User and installation manual V1 0 This page is intentionally left blank ...

Page 3: ...0950 1 Safety Precautions Caution before Use Please read this manual before installing or using the DVR Please keep this manual in a safe place to allow for future reference For the safety and proper use The DVR is marked with various symbols Please read these to prevent injury of financial loss Installation Site Ensure installation position is level secure and adequately ventilated Avoid installi...

Page 4: ...4 Vista QXTRA User and installation manual V1 0 This page is intentionally left blank ...

Page 5: ...ack Search 22 DATE TIME EVENT AND BOOKMARK SEARCH 23 Calendar Date and time searches 23 Event Search 25 Log search 26 Bookmark search 27 GOTO SEARCH OPTION 28 4 ARCHIVING EVIDENCE TO DVD CD OR USB 29 Time and Date archive 29 Event list archiving 32 4 PTZ CONTROL 33 4 1 PTZ Control by mouse 34 4 2 PTZ Control by remote controller 35 4 3 PTZ Control by Client software 36 SETUP MENU 37 1 DISPLAY 39 1...

Page 6: ... 66 3 2 Recording 67 3 3 System 68 3 4 Network 69 3 5 Event 69 4 LOCAL SEARCH VIEWING DOWNLOADED FOOTAGE 70 4 1 Search 70 4 2 Log 72 4 3 Info 72 5 LOCAL SETUP 73 5 1 Global 73 5 2 Opacity 73 5 3 Audio Buffer 74 5 4 Camera name 74 6 TELEMETRY CONTROL PAN TILT ZOOM FOCUS 75 6 1 Pan Tilt Zoom Focus 75 6 2 Preset Learn 76 7 FIRMWARE UPGRADE 77 APPENDIX 1 78 DYNAMIC IP SUPPORTING DDNS SERVER 78 APPENDI...

Page 7: ...7 Vista QXTRA User and installation manual V1 0 Overview 1 Contents of Packing Mouse Power Cable User Manual Remote Controller Battery ...

Page 8: ...emote DVR s can be controlled using the supplied software client viewer Technology Embedded LINUX OS Maximum record rate D1 400fps PAL D1 480fps NTSC High resolution high quality H 264 algorithm Uses watermarking scrambling technologies H 264 1 2 Kbytes per image with resolution 360x240 Functionality Variable recording function normal alarm motion schedule duration Time Lapse Up the coax and RS485...

Page 9: ...ng password protected Video play back keys Play Stop Pause fast forward etc Search key Press once to put unit into playback mode press a second time to enter the search menus Select key Used as an enter button in the menus Menu Displays the menu on the screen PTZ Camera select key Select the cameo image to be controlled in the multi screen views ...

Page 10: ... select the display mode single 4way 9way 16way 17way screen PTZ mode selection Turns the telemetry function on or off Arrow keys Used to navigate around the menu pages Zoom control This toggles the function of the arrow keys when in PTZ mode the front arrow keys can be used to pan and tilt or to zoom and focus Number Buttons Used for individual camera selection and selection of numbers letters wi...

Page 11: ...Vista QXTRA User and installation manual V1 0 2 Rear Panel Connectors Spot Monitor Outputs Spot Video Output Composite Video 8 Channel 16 Channel 16 HDMI For future development HDMI For future development ...

Page 12: ...al monitor 1024x768 HDMI Output For future use not yet functional VGA Output Main Monitor VGA video output for main monitor 1920x1080 Audio Output Audio output RS232 Serial Communication for service Network Port Connecting to the DVR through Internet or LAN USB Port USB 2 0 port for mouse eSATA Port Port for e SATA HDD PTZ Camera Controller Serial Communication for Pan Tilt Camera Alarm Output Ala...

Page 13: ...ation ID Entering control ID set mode MUTE Audio Mute AUDIO Switches through Audio channels MENU Entering system menu SEARCH Entering search ARROW Left Right Up and Down SEL Select Enter VOL Up down volume CH Up down channel Reverse play Play or fast forward I I Pause Stop playback OSD On Screen Display ON OFF SEQ Sequence operation LOG Direct access Log list CAM Changing PTZ icon P T Pan Tilt Z F...

Page 14: ...n output Connect to the VGA port of the main monitor VGA sub output Connect to the VGA port of the sub monitor Composite output Connect to the Video Input of the spot monitor HDMI For future development not yet functioning Spot Monitor Camera Mic Main Monitor Sub Monitor Speaker System PC Client 99Main Monitor Mouse PTZ Camera Siren Sensor e SATA HDD ...

Page 15: ...ct to an amplified speaker system Audio output Connect to the audio in of the audio AMP Connecting to a network Use the Ethernet port to connect to remote PC via Ethernet network Connecting to a sensor input There are 16 individual alarm inputs marked as Sensor In 1 16 Sensor inputs Connect to terminal of a sensor Common GND Connect to terminals of sensors Connecting to a alarm output The DVR can ...

Page 16: ...g to a mouse USB 2 0 Connect to the mouse Connecting to a external HDD To expand the HDD capacity connect the external storage e SATA Connect to the e Sata HDD storage 5 Turning on the DVR 1 Connect the power cable 2 Connect camera cables 3 Connect a network cable and a monitor cable 4 Press the POWER button on the front panel and wait until the main screen is displayed on the connected monitor th...

Page 17: ...Stop start toggle Playback mode 1 2 Menu Navigation To enter the Setup menu the user has to have the required access rights and be logged on Press the Menu button or right click with mouse on screen and select the menu icon The following screen will be displayed asking for password Select the user ID Enter the password The default password is 00000000 8 zeros Press OK the setup menu will be displa...

Page 18: ... capacity Total capacity Network connection It is shown that admin or user is connected Mouse connection Multi screen Display Buttons Current Date Time Click here to temporarily hide the information bar 2 2 Select Channel Use the Multi screen display buttons on the status bar to select the display mode Single Channel 4 Channel 9 Channel Live 1ch Live 4ch Live 9ch 16 Channel 17 Channel Live 16ch Li...

Page 19: ...lay mode Display switches in the following order when the DIS button is pressed Single Channel 4 Channel 9 Channel 16 Channel 17 Channel 2 3 Digital Zoom When the system is in full screen mode left click and drag your mouse over the area to be enlarged a grey rectangle will appear Left click the mouse to zoom in on the highlighted area To exit right click the mouse Playback Video Channel selection...

Page 20: ...p menu will be displayed on screen Ensure that the PTZ function is turned off Otherwise Play back mode will not operate 3 1 OSD Description The Control Bar on screen shows Playback control buttons Progress bar Display mode buttons Playback time etc To begin playback press the Play button on the popup menu ...

Page 21: ...reen images To release the pause press the pause button for a second time Single Frame Advance During the pause mode press the Frame Advance button to view the frame directly after the frame displayed on screen Single Frame Rewind During the pause mode press the Frame Rewind button to view the frame directly before the frame displayed on screen Fast Forward In playback mode press the Fast Forward ...

Page 22: ...ll be offered OFF Optimized for resolution but shows 2 individual fields so can produce juddering on moving objects D1 Optimized for moving images with slight reduction in resolution D2 Optimized for resolution but shows integration artefacts on moving objects Camera selection Interlace selection Date Time Event and Bookmark search GOTO selection Main menu Sequence selection DVD Eject Emergency re...

Page 23: ... Bookmark toggle arrows Click on the right arrow to display the Bookmark search screen see Book marks below Calendar Date and time searches Time Line When a specific date is chosen in the calendar search box cameras with recordings will be graphically displayed in the this box Blue Time lapse recording Red Alarm recording Yellow Motion recording Time line Calendar search days with recording shown ...

Page 24: ...required month using the arrows days within this month that have recordings related to them will be displayed in blue Time and Date selection A specific time and date can be chosen click on the start time a data entry box will appear enter the correct start time and press PLAY ...

Page 25: ... channels that are valid for the search Start search Click start search the search results will be displayed in the table on the right side of the screen To play the events double click on the entry in list Archiving Events To Archive tick the boxes on the right hand side of the list for the required events then click the Archive box at the bottom of the list Event type Event search selection Came...

Page 26: ...n Power off Power fail Record Rec fail Rec start Rec stop Rec error Rec full Operation Play start Play stop HDD format Menu set Event Alarm Motion Audio Video loss Email fail Archive This lists the user time date when archive was done and time range of archived section Select the parameters to be search Press the Start Search button the list will appear in the box on the right Selecting any event ...

Page 27: ...l V1 0 Bookmark search Using the arrows on the left side of the screen toggle to the Bookmark option to display the screen below To play the recorded data double click on the entry in the list Bookmark list Bookmark details Delete all bookmarks ...

Page 28: ...ayback right click on the screen to display the following icon option menu The following selection bar will appear on screen Click on the time and date box a data entry screen will appear on screen fill in the desired Time and date click ok then click on the GOTO button Select the GOTO icon ...

Page 29: ... USB port Insert media disc or USB flash drive and then press Device box The media will be automatically recognised by DVR Device Format This is only required when using a USB pen there is no need to format CDs or DVDs Type Exclusive If evidence is downloaded as an Exclusive file the DVR will download bespoke player software on to the CD DVD or USB device along with the evidence This means that no...

Page 30: ...e Configuration files for the DVR can be downloaded and saved From To Click on the select to edit box the following screen will appear Click on add the following screen will appear When selection is complete click OK The Archive list screen will reappear Add button Enter the start and stop time Select the camera inputs to be archived ...

Page 31: ... Archive size to confirm the file will fit on the available media Next click on the Transfer button a percentage done during downloading will be shown on the screen Once the download process has started it will operate in the background while the DVR is being used normally NOTE Do not shutdown the DVR during the archiving process Ensure the boxes for any periods required are ticked ...

Page 32: ...Once the archive box has been clicked the original Archive screen will be displayed Click on the Calculate Archive size to confirm the file will fit on the available media Next click on the Transfer button a percentage done during downloading will be shown on the screen Once the download process has started it will operate in the background while the DVR is being used normally Tick the boxes of th...

Page 33: ... The user can control PTZ cameras via RS485 communication The PTZ domes can be wired in a Daisy chain Daisy Chain configuration The telemetry function of DVR can be controlled via 4 different methods 1 Mouse 2 Remote keyboard 3 Remote controller 4 Software viewer ...

Page 34: ...ons Dome Menu Entering the Dome Camera menu Tilt Up Zoom In Menu escape button Camera selection The PTZ cameras can be controlled in either full screen or split screen mode If in split screen mode press the PTZ Camera Selection button the PTZ camera icon will step from one camera to the next on the split screen Pan and Tilt control The camera is moved by clicking and dragging around the screen the...

Page 35: ...p window will appear 2 Enter the preset number you want then press OK 4 2 PTZ Control by remote controller Camera selection The PTZ cameras can be controlled in either full screen or split screen mode If in split screen mode press the camera selection button the PTZ camera icon will step from one camera to the next on the split screen Pan and Tilt control Press the P T button to enter the Pan Tilt...

Page 36: ...con at the top of the screen The Pan Tilt control window will appear 2 To move the dome use the arrows buttons Left Pan left Right Pan right Up Tilt up Down Tilt down 3 Press the Z F mode button on the control window to change to the Zoom Focus mode The Zoom Focus control window will appear 4 To zoom or focus use the arrows buttons Left Focus near Right Focus far Up Zoom in Down Zoom out ...

Page 37: ...vent Config Motion Area Alarm Recording Schedule Day Night Weekend Holiday Time Frame Day Night Weekend Time Instant Rec Resolution Recording Mode Frame Picture Quality Audio Pre Recording Action Alarm Out Preset on Alarm Relay Follower Main Menu Live Setting Duration Event Popup OSD Setting Display Camera Setting Camera Name Covert Color Setting PTZ Setup Spot Setting Duration Event Popup ...

Page 38: ...38 Vista QXTRA User and installation manual V1 0 Network IP Set NTP Set DDNS Set Event Beep SMTP Set E mail Registration ...

Page 39: ...e hidden from the viewer in live or play back mode Click the check box to hide the camera In order to view covert camera in Live or Playback it needs to be turned off in the menus this is requires the necessary user rights Colour Setting The picture displayed from each camera can be individually adjusted to balance the multi screen view Move the control bar to change the values of Hue Saturation C...

Page 40: ... or split screen option Mode Select the sequence mode full screen quad or nine way split sequences Duration Set the sequence interval time 0 240 seconds for individual cameras Event Popup The Main screen can be set to display events the options are Motion Any camera with motion will be displayed multiple motion cameras will be sequenced Alarm If the single alarm input is activated then any camera ...

Page 41: ... Duration Set the sequence interval time 0 240 seconds for individual cameras Event Popup The spot monitor can be set to display events the options are Motion Any camera with motion will be displayed multiple motion cameras will be sequenced Alarm If the single alarm input is activated then any camera that has the alarm function turned on will be sequenced Enable the motion or alarm popup and set ...

Page 42: ...isplay bar at the bottom of the screen can be set to be permanently on or to disappear after a period of time Event Display Icons such as recording mode motion detection can be displays or not Camera Name The camera title can be displayed or not Blending The opacity of the menus and Status bar can be set between 0 and 5 0 is solid 5 being very opaque ...

Page 43: ...ng schedule you want to set and set the follow items Resolution Each channel can be individually configured for record rate CIF 2CIF D1 Recording mode C A M A C M C A M A M C C Continuous A Alarm M Motion Continuous Recording FPS PAL 0 25fps Alarm Recording FPS NTSC 0 30fps PAL 0 25fps Motion Recording FPS NTSC 0 30fps PAL 0 25fps Quality Low Middle High Audio recording Enable each audio channel f...

Page 44: ...s night time 6 00 to 18 00 is defined as daytime Weekend Holiday Define weekend 1 Click a date for holiday on the calendar 2 Define holiday by the following method 1 Date of month 2 Day of week Click a date again to cancel Time The time recording allows the DVR to be set to only record at particular times of the day Set the recording time 1 Day 2 Start Time 3 End Time 4 Channel ...

Page 45: ...Set to setup the motion detection grid per channel The detection area is divided into cells Default is all cells in active mode 2 Select cells and toggle them on and off Click icons if you want to select the motion area by the block The motion detection is not recommended for external cameras Alarm Mode On Off There are 16 alarm sensor inputs on the rear of the unit Click the check box to enable e...

Page 46: ...h the relay will be on It can be set to 0 999 seconds Sensor Relay 1 4 Associate the relays with a channel Click the check box to enable each relay The associated relays will be on when a sensor alarm happens Duration This is the time for which the relay will be on It can be set to 0 999 seconds Preset on alarm You can enable PTZ camera to move to a preset position when a sensor alarm occurs A sin...

Page 47: ... yyyy yyyy mm dd Time DST Setting The DVR s time can be set by clicking on the time and date displayed in this section the on screen keyboard will appear Set the time and date and click OK next select the country to enable the Day Light Saving mode NOTE Playback following time change The DVR uses the time and date to index video on the hard disk drive so you can find it later Changing the time can...

Page 48: ...rol up to 16 DVRs the ID number on each can be set to a unique address so that the remote will only control one at a time if they are in close proximity The default is 11 To select a unit on the remote control press the ID button followed by the number followed by the ID button again The LED will flash slowly Key Beep The buzzer can be set to sound on whenever the button on the front panel or remo...

Page 49: ... a check on the health of the Hard disk The parameters which can be monitored are 1 Read Write errors on the drive 2 Drive temperature Smart Turn to on to enable feature Temperature Using the on screen keyboard set the temperature at which the warning is to be reported recommended setting 45 Message Box The message box can be turned on or off to give a visible warning HDD Overwrite The hard disk d...

Page 50: ...at this level only have the ability to search and play control PTZ cameras and get access via the network ID Enter the operator ID using the on screen keyboard Password Enter the operator password using the on screen keyboard Rights Click the check boxes beside Rights Each users rights can be individually tailored to their own requirements the amending of these rights can only be done by an admini...

Page 51: ... V1 0 Auto Logout A time period can be set after which if there is no activity then the user will be logged out of the client and from the front panel Archive log password A password can be set to prevent un authorised archiving of the log files ...

Page 52: ...et domain names to IP addresses DDNS serves a similar purpose to DNS DDNS allows anyone hosting a Web or FTP server to advertise a public name to prospective users Unlike DNS that only works with static IP addresses DDNS works with dynamic IP addresses such as those assigned by an ISP or other DHCP server What this means is that the DVR does not need a Static IP address to be available for viewing...

Page 53: ... of an event such as Video Loss Alarm Motion or Power Loss An E mail will only be sent if the DVR is sitting on a network with access to the Internet e g through a router The user name e mail address are set from the on screen keyboard via the mouse The Sender Address is the address that will appear on the E mail received by the user this should be set logically to identify the specific DVR The re...

Page 54: ...cification for the PC is as follows Minimum PC specification CPU Core 2 Duo 3 16GHz Graphic Memory 512MB Installing software When you put Network installation CD into your PC it will auto run and lead you through an installation wizard Follow the instructions Once the software is loaded it will automatically run Connection To connect to the Unit open the Viewer Software and click the connection bu...

Page 55: ...live monitoring Description field is the name of area Building location of the DVR this should be typed in he first time the unit is connected to this will store it in the address book Address book Click on the Arrow to the left of the IP address the following box will appear This lists the last 22 units that have been accessed To reconnect to one of these units simply double click then add the ID...

Page 56: ... will be shown as below Connect Tool bar selection Remote Search Remote setup Local Search Local Setup Pan Tilt Zoom Focus Firmware upgrade Close Client version Split screen options Full screen Return to live Turn off OSD Camera re arrange Save image Open saved images Audio Audio controls Playback controls Camera selection Buttons Connect Reboot DVR ...

Page 57: ...he software is best viewed with the PC monitor resolution set to 1024 x 768 Split Screen options 1 4 6 7 8 9 10 13 6 Spilt Screens can be viewed during both live and playback The splits screens available are full screen 4 6 7 8 9 10 13 and 16 way 1 Full Screen 2 10 Way ...

Page 58: ...s that are not logical the Smart button will rearrange and put camera input 1 into segment 1 Top Left etc The OSD button will toggle between the on screen titles etc being shown or hidden When the full screen button is selected a tool bar offering the various split screen options and the Exit key will be displayed at the bottom of the screen ...

Page 59: ... a Jpeg image using the date and time as the file name LOAD This icon is used to retrieve and view a saved still image when selected a list of available images will be shown Select to one required it will be displayed along with data information Status Live Playback IP address CH No Playback Step Backward Backward Playback Pause Recording Stop Step Forward Audio Mute Volume Select Audio Microphone...

Page 60: ...ppear use this to set the required value When set Click Play button this window disappears and Remote Playback will start To stop playing back press Stop the search screen will appear to allow another search to be carried out if not required click cancel followed by live Click on the Event button on the right hand side the software will search for all event types This may take a short while A list...

Page 61: ...e date has been selected 1 Drag the Red line along the colour bar I e Blue Normal Recording till the required time is reached 2 Click on the required time for playback on the blue bar then the red line will move to this point 3 Hover over the time box a drop down arrow will appear allowing the manual selection of Hours mins and seconds Next click the Play button for Remote Playback Or click Prev t...

Page 62: ...e displayed Finally click Archive the file will be transferred to C H264CD Download Select either Alarm Motion or Audio from the top of the screen A list of events will appear Click on the event required it will be come highlighted Click on Calculate the file size will be calculated this may take a few seconds Finally click Archive the file will be transferred to C H264CD Download Channels can be ...

Page 63: ...nce the date has been selected 1 Drag the Red line along the colour bar I e Blue Normal Recording till the required time is reached 2 Click on the required time for playback on the blue bar then the red line will move to this point 3 Hover over the time box a drop down arrow will appear allowing the manual selection of Hours minutes and seconds Then click the Next button to set End Archive time in...

Page 64: ...ous stage The downloaded data is saved in the follows location C H264CD Download Play back down loaded files Open the viewer software but do not connect to a unit click the cancel button to remove the log on box Next click on the Local search button the normal search box will appear use the same method to search the files on the PC and Play back ...

Page 65: ...nu set Client R_Login R_Logout R_Logfail R_Play R_Transfer R_Rec on R_Rec off R_Upgrade Event Alarm Motion Audio Video loss Email fail Archive This is a Password protected section only available to users with the correct rights Click on the Archive button a password entry box will appear which has to be completed before the Archive log list will appear Info System Info of the Remote Log Status Inf...

Page 66: ...ill enter a web browser bases set up menu as shown below 3 1 Display This is the same as the Display Menu of DVR refer to setting the Display Menu of DVR Camera Setting Main monitor settings Use this menu to adjust the picture color and specify cameras as covert recorded but not displayed Use this menu to set the main output ...

Page 67: ...ecording Menu of DVR refer to setting the Recording Menu of DVR Frame Schedule Use this menu to set up the spot monitor settings This configures the FPS for each schedule Day Night Weekend Holiday Time Instant recording Use this menu to configure the recording schedule Use this menu to set up the On Screen Display settings ...

Page 68: ...ccount Use this menu to configure the motion alarm settings Use this menu to configure the relay settings relating to the event motion alarm Use this menu to set Language Time DST Video Type System ID PTZ controller Also Initialisation and System Information is available The DVR can have the following different levels of operators each with different user rights and passwords ...

Page 69: ...ng the Network Menu of DVR 3 5 Event This is the same as the Event Menu of DVR refer to setting the Event Menu of DVR Use this menu to configure network settings IP DDNS NTP This menu is used to inform the user as to an event occurring this can be by the sound of a buzzer or by sending an E mail to a predefined address ...

Page 70: ...an be done by Date Time Even and Calendar Date Time Event Hovering over the Date and Time bars will allow drop down boxes to select the required time and Date Once set click Play Choose the Event search box then choose the type of Event you are searching for options are Alarms Motion or Audio Once the selection is made a list will appear choose the Event required and click Play ...

Page 71: ... Calendar option is chosen this screen will appear any day with recording available will be highlighted in Blue Select the required day Any downloaded event s will be shown click on the event the red line will move to that event Then click Play to review the recording ...

Page 72: ...and installation manual V1 0 4 2 Log 4 3 Info Clicking on Log will display the log file from the unit This file can be printed by clicking Print Click on Info This will display the version of the software client being used ...

Page 73: ...This screen allows the following Draw mode to be set to YUV or RGB Date Format to be set to DD MM YYY MM DD YYYY or YYYY MM DD Save Format for the saving of stills as either JPEG Bit Map or TIF Location for where stills are saved The opacity or boldness of the OSD can be individually set per function The lower the number the more see through the box ...

Page 74: ...mpensate for different network speeds LANs WANs etc This can only be adjusted if the LIVE video is switched off Adjust each variable to achieve best quality video for Network bandwidth available this is best done through trial and error Each camera can be given a title to be displayed on screen The Deinterlace function can be used to improve the playback quality of D1 recordings ...

Page 75: ...l be pop up on the live image 6 1 Pan Tilt Zoom Focus When PAN TILT button is clicked the Pan Tilt control appears this allows Left Right Up and Down Control of PTZ cameras When Zoom Focus button is clicked the control changes to Zoom in on the up arrow Zoom out on the down arrow Focus near on the left button and focus far on the right arrow ...

Page 76: ...d by clicking on the centre of the control icon the preset symbol will appear and the Preset selection box will appear To save a preset move the camera to the desired position then click Set followed by the desired number To recall the preset click Call followed by the desired number PRESET LEARN icon ...

Page 77: ...then New program not found message will be displayed To proceed with upgrading press the OK button and select each firmware files to upgrade it to the system by ticking the boxes Once the upgrade has been completed the following message will appear Next press the OK button to reboot the DVR the firmware will only be applied completely once the system is rebooted Quit Exiting Client program To exit...

Page 78: ...nect to the unit remotely without the need for a fixed IP address Please register your ID Domain at www ddns dvr com in which you can use their DDNS server as free of charge 1 Visit www ddns dvr com to get the DDNS user ID PW as well as Host name 2 Click to create set account of Dynamic DNS 3 Select Create Account menu 4 Create Account ...

Page 79: ...y Once the DDns Dvr account has been setup it is necessary to add the details in the Network menu of DVR Set up DDNS 1 Change DDNS to ON 2 Input User ID 3 Input User PW 4 Input Domain 5 Click DDNS Status Check If it is ok click Apply NOTE In DDNS Setup The Domain Name has to be filled in In DDNS environment need to be changed DVR Web server port please refer to IP set ...

Page 80: ...to forward IP which is allotted to DVR For example DVR 1 IP 192 168 10 107 DVR Port 7000 Web Server Port 7001 If DVR 1 is configured as above the virtual server on IP sharing router is as follows PC Server Name DVR 1 IP 192 168 10 107 Protocol TCP Internal Port 7000 External Port 7000 PC Server Name DVR 1 IP 192 168 10 107 Protocol TCP Internal Port 7001 External Port 7001 For more detail please r...

Page 81: ...Alarm Motion Speed Forward x1 2 4 8 16 Backward x1 2 4 8 16 Network Network Interface Ethernet Mobile Protocol TCP IP SMTP HTTP DHCP PPPOE ADSL Serial Communication RS 485 x2 PTZ Keyboard KBD4 Control Web Browser Internet Explorer 5 0 Higher DVR Control or Monitoring Event Transport E mail notification with JPEG when Event occurs Viewing Remote Client QCMS QRemote APP Archive Interface USB 2 0 Fro...

Page 82: ...82 Vista QXTRA User and installation manual V1 0 Operator Notes ...

Page 83: ...83 Vista QXTRA User and installation manual V1 0 Operator Notes ...

Reviews: