


17
Installation
S
LIDER
/D
AMPER
S
ET
-U
P
:
This is used to regulate the airflow through the pellet stove. The slider damper should be set
by a trained technician using magnehelic.
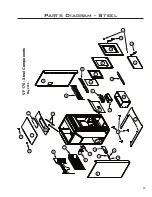
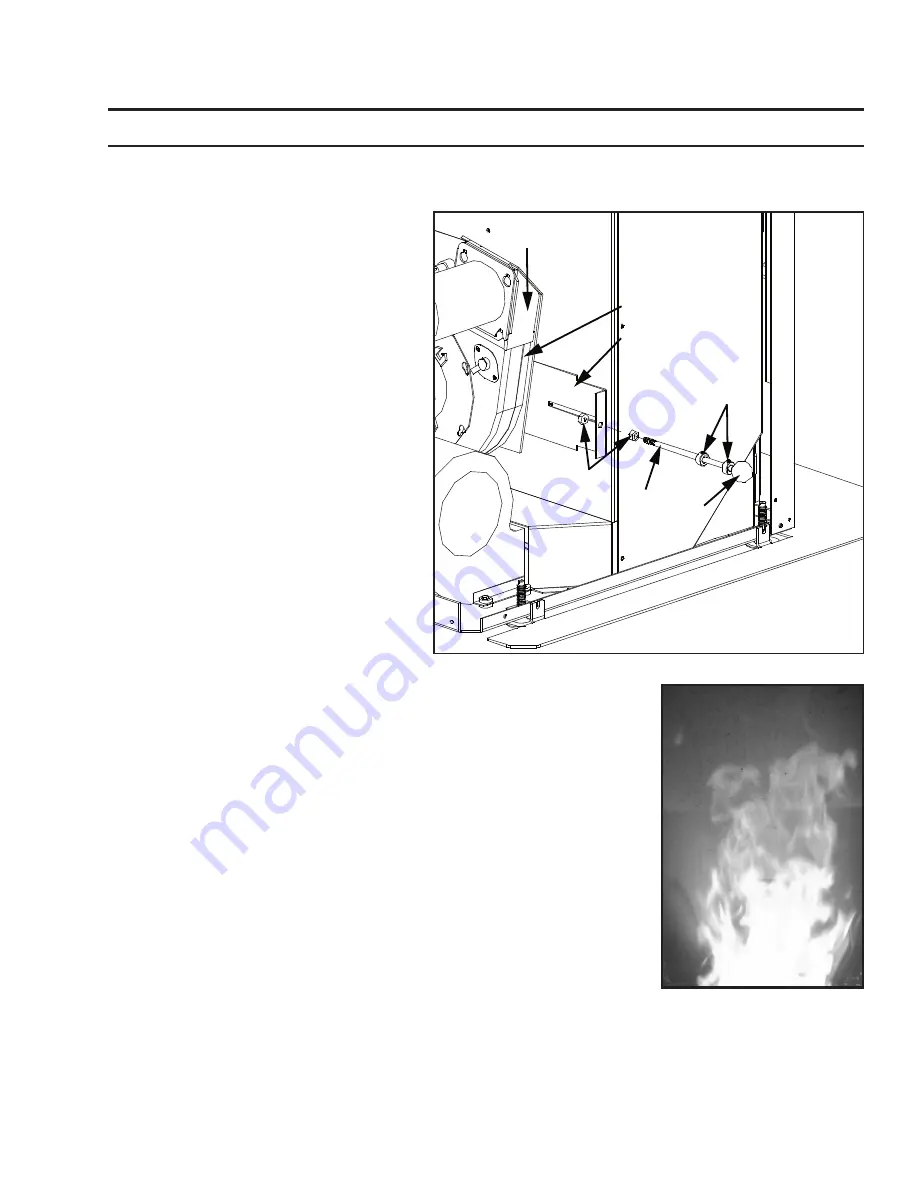
Exhaust Channel
Slider Damper
Exhaust Fan
Housing
Set collars are
installed on either
side of the cabinet.
7
/
16
” (11mm)
nuts
Rod
Knob
Figure 19: Slider/Damper Plate & Rod in Unit.
1. To install the optional slider damper
rod remove the left cabinet side panel.
Partially back out the two (2) T-20 Torx
screws on the back of the each panel and
the two (2) located on the front inside
edge below the louvers and ash shelf.
Pull the panel forward then remove and
locate the slider damper plate.
2. Install the
7
/
16
” (11mm) nut onto the
slider damper rod, thread it all the way
onto the rod.
3. Slide rod through the hole in the slider
damper plate and install the
7
/
16
”
(11mm) clinching nut onto the rod.
Leave nut a little loose to help it line up
when the cabinet is re-installed.
4. Re-install the cabinet side.
5. Mark the rod at either end of range in
which the unit runs correctly and has
a good flame pattern. Pull the rod out
until the flame becomes a short, brisk
flame, like a blowtorch; push the rod in
a little and mark it. The next mark its the most important and is set with
a magnehelic.
IMPORTANT:
Taking a reading of vacuum pressure inside the firebox with
a magnehelic gauge should be used to set the slider for best combustion.
The slider damper should be set only on a hot stove (operating for thirty
(30) minutes or more) by using a Magnahelic Pressure Gauge to measuring
the pressure in the firebox.
The best settings are a reading of
approximately 0.14 - 0.15 inches of water column (34.8 - 37.3 Pa)
on the high fire setting. Some fuels may require higher or lower
settings.
The reading can be taken from the 1⁄8” (3 mm) hole located on
the front of the unit below the ash shelf on the right hand side.
6. Remove the cabinet side
7. Install a set collar 1⁄2” (12mm) in from the inner mark from step #5
8. Re-install the cabinet side.
9. Install a set collar on the outside of the outer mark from step #5
Figure 20: Efficient Flame.
10. Install the black knob on the end of the rod. Check slider damper for smooth operation.


