ASSEMBLY INSTRUCTIONS
WE RECOMMEND INSTALLATION OF THIS LIGHTING FIXTURE BE DONE BY A
LICENSED ELECTRICIAN.
WARNING *** SWITCH OFF THE MAIN ELECTRICAL SUPPLY FROM THE MAIN
FUSE BOX/CIRCUIT BREAKER BEFORE INSTALLATION.
INSPECT ITEM CAREFULLY BEFORE ATTEMPTING TO INSTALL. IF THERE IS
ANY DAMAGE OR OBVIOUS DEFECT, DO NOT INSTALL.
ITEM MAY NOT BE RETURNED ONCE IT HAS BEEN INSTALLED.
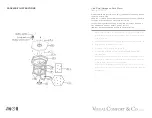
11. Affix mounting plate (B) to the ceiling outlet box by aligning holes with center
hole of plastic anchors (A), inserting mounting screws (C) to secure mounting
plate (B) to the wall.
12. Attach lantern base (E) to mounting plate (B) and tighten with base screws (D).
13. Insert light bulbs (not included) into sockets.
14. Close the door (G) by inserting locking pins (H).
15. INSTRUCTIONS FOR MOUNTING FIXTURE OUTDOORS AND/OR IN
WET LOCATION:
A.) Mounting surface should be clean, dry, flat, and 1/4” larger thank canopy/
fixture base on all sides. Any gaps between the moutning surface and canopy
exceeding 3/16” should be corrected as required.
B.) With silicone (ex. GE-108) caulking compound, caulk completely around
where back of canopy meets the wall surface to prevent water from seepig into
the outlet box.
WET
Club Small Hexagonal Flush Mount
Item # CH04110


