Criticare Systems, Inc.
VitalCare
TM
506N3 Series
Service Manual
Page 7-39
Section 7 —Disassembly
Chassis Service/
Pump Disassembly
1. Follow the caution for static-sensitive devices in “Electrostatic
Discharge Protection” in this section.
2. Turn the monitor off and disconnect the monitor from the AC
(Mains) power source.
3. Remove the battery as described in “Battery Removal/
Replacement” in Section 5.
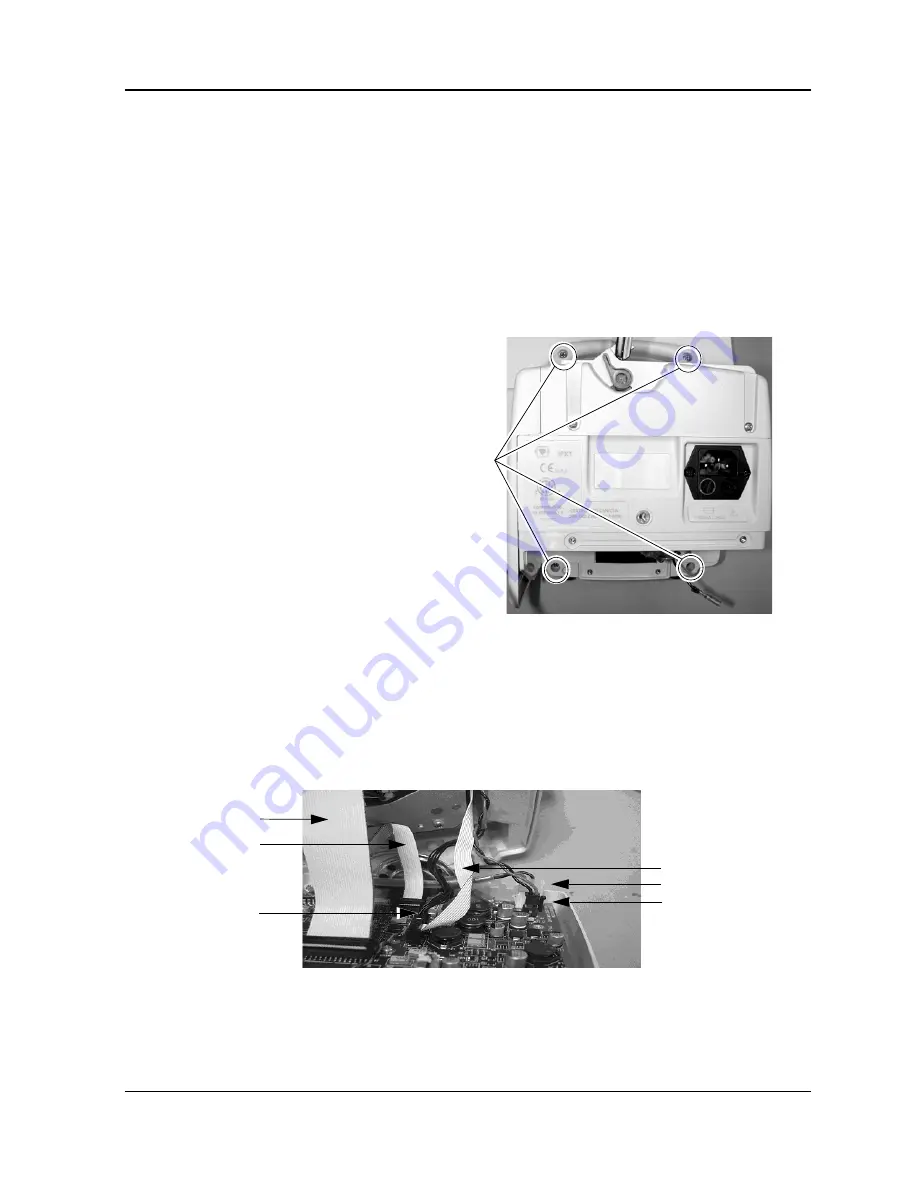
4. Flip the monitor over and loosen the four (4) gray-coated screws
(pn 40195B005). There are two (2) screws at the top of the
handle and two (2) screws at the bottom of the rear housing.
Torque to 5 in. lbs.
Figure 7-49: Remove Screws Holding Bezel
5. Carefully pull the front bezel away from the rear housing.
6. Disconnect the remaining cables from the main board.
NOTE
: Inserting cables incorrectly during reassembly will cause
damage.
Figure 7-50: Disconnect Cables
7. Disconnect the battery cable at J12 on the Main Board.
8. Disconnect the AC cable at
J10
on the Main Board.
Remove Screws
Printer Cable
NIBP Cable
SpO
2
Cable
Battery Cable
AC Cable
Temp Cable
Summary of Contents for 506DN3
Page 12: ......
Page 56: ......
Page 62: ......
Page 90: ......
Page 156: ......
Page 184: ......
Page 225: ......
Page 229: ......
Page 230: ......
Page 231: ......
Page 232: ......
Page 233: ......
Page 237: ......
Page 238: ......
Page 239: ......
Page 240: ......
Page 241: ......
Page 242: ......
Page 243: ......
Page 244: ......
Page 245: ......
Page 247: ......
Page 248: ......
Page 249: ......
Page 250: ......
Page 251: ...DO NOT SCALE PRINT DO NOT SCALE PRINT REV DATE DESCRIPTION BY...
Page 253: ......
Page 254: ......


