background image

8

ENGLISH

BLENDER SET  VT-1465

The  blender  is  included  into  the  blender  set  and 
intended for whisking, mixing, chopping.

DESCRIPTION

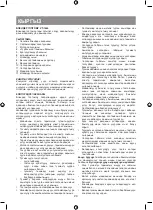
1.  Detachable blender attachment 
2.  Attachment installation place
3.  Motor unit
4.  «Turbo» mode button
5.  ON button
6.  Speed control knob
7.  Measuring cup
8.  Whisk attachment gear
9.  Whisk attachment
10. Chopper geared lid
11. Chopper bowl
12. Chopping knife
13. Measuring cup lid

ATTENTION!
For additional protection it is reasonable to install a 
residual  current  device  (RCD)  with  nominal  opera-
tion current not exceeding 30 mA. To install an RCD 
contact a specialist.
 

SAFETY PRECAUTIONS

Before  using  the  blender  set,  read  this  instruction 
carefully.  Keep  these  instructions  for  further  refer-
ence. Use the blender set for its intended purpose 
only as specified in this manual.
Mishandling  of  the  unit  can  lead  to  its  breakdown, 
injury to the user, as well as cause harm to the user 
or damage to his/her property.

 •

Before  connecting  the  unit  to  the  mains,  make 
sure that the voltage specified on the unit corre-
sponds to your home mains voltage.

 •

Do not use the unit outdoors.

 •

Do not use the unit near hot surfaces (such as gas 
or electric stove, oven).

 •

Provide that the power cord does not touch sharp 
edges of furniture and hot surfaces.

 •

Do not touch the motor unit body, the power cord 
and the plug with wet hands.

 •

To  avoid  risk  of  electric  shock  or  fire,  do  not 
immerse the unit, the power cord and the power 
plug into water or any other liquids.

 •

If the unit is dropped into water:
–  do not touch the water;
–  unplug  the  unit  immediately,  only  after  that 

you may take the unit out of water;

–  apply to an authorized service center for test-

ing or repairing the unit.

 •

Before using the unit for the first time, thoroughly 
wash all the removable attachments and contain-
ers that will contact food. 

 •

Use only the attachments supplied with the unit. 

 •

Before using the unit, make sure that the attach-
ments are set and fixed properly. 

 •

It  is  not  allowed  to  switch  the  unit  on  without 
attachments and foodstuffs for processing. 

 •

Always unplug the blender if it is left unattended 
and before assembling, disassembling or clean-
ing; as well as after using. 

 •

Place the chopper bowl on a flat stable surface.

 •

Foodstuffs should be put into the chopper bowl 
before the unit is switched on.

 •

Cool down hot foodstuffs before putting them into 
the measuring cup or the chopper bowl.

 •

Do  not  overfill  the  chopper  bowl  with  food  and 
watch the level of poured liquids.

 •

The unit is not intended for mixing of sticky and 
viscous ingredients.

 •

If rotation of the chopping knife is hindered dur-
ing  the  operation  of  the  chopper,  unplug  the 
unit and carefully remove foodstuffs that prevent 
blade rotation.

 •

Remove products and pour out liquids from the 
chopper bowl only after the chopper knife is com-
pletely stopped and removed.

 •

The  cutting  edges  of  the  chopping  knife  and  of 
the blender attachment are very sharp and dan-
gerous. Handle these attachments very carefully!

 •

Do not touch the rotating parts of the unit. Do  not 
let hair or free hanging clothes get into the rota-
tion area of the blender attachment knife or whisk.

 •

Handle  sharp  cutting  blades  with  care,  when 
emptying the bowl and during cleaning.

 •

To  unplug  the  unit,  do  not  pull  the  power  cord, 
instead take the power cord plug and disconnect 
it from the mains.

 •

Do not place the chopper bowl and the measuring 
cup into a microwave oven.

 •

Do  not  put  the  attachments  and  the  bowls  in  a 
dishwashing machine.

 •

For  children  safety  reasons  do  not  leave  poly-
ethylene bags used as a packaging unattended.

Attention!  Do  not  allow  children  to  play  with  poly-
ethylene  bags  or  packaging  film.  Danger  of  suf-
focation!

 •

Never use the unit if the power cord or the power 
plug is damaged, if the unit works improperly or 
after it was dropped.

 •

Close  supervision  is  necessary  when  children 
or  people  with  disabilities  are  near  the  operat-
ing unit. 

 •

Do  not  allow  children  to  use  the  blender  unsu-
pervised.

 •

Do not leave children unattended to avoid them 
using the unit as a toy.

 •

Do  not  allow  children  to  touch  the  body  of  the 
motor unit, the power cord or the power plug dur-
ing operation of the unit.

 •

During  the  unit  operation  and  breaks  between 
operation  cycles,  place  the  unit  out  of  reach  of 
children.

 •

The unit is not intended to be used by people with 
physical,  sensory  or  mental  disabilities  (includ-

Summary of Contents for VT-1465

Page 1: ...VT 1465 3 8 12 16 20 24 Блендерный набор Blender set ...

Page 2: ...1 2 7 13 3 8 10 12 11 9 4 5 6 ...

Page 3: ... в авторизованный уполномо ченный сервисный центр для осмотра или ремонта устройства Перед первым использованием устройства тща тельно промойте все съёмные насадки и ёмко сти которые будут контактировать с продуктами Используйте только те насадки которые входят в комплект поставки Прежде чем начать пользоваться устройством убедитесь в том что насадки установлены пра вильно и надёжно зафиксированы ...

Page 4: ...емпературе не менее трёх часов Извлеките блендер из упаковки и удалите упако вочные материалы и рекламные наклейки меша ющие работе устройства Проверьте целостность устройства при наличии повреждений не пользуйтесь устройством Перед включением убедитесь что напряжение в электрической сети соответствует напряжению указанному на корпусе устройства Перед использованием устройства промойте насадки 1 9...

Page 5: ...кан 10 Для включения устройства нажмите и удержи вайте кнопку 5 Вы можете регулировать скорость вращения регулятором 6 После использования устройства извлеките вилку сетевого шнура из электрической розетки отсо едините редуктор венчика 8 от моторного блока 3 повернув редуктор 8 по часовой стрелке Выньте венчик 9 из редуктора 8 ВНИМАНИЕ Запрещается использовать насадку венчик 9 для замешивания крут...

Page 6: ...ителем 12 крайне осторожно Перед чисткой устройства отключите его от элек трической сети Снимите насадки Для чистки моторного блока 3 и редукторов 8 10 используйте слегка влаж ную ткань после чего их следует вытереть насухо После переработки солёных или кислых продук тов необходимо сразу ополоснуть водой насадку блендер 1 или нож измельчитель 12 При переработке продуктов с сильными кра сящими свой...

Page 7: ...ьной информации об ути лизации данного продукта обратитесь в местный муниципалитет службу утилизации бытовых отходов или в магазин где Вы приобрели данный продукт Срок службы устройства 3 года Данное изделие соответствует всем требу емым европейским и российским стандар там безопасности и гигиены ИЗГОТОВИТЕЛЬ СТАР ПЛЮС ЛИМИТЕД STAR PLUS LIMITED МЕСТОНАХОЖДЕНИЕ И ПОЧТОВЫЙ АДРЕС ДЛЯ СВЯЗИ ЮНИТ БИ ЭН...

Page 8: ...is left unattended and before assembling disassembling or clean ing as well as after using Place the chopper bowl on a flat stable surface Foodstuffs should be put into the chopper bowl before the unit is switched on Cool down hot foodstuffs before putting them into the measuring cup or the chopper bowl Do not overfill the chopper bowl with food and watch the level of poured liquids The unit is no...

Page 9: ... should not exceed 30 seconds while using the blender attachment 1 1 minute while using the whisk attachment 9 and 30 seconds while chopping hard foodstuffs in the chopper bowl 11 Make at least a 3 minute break between operation cycles USING THE BLENDER ATTACHMENT Use the removable blender attachment 1 for making fruit puree baby food sauces mayonnaise for mix ing various ingredients and making co...

Page 10: ...ed properly Install the motor unit 3 strictly in the vertical posi tion and evenly Connect the unit to the mains by inserting the power cord plug into the mains socket Make sure that speed control knob 6 is set to LOW position To switch the unit on press and hold the button 5 You can adjust speed with speed control knob 6 During operation hold the motor unit 3 with one hand and the chopper bowl 11...

Page 11: ...wl 1 pc Cup with lid 1 pc Instruction manual 1 pc Warranty certificate 1 pc TECHNICAL SPECIFICATIONS Power supply 220 240 V 50 60 Hz Rated input power 330 W RECYCLING For environment protection do not throw out the unit and the batteries if included do not discard the unit and the batteries with usual household waste after the service life expiration apply to specialized centers for further recycl...

Page 12: ...ың дұрыс орнатылғанына және сенімді бекітілгеніне көз жеткізіңіз Құралды қондырмалар мен қайта өңдеуге арналған азықтарды пайдаланусыз қосуға тыйым салынады Егер блендер қараусыз қалса және оны құрастыру бөлшектеу немесе тазалау алдында оны үнемі қуат көзінен ажыратып отырыңыз және пайдаланғаннан кейін де Чоппер тостағанын тегіс тұрақты бетке орнату керек Чоппер тостағанындағы өнімдерді құрал қосы...

Page 13: ...қақпақ бәсеңдеткішін 10 және бұлғауыш қондырмасының бәсеңдеткішін 8 желілік бауды және желілік бау айыртетігін суға немесе кез келген басқа сұйықтықтарға матырмаңыз Блендер қондырамысынң 1 жұмыс бөлігін ғана жуыңыз сыртқы бетін дымыл матамен сүртіңіз Қондырма блендерді 1 толығымен суға немесе кез келген басқа сұйықтықтарға матыруға тыйым салынады Қондырмалар мен ыдыстарды ыдыс жуатын машинаға салм...

Page 14: ...ін және шеміршектерін жойыңыз Майдалау Абайлаңыз Ұсақтағыш пышақ 12 өте өткір Әрқашан ұсақтағыш пышақты 12 жоғарғы пластмасс артқы ілмегінен ұстаңыз Чоппер тостағынын 11 тегіс тұрақты бетке орнатыңыз Ұсақтағыш пышақты 12 чоппер тостағаны 11 ішіндегі оське орнатыңыз Азық түлікті чоппер тостағанына 11 салыңыз Ескерту Құрылғыны чоппер тостағаны 11 бос болғанда іске қоспаңыз Бәсеңдеткіш қақпақты 10 чо...

Page 15: ...алқын және құрғақ жерде балалардың және мүмкіндігі шектеулі адамдардың қол жетімсіз жерде сақтаңыз ЖЕТКІЗІЛІМ ЖИНАҒЫ Моторлық блок 1 дн Қондырма блендер 1 дн Бұлғауыш бәсеңдеткіші 1 дн Қондырма бұлғауыш 1 дн Қақпақ бәсеңдеткіш 1 дн Ұсақтағыш пышақ 1 дн Чоппер тостағаны 1 дн Қақпағы бар стақан 1 дн Нұсқаулық 1 дн Кепілдік талоны 1 дн ТЕХНИКАЛЫҚ СИПАТТАМАЛАРЫ Электрлік қуаттандыруы 220 240 В 50 60 Г...

Page 16: ...ористовуйте лише ті насадки які входять до комплекту постачання Перш ніж почати користуватися приладом переко найтеся в тому що насадки встановлені правильно і надійно зафіксовані Забороняється вмикати пристрій без використання насадок і продуктів для перероблення Необхідно завжди вимикати блендер від живлення якщо він залишений без нагляду і перед збиран ням розбиранням чи чищенням а також після ...

Page 17: ...кришку редуктор чопера 10 редуктор насадки віночка 8 мереж ний шнур і вилку мережного шнура у воду або у будь які інші рідини У насадки блендера 1 промивайте тільки робочу частину зовнішню поверхню протирайте вологою тканиною Забороняється повністю занурювати насадку блендер 1 у воду або будь які інші рідини Не поміщайте насадки і посудини у посудомийну машину ТРИВАЛІСТЬ РОБОТИ Блендерний набір до...

Page 18: ...а 12 дуже гострі Завжди тримайте ніж подрібнювач 12 за верхній пластмасовий хвостовик Встановіть чашу чопера 11 на рівній стійкій поверхні Установіть ніж подрібнювач 12 на вісь всередині чаші чопера 11 Помістіть продукти у чашу чопера 11 Примітка Не вмикайте пристрій з порожньою чашею чопера 11 Встановіть кришку редуктор 10 на чашу чоппера 11 і поверніть її за годинниковою стрілкою до упору Устано...

Page 19: ...е блендерний набір у сухому прохолод ному місці недоступному для дітей та людей з обмеженими можливостями КОМПЛЕКТ ПОСТАЧАННЯ Моторний блок 1 шт Насадка блендер 1 шт Редуктор віночка 1 шт Насадка віночок 1 шт Кришка редуктор 1 шт Ніж подрібнювач 1шт Чаша чопера 1 шт Стакан з кришкою 1 шт Інструкція 1 шт Гарантійний талон 1 шт ТЕХНІЧНІ ХАРАКТЕРИСТИКИ Електроживлення 220 240 В 50 60 Гц Номінальна сп...

Page 20: ...нотулуп бекем бекитилгенин текшерип алыңыз Саптамалар жана ишетиле турган азыктары жок түзмөктү иштетүүгө тыюу салынат Блендер кароосуз калганда аны кураштыруунун ажыратуунун же тазалоонун алдныда жана колдонуудан кийин аны ар дайым электр тармактан ажыратуу зарыл Чоппердин табагын тегиз туруктуу беттин үстүнө орнотуңуз Азыктарды чоппердин табагына түзмөктү иштетүүдөн мурун салыңыз Ысык азыктарды ...

Page 21: ...ып сүртүнүз КӨҢҮЛ БУРУҢУЗДАР Мотор сапсалгысын 3 чоппердин редуктор капкагын 10 жана венчиктин редукторун 8 электр шнурун жана шнурунун сайгычын сууга же башка суюктуктарга салбаңыз Блендер саптамасынын иштөө жагын гана жууп сырткы бетин нымдуу чүпүрөк менен сүртүңүз Блендер саптамасын 1 сууга же башка суюктуктарга толугу менен салууга тыюу салынат Насадкаларды жана идиштерди идиш жуучу аспапка са...

Page 22: ...ият болуңуз майдалатуу бычактын 12 миздери өтө курч Майдалатуу бычакты 12 үстүндөгү пластмасса хвостовигинен гана кармаңыз Чоппердин табагын 11 тегиз туруктуу беттин үстүнө коюңуз Майдалатуу бычакты 12 чоппердин табагынын 11 ичиндеги огуна орнотуңуз Азыктарды чоппердин табагына 11 салыңыз Эскертүү Чоппердин табагы 11 бош болгондо шайманды иштетпеңиз Редуктор капкагын 10 чоппер табагына 11 үстүнө о...

Page 23: ...н мотор сапсалгысынын 3 үстүнө түрбөңүз Блендер топтомун балдар жана жөндөмдүүлүгү төмөн болгон адамдар колу жетпеген кургак салкын жерлерде сактаңыз ЖАБДЫКТЫН ЖЫЙЫНТЫГЫ Мотор сапсалгысы 1 даана Блендер насадкасы 1 даана Венчиктин редуктору 1 даана Венчик насадкасы 1 даана Редуктор капкагы 1 даана Майдалатуучу бычак 1 даана Чоппердин табагы 1 даана Чыны капкакгы менен 1 даана Колдонмо 1 даана Кепи...

Page 24: ...tilizare Așezați vasul chopperului pe o suprafaţa plană şi stabilă Puneţi alimentele în vasul chopperului până a porni dis pozitivul Răciţi alimentele fierbinți înainte de a le pune în paharul gradat sau vasul chopperului Nu supraîncărcați vasul chopperului cu alimente și urmăriți nivelul lichidelor turnate Dispozitivul nu este destinat pentru amestecarea ingre dientelor lipicioase și vâscoase La ...

Page 25: ...Înainte de a monta duza 1 asigurați vă că fișa cablului de alimentare nu este conectată la o priză electrică Întroduceți duza blender detașabilă 1 în unitatea moto rului 3 și rotiți o în sensul invers acelor de ceasornic până când se oprește asigurați vă că duza este bine fixată Introduceţi fişa cablului de alimentare în priza electrică Asigurați vă că regulatorul de viteză 6 este setat în poziția...

Page 26: ... tocător 12 ţinând de coada din plastic Scoateţi alimentele mărunțite din vasul chopperu lui 11 ATENȚIE Respectaţi cu stricteţe succesiunea acţiuni lor descrise Remarcă Pentru a porni modul turbo apăsați și mențineți apăsat butonul 4 timp de 30 de secunde când utilizați duza blender 1 60 de secunde când bateți cu duza tel 9 30 de secunde când tocați în vasul chop perului 11 Pentru a obține rezulta...

Page 27: ...rivind reciclarea acestui produs contactați primăria locală serviciul de reciclare a deșeurilor menajere sau magazinul de unde ați achiziționat acest produs Producătorul îşi rezervă dreptul de a modifica designul construcția și caracteristicile tehnice care nu afectează prin cipiile generale de funcționare ale dispozitivului fără notifi care prealabilă din cauza cărora între instrucțiune și produs...

Page 28: ...усым айында алтыншы ай жасалғанын білдіреді UA Дата виробництва виробу вказана в серійному номері на табличці з технічними даними Серійний номер представляє собою одинадцятизначне число перші чотири цифри якого означають дату виробництва Наприклад серійний номер 0606ххххххх означає що виріб був виготовлений в червні шостий місяць 2006 року KG Буюм иштеп чыгарылган датасы сериялык номурунда техника...

Reviews: