


P/5
P/6
Selecting the steam.
The quantity of steam is regulated by the steam selector
H
.
1. Move the steam selector to a position between minimum and maximum
d
epending on the quantity of steam required and the temperature
s elected
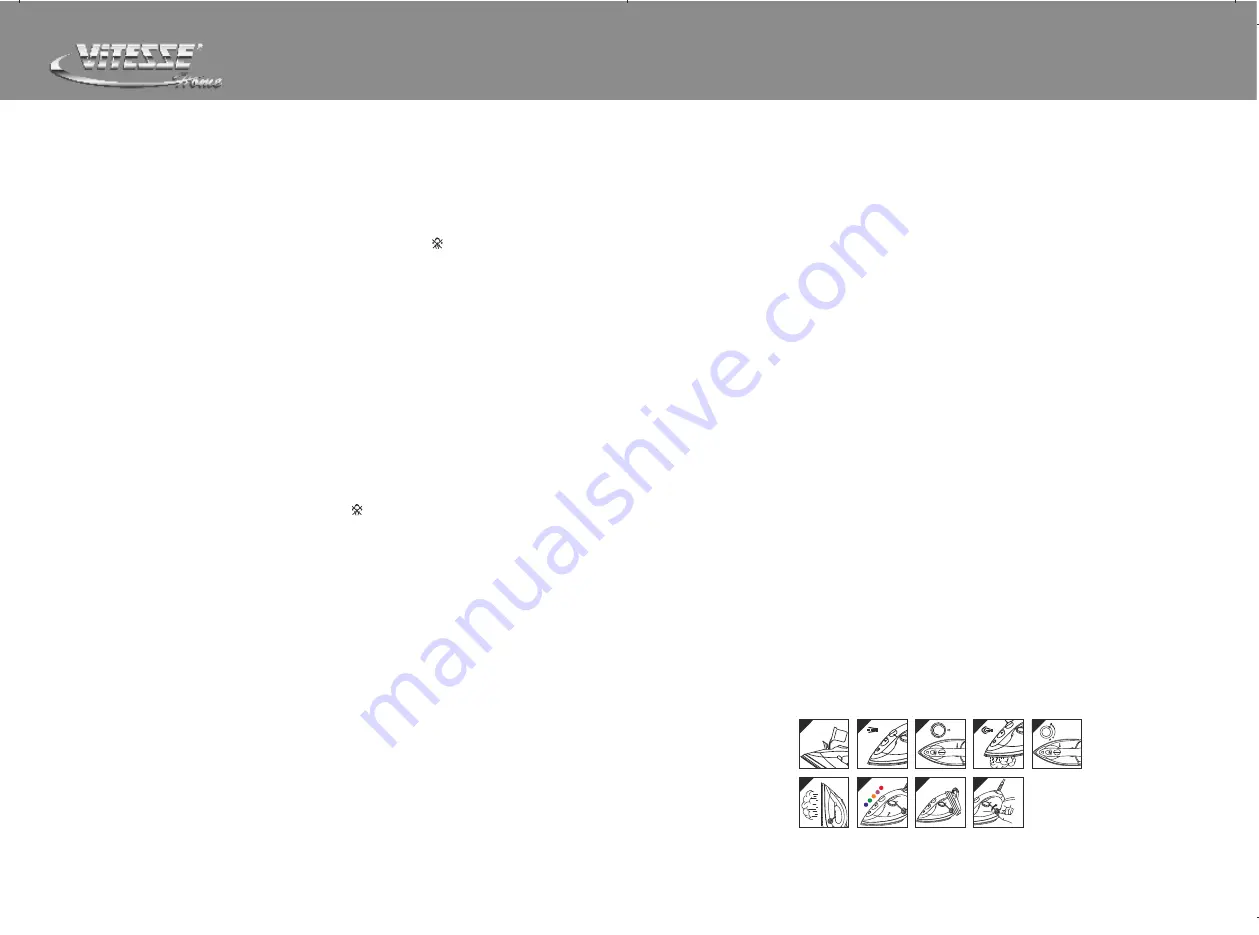
[Fig. 5]
.
Warning
: the iron gives off steam continuously only if you hold the iron
horizontally. You can stop the continuous steam by placing the iron in a
vertical position or by moving the steam selector to “ ”. As indicated on the
thermostat knob
I
and in the initial table, you can only use steam at the
highest temperatures. If the selected temperature is too low, water may drip
onto the plate.
Selecting Shot-steam and steam when ironing vertically.
Press the shot-steam button D to generate a powerful burst of steam that can
penetrate the fabrics and smooth the most difficult and tough creases.W
ait for
a few seconds before pressing again [Fig. 4].
By pressing the shot-steam button at intervals you can also iron vertically
(curtains, hung garments, etc.) [Fig. 6].
Warning: the shot-steam function can only be used at high temperatures. Stop
the emission when the plate temperature control light E comes on, than start
ironing again only after the light has gone off.
Dry ironing
To iron without steam, follow the instructions in section “steam ironing”,
leaving the steam selector H on position “ ”.
Spray Function
Make sure that there is water in the reservoir. Press the spray button C
slowly (for a dense spray) or quickly (for a vaporized spray) [Fig. 2].
Warning:
for delicate fabrics, we recommend moistening the fabric
beforehand using the spray function C, or putting a damp cloth between the
iron and the fabric. To avoid staining, do not use the spray on silk or synthetic
fabrics.
Self-cleaning
The self-cleaning feature cleans inside the plate, removing impurities. We
recommend using it every 10-15days. Directions:
1. Fill the reservoir up to the maximum level indicated and set the steam
selector
2. Set the thermostat knob
I
to the maximum temperature and wait for
the light
E
to turn off.
3. Pull the plug out of the socket and hold the iron horizontally over the
sink.
4. Hold the cleanout button
H
setting until all the boiling water, steam,
impurities come out
[Fig. 5]
.
5. When the soleplate has cooled down, you can clean it with a damp cloth.
Cleaning
Please note: before cleaning the iron in any way, make sure that the appliance
plug is not connected to the socket.
Any deposits, starch residue or size left on the plate can be removed using a
damp cloth or an unabrasive liquid detergent.
Avoid scratching the plate with steel wool or metallic objects.
The plastic parts can be cleaned with a damp cloth then wiped over with a dry
cloth.
How to put it away
1. Disconnect the plug of the iron from the socket.
2. Empty the reservoir by turning the iron upside down and gently shaking
it.
3. Leave the iron to cool down completely.
4. Roll up the power cord with the rewinder
[Fig. 8]
.
5. Always put the iron away in a vertical position.
Advice for good ironing
1. We recommend using the lowest temperatures with fabrics that have
unusual finishes (sequins, embroidery, flush, etc.).
2. If the fabric is mixed (e.g. 40% cotton 60% synthetics), set the
thermostat to the temperature of the fibre requiring the lower
temperature.
3. If you don't know the composition of the fabric, determine the suitable
temperature by testing on a hidden corner of the garment. Start with a
low temperature and increase it gradually until it reaches the ideal
temperature.
4. Never iron areas with traces of perspiration or other marks: the heat of
the plate fixes the stains on the fabric, making them irremovable.
5. The size is more effective if you use a dry iron at a moderate temperature:
excess heat scorches it with the risk of forming a yellow mark .
6. To avoid marking silk, woolen or synthetic garments shiny, iron them
inside out.
7. To avoid marking velvet garments shiny, iron in one direction (following
the fibre) and do not press down on the iron.
8. The heavier the washing machine is loaded, the more garments come out
creased.
9. This also happens when the spin drying revolutions are very high.
Technical Data
Power supply: 230V ~ 50HZ
Power consumption: 1800-2200W
1
2
3
max
min
4
5
6
8
7
T h e m o C o l o r
MAX
I I I
I I
I
0
9
coin
www.vitesse.ru


