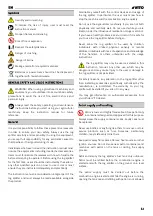
Don't overfill the fuel tank. In order to allow the fuel to have
space to expand, never add fuel above the lower edge of
the filler neck. In addition, respect the operating
instructions of the combustion engine.
If petrol overflows, clean up any spilled fuel immediately.
The combustion engine should only be started after the
surface dirty with petrol has been cleaned. Any attempt to
start the engine should be avoided until the petrol vapours
have volatilised (dry with a cloth).
If petrol has come in contact with clothing, it must be
immediately changed.
When working, always wear resistant footwear with a non-
slip sole that fully covers the foot.
During maintenance and cleaning work, accessories'
changing as well as the transport of the machine, always
wear tight gloves.
Clothing worn during use of the machine must be adequate,
tight and closed, for example, a work boiler suit. Do not
wear loose clothing or jewellery. Do not use scarves, ties,
hanging ropes or other similar large pieces of clothing.
Keep hair, clothing and gloves away from moving parts. The
rotating parts may touch or drag the hair or clothes which
may result in serious injuries.
Do not carry the log splitter with the combustion engine
running. Transport the machine only when the combustion
engine is cold and without fuel.
The machine should always be loaded by two people,
respect the point hitches. Use suitable loading equipments
(cargo ramps, lifting devices).
Protect the machine and its parts carried on the cargo
surface with properly sized means of attachment (straps,
cables, etc.). Always secure the machine when transporting
it.
Carry the machine with a suitable trailer or on a suitable
cargo surface, and not inside the car (e.g. car trunk).
When carrying the machine, regional legislation in force
must be respected, in particular the ones concerning the
cargo’s
protection and the transport of objects on cargo
surfaces.
Ensure the log splitter is only used by users who have
familiarized themselves with the instruction manual.
Before starting the log splitter, check the leak-
tightness of the fuel system, particularly the visible
parts such as (tank, tank cap and hose couplings) and the
hydraulic system (hydraulic hoses and couplings). In case
of leakage or damage, do not start the combustion engine
and request the repair of the machine from an official
dealer.
Before using the log splitter, replace defective parts as well
as all other used and damaged parts.
Check that all nuts and screws are properly screwed. It is
important to check regularly the log splitter to ensure
safety and a good performance.
Make all adjustments and work necessary for the correct
assembly of the log splitter. If you have any questions or
difficulties, contact your official dealer.
Before starting the engine, remove all objects on top of the
log splitter (tools, accessories, cloths, etc.).
Take into account the municipal regulations about the
hours when it is allowed to use machines with combustion
engines.
Keep third parties away from the operating area.
Never work while animals or people, particularly
children, are in the danger zone. When using the log
splitter, firewood may be projected to the sides.
Always place the log splitter on a firm, level floor to prevent
the log splitter from falling or slipping.
Work only in daylight or with good artificial lighting and do
not work with unfavourable weather conditions such as
rain, thunder and, in particular, under the danger of
lightning.
Keep both hands on the control valve handles. Thus,
you avoid crushing while the log splitter is running.
The control and safety devices installed must not be
removed or inhibited.
In case of nausea, headaches, vision problems (e.g.
reduced field of vision), hearing problems, dizziness,
reduced concentration capacity, stop work immediately.
These symptoms can be caused by too high concentrations
of exhaust gases.
Summary of Contents for VIRLG12
Page 5: ...RACHADOR DE LENHA A GASOLINA VIRLG12 Fig B Fig A ...
Page 6: ...Fig C Fig D Fig H Fig G Fig F Fig E 1 2 1 2 3 1 2 1 2 4 3 ...
Page 7: ...Fig I Fig N Fig M Fig L Fig K Fig J 1 2 2 1 2 3 4 4 5 5 4 1 2 1 2 2 3 4 2 3 4 ...
Page 8: ...Fig O Fig R Fig Q Fig P 1 3 4 5 4 6 7 8 1 2 3 5 4 1 2 2 Velocidade máxima Ralenti 1 1 2 3 ...
Page 9: ...Fig U Fig V Fig T Fig S 2 5 2 1 1 2 1 1 2 2 3 3 3 Fig W 0 7 0 8 1 2 Fig X 2 ...
Page 55: ......
Page 56: ...VIRLG12_REV02_MAR22 ...


