38
▪
Create "islands" around obstacles, for example
flowerbeds, with the boundary wire,
if you don't
want the robot to cut inside that area. Leave a 5mm
spacing between wires;
▪
The robot mower can hit stones, without any
problems, as long as they are heavy enough so that
the robot does not move them.
If, however, the
stone has a sloping surface, which the robot may
accidentally climb, it is advisable to move or remove
the stone from the working area;
▪
If you have trees with visible roots it is advisable to
bypass with the boundary wire to protect the roots
and the robot;
▪
If your garden entrance or paths are at the same level
as the lawn, the robot can easily pass over them. But
if you avoid it, you only need 10cm between the path
and the boundary wire. If, however, its entrance is
covered with gravel or something similar, the robot
cannot pass over.
In this case, you will need a
distance of 30cm between the boundary wire and the
entrance;
▪
The robot mower is capable of climbing steep slopes
with 30° maximum. If the terrain gets steeper, the
robot has a sensor that will immediately stop it. If the
ground is tilted more than 25° down towards the
boundary wire,
the robot can slide out of the working
area in case of wet grass. Therefore, we recommend
that the bounding wire should be placed up to 40cm
from the boundary line on sloping grounds.
INSTALLATION INSTRUCTIONS
Materials and lawn preparation
Remove the bounding wire, wire joints and the double
scale guidance ruler from the box.
You'll also need a hammer, plier and socket wrench.
The lawn should not be more than 60mm high when
laying the boundary wire.
If it is higher, it is advisable to
mow it first with a conventional lawnmower.
Then the
wire can be placed as close to the ground as possible,
to
prevent people from stumbling or the robot get
damaged.
Installing the boundary wire
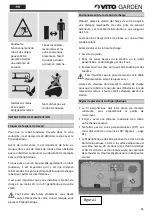
Place the docking station as shown in the sketch (figura
1) and insert the first peg.
Reserve 0.5m of wire to use in the final installation of
the docking station.
Place the boundary wire freely around the working area
in the garden according to your sketch. Then adjust it as
you fix it.
At this moment you can start putting pegs in. Use the
double scale guidance ruler to keep the desired distance
to the edge (10 - 30cm), depending on the type of edge,
as described above). The distance between pegs should
be 1m maximum. It is advisable that the pegs be placed
closer together in the edges, which should always be
over 100°.
If there are areas in your garden where you do not want
the robot to cut, surround the area with the boundary
wire.
Place the last peg when the wire gets to the docking
station.
Connecting the boundary wire to the docking station
Cut the end of the wire to an appropriate length to
reach the terminal (too much wire can cause signal
problems). Remove the coating from both ends of the
wire.
When connecting the wire to the docking station there
is an IN-wire and an OUT-wire as indicated. The IN-wire
is placed in the brackets under the docking station and
must be connected to the left terminal,
while the OUT-
wire is connected to the right terminal.
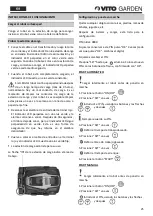
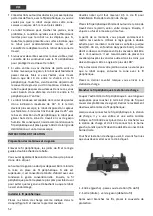
To secure the docking station to the ground, 4 screws
are provided which you must tighten with the socket
wrench.
1 - IN (left) - from under the docking station (end of
wire);
2 - OUT (right) - to the lawn (start of the wire);
After connecting IN and OUT wire, put the protective
cap.
1
2
Summary of Contents for VIRCR1000
Page 1: ...PT EN ROBOT CORTA RELVA ROBOT LAWN MOWER ES FR ROBOT CORTACÉSPED ROBOT TONDEUSE VIRCR1000 ...
Page 61: ...61 FIGURA 1 ...
Page 63: ......
Page 64: ...VIRCR1000_REV00_JAN20 ...

