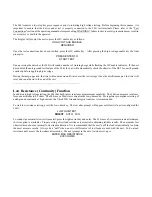
is set to zero, the limit becomes inactive. Any value between 0 nA and 35 mA may be used as a minimum current limit. To
change the value of the current limit, use the number keypad. To change the units from m (milli) to u (micro) or n (nano), use the
up/down cursor arrows. Once the desired current limit is displayed, press enter. The next prompt is:
ENTER RAMP CURRENT
10.0
mA
The ramp current feature allows the user to program separate max current limits for the ramp and dwell portions of the test. The
default value for the ramp current limit is the same value as the dwell current limit. The next prompt is:
ENTER TEST TIME
10.0
SECONDS
The test time is the amount of time that the 944i will hold the test voltage once it has arrived at that voltage. This period is often
referred to as dwell time. During the dwell time the unit continuously monitors leakage current against both min and max current
limits, while holding the output constant. If at any time during either the ramp or dwell period, a current limit is exceeded the test
is stopped and the DUT is failed. If the test time elapses then the DUT has successfully passed the test without tripping a limit.
Use the number keypad to overwrite the default test time with the desired time and then press enter. This completes the test
parameters for automatic DC Dielectric testing. The next prompt is as follows:
SELECT MODE
RUN
ADD CHANNL STORE
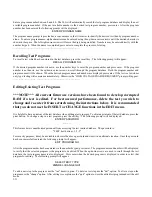
Run is the highlighted menu item when the select mode prompt appears. If the user chooses, another step can be added on before
running the test. The cursor arrows may be used to select any of the desired mode options. Detailed instructions on the
add
,
channel
and
store
functions can be located later in this chapter. If the user is interested in repeating the test just entered, it is
recommended that the test be stored. To run the test that has just been set-up, press enter while the "run" is highlighted.
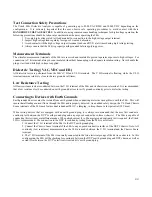
As in direct mode testing, the automatic mode of the 944i requires a two step key press sequence prior to initiating high voltage
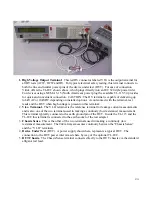
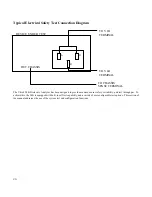
testing. Before beginning this sequence, it is important to ensure that the device under test is properly connected to the 944i test
terminals. Please refer to the "Test Connections" section of the operating manual before proceeding.
WARNING! Failure to observe test connection precautions may result in severe injury or death to the operator. The display will
prompt the user to press the HV enable key as follows:
HIGH VOLTAGE ENABLE
REQUIRED
Once the test connections have been verified, press the HV enable button. After pressing the high voltage enable key the final
prompt is:
PRESS ENTER TO
START
TEST
Upon pressing the enter key the 944i will sound a number of warning beeps while flashing the HV enable indicator. If the user
has enabled the auto-ground test feature of the 944i, the unit will automatically check the chassis of the DUT for earth ground
continuity before applying high voltage to the DUT.
........................................................................................
AC Dielectric Strength Function
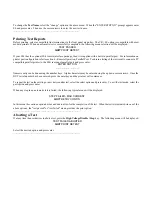
To set-up a new AC Dielectric test, press the VAC key. The familiar confirmation prompt will appear as follows:
AC DIELECTRIC TEST
DIRECT
AUTOMATIC
Use the right cursor arrow to highlight the Automatic mode, then press enter. The following prompt will appear:
ENTER TEST VOLTAGE
1000
VOLTS
This prompt allows the operator to set the test voltage. The 1000 VAC shown is the default test voltage. To enter another test
voltage, simply press the number keys for the desired value. The range of output for the VAC function is from 100 to 5000 VAC
RMS (8000 VAC with option AC-8). When the desired test voltage is displayed, press enter to advance to the next step.
ENTER SLEW RATE
_100
VOLTS/SEC


