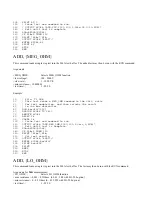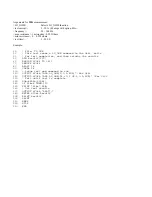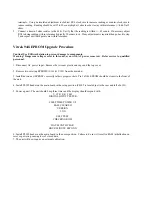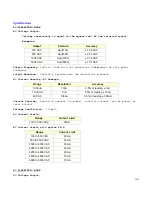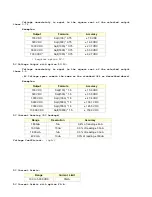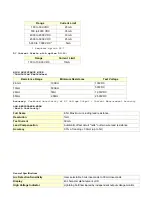
Press enter on the 944i. The display should respond with:
APPLY 18µA FROM VLO
TO REAR GND (ENTER)
Set the output current range of the 2500 to 10µA.
Press enter on the 944i. The display should respond with:
APPLY 1.8mA FROM VLO
TO REAR GND (ENTER)
Set the current output range of the 2500 to 1mA.
Press enter on the 944i. The display should respond with:
APPLY 85mA FROM VLO
TO REAR GND (ENTER)
Dial in .85000 volts on the 2701C.
Set the current output range of the 2500 to 100mA.
Press enter on the 944i. The display should respond with:
ENTER TO PROCEED
CLEAR TO BACKUP
Press Enter to complete the calibration procedure. DO NOT use the “CLEAR TO BACKUP” feature. If you made a
mistake during the calibration routine, exit the routine and start all over again. DO NOT try to back out of the routine or
turn off power during the routine. When enter is pressed, the display will respond with:
STORING CALIBRATION
CONSTANTS
(FOLLOWED BY)
CALIBRATION COMPLETE
THANK YOU
(FOLLOWED BY)
ENTER
Press enter when ready and the calibration screen will show up again:
CALIBRATION
VOLTS CURRENT EXIT
You may exit by selecting EXIT or pressing “3” on the keypad.
Once the calibration n procedure is complete, another verification procedure should be run to ensure that the procedure
was successful.
Vitrek 944i Lo Ohms Adjustment Procedure
1.
In the direct lo ohm mode zero out the test lead resistance before attaching leads to a 1 ohm standard resistor. The
uncertainty of the 944i in this mode is 1 ohm +/-0.033. Should the reading fall near or outside of this tolerance
adjustment may be needed.
2.
To adjust the lo ohms reading remove the screws retaining the top cover and slide the top cover back approximately
two inches. Find the adjustment access hole in the clear high voltage cover located behind the front panel output

