95x Series Operating Manual - May 17, 2022
Page
96
of
155
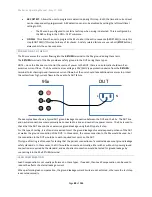
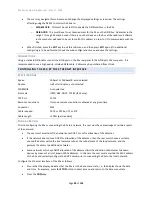
PRINTOUT…
SYSTEM…
INTERFACES…
DIGITAL I/O…
BUILD…
SET TO DEFAULTS…
LOCK PASSWORD:000000
RELOCK…
•
Using the Left Arrow or Right Arrow keys as needed, change the selection point to the INTERFACES line.
•
Press the
ENTER
key.
•
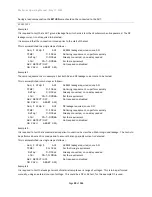
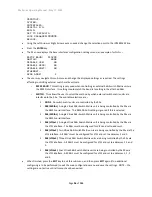
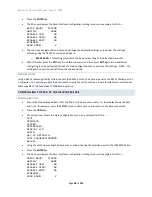
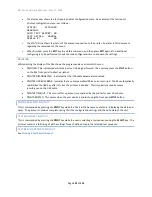
The 95x now displays the base interfaces configuration settings menu, an example of which is
–
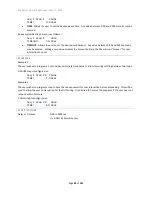
RS232 BAUD: 115200
SWITCH: NONE
DISABLE USB: NO
DISABLE GPIB: NO
DISABLE ENET: NO
ETHERNET…
GPIB ADDR: 2
•
The user may navigate this sub-menu and change the displayed settings as required. The settings
affecting controlling external switch matrix units are -
o
RS232 BAUD
. This setting is only used when controlling an external 964i Switch Matrix unit via
the RS232 interface. Its setting should match the baud rate setting in the attached 964i.
o
SWITCH
. This allows the user to select the method by which external switch matrix units are
interfaced to the 95x. The available selections are
–
▪
NONE
. No switch matrix units are controlled by the 95x.
▪
948 (SERIAL)
. A single Vitrek 948i Switch Matrix unit is being controlled by the 95x via
the RS232 serial interface. The RS232 BAUD setting is ignored if this is selected.
▪
964 (SERIAL)
. A single Vitrek 964i Switch Matrix unit is being controlled by the 95x via
the RS232 serial interface.
▪
964 (VICLx1)
. A single Vitrek 964i Switch Matrix unit is being controlled by the 95x via
the VICL interface. The 964i must be configured for VICL and set to address 1.
▪
964 (VICLx2)
. Two Vitrek 964i Switch Matrix units are being controlled by the 95x via the
VICL interface. All 964i’s must be configured for VICL and set to addresses 1 and 2.
▪
964 (VICLx3)
. Three Vitrek 964i Switch Matrix units are being controlled by the 95x via
the VICL interface. A
ll 964i’s must be configured for VICL and set to addresses 1, 2 and
3.
▪
964 (VICLx4)
. Four Vitrek 964i Switch Matrix units are being controlled by the 95x via
the VICL interface. All 964i’s must be configured for VICL and set to addresses 1, 2, 3
and 4.
•
When finished, press the
EXIT
key to exit this sub-menu, and then press
EXIT
again (if no additional
configuring is to be performed) to exit the main configuration menu and save the settings. NOTE
–
the
settings are not active until all menus have been exited.

