95x Series Operating Manual - May 17, 2022
Page
39
of
155
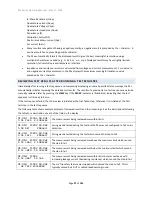
test steps in the test sequence. Note that test steps which do not have any measurements, i.e., switch
unit control steps or timing test steps, are not reviewable and are skipped unless they contain a failure.
Only test steps which have been performed can be reviewed, as an example if a 10-step test sequence
was aborted during the 2
nd
test step, then only the 1
st
and 2
nd
test steps are reviewable as no others were
performed.
•
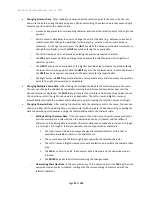
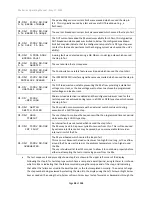
The remainder of the upper portion of the display shows the instantaneous applied voltage (or current)
and frequency (if applicable) at the moment of the failure (if FAIL) or at the end of the dwell period (if
PASS).
•
The elapsed time in the period at the completion of the test step is shown in the lower left corner of the
display.
•
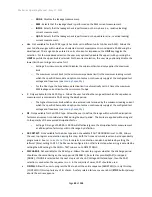
The displayed measurement result can be changed by pressing the
UNIT
key. This sequentially selects
amongst the available results for the selected test step. When reviewing results, only those which have
limits defined are available for review. See Displayed Measurement Results for more details on available
results.
•
The selected measurement result and the pass or fail result for that measurement is shown in the
remainder of the lower portion of the display. If the step contained a failure, other than a simple checked
measurement limit failure, then a failure message is displayed instead.
•
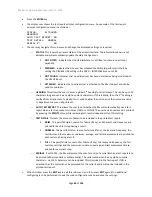
By default, the final measurement result is shown in the lower portion of the display. This can be changed
to the minimum (MIN), maximum (MAX) or average (AVG) value by selecting the elapsed time in the
display using the Left Arrow or Right Arrow keys as needed, then using the Up Arrow or Down Arrow keys
to change the selection.
PRINTING A TEST RESULTS REPORT
If the 95x has a suitable printer is connected to its USB port, the user can configure the 95x to automatically print a
test results report when a test sequence is completed, and/or the user can manually command the 95x to create a
test results report. See
Printing from the 95x using the USB Interface
for details regarding connecting and
configuring a printer and the display messages while performing a printout.
CONFIGURING THE TEST RESULTS REPORT
Before a test report can be printed, its format should be configured by the user. This is achieved by using the
PRINTOUT sub-menu of the CNFG menu as follows
–
•
Ensure that the display indicates that the 95x is in the base menu state, i.e., the display shows the date
and time. If necessary, press the
STOP
button to abort a menu and return to the base menu state.
•
Press the
CNFG
key.
•
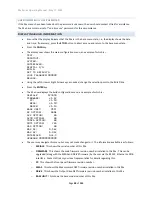
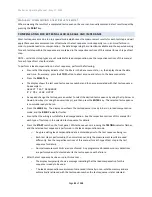
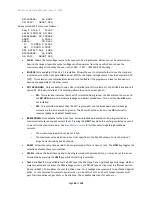
The display now shows the main configuration menu, an example of which is
–
TEST…
PRINTOUT…
SYSTEM…
INTERFACES…
DIGITAL I/O…
BUILD…
SET TO DEFAULTS…
LOCK PASSWORD:000000
RELOCK…
•
Using the Left Arrow or Right Arrow keys as needed, change the selection point to the PRINTOUT line.

