
3
DURING USE
• Do not cut any materials other than: tile, stone, concrete, roof
tiles, bricks or similar products.
• Do not use the diamond blade to dry cut as this will affect the
life span. Only use the turbo blade to dry cut.
• Do not apply force during cutting; apply constant and regular
pressure to the material.
• Regularly check the level of the water and top up if necessary.
• Ensure cutter is on a flat surface.
Please note:
This machine does not have full water recirculation. Some water
from the cutter surface will not be recirculated and may fall on to
your work area.
Please take appropriate measures to protect your surroundings.
• Always ensure that the guard is in place and in working order.
• Connect to electrical power point using an approved RCD
circuit breaker. This is an essential safety precaution.
• For safety and motor life only switch the cutter on before
cutting.
• Switch off immediately after use.
• Use adequate eye and hand protection as specified.
• Assemble and adjust all the accessories including the
protective devices.
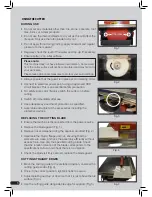
REPLACING THE CUTTING BLADE
• Ensure the machine is disconnected from the power source.
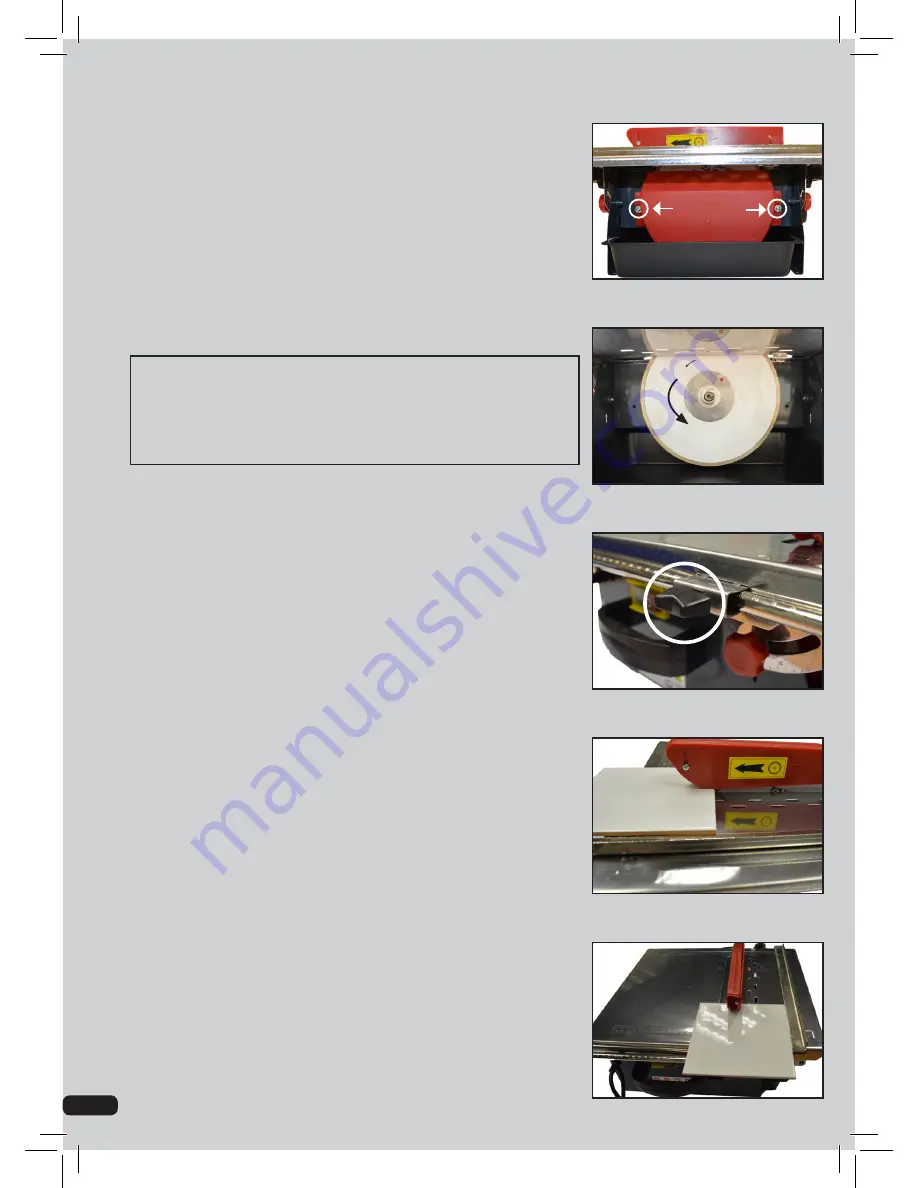
• Remove the blade guard (Fig. 1).
• Remove nut and washer using the spanner provided (Fig. 2).
• Assemble the blade, flange and nut, ensuring that the
elements are clean, and lock the assembly efficiently without
excess force. Use only the specified cutting blade. Check
that the rotation direction of the blade corresponds to the
specifications (arrow) and check there is no vibration.
• Check the blade is firmly secured, replace the blade guard.
CUTTING STRAIGHT EDGES
• Move the cutting guide to the preferred position, unscrew the
cutting guide knobs (Fig 3).
• Once in the correct position, tighten knobs to secure.
• Adjust splash guard up or down so that it is just above the tile
surface (Fig 4).
• Use the cutting guide alongside tile edge for support. (Fig 5)
USING THE CUTTER
Unscrew
Fig. 2
Fig. 3
Fig. 4
Fig. 5
Fig. 1


