background image

24

English

size: A5

6.  Operating instructions

Operation with the mains adaptor

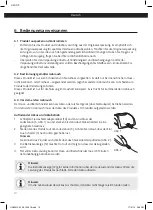
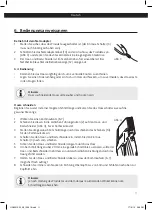
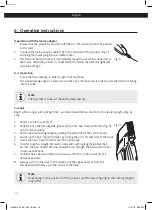
1.  Ensure that the product is switched off (the on / off switch (3) must be pushed 

to the rear).

2.  Connect the mains adaptor cable (10) to the terminal of the product (Fig. 3)  

and plug the mains plug into a suitable socket.

3.  The hair and beard trimmer is immediately ready for use when connected to 

the mains. When the product is connected to the mains, the indicator light (12) 

will shine orange.

6.4 Operation

• 

Comb the hair carefully, in order to get rid of any knots.

• 

Put a hairdressing cape or a towel around the neck / throat area, in order to prevent hair from falling 

into the collar.

Note

The hair that is to be cut should be clean and dry.

Cut hair

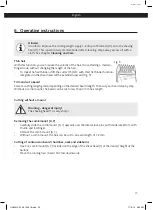
Begin with a longer cutting length first, and then make the hair shorter, to the desired length, step by 

step.

1.  Select a comb mount (6, 7).

2.  Slide this into the lateral guide grooves (2) on the hair / beard trimmer (Fig. 4) 

until it clicks audibly.

3.  Set the desired cutting length by sliding the slide (14) for the comb mount.

4.  Switch on the hair / beard trimmer, by sliding the on / off switch (3) to the front.

5.  Guide the hair / beard trimmer over the hair slowly.

6.  In order to get a straight intersection line with cutting lengths greater than  

20 mm, the hair / beard trimmer should be run through the hair several times,  

in various directions.

7.  Hold the hair / beard trimmer in such a way that the comb mount (6, 7) is  

as flat as possible.

8.  Always cut from the neck in the direction of the upper head, or from the 

forehead and temples up to the centre of the head.

Note

Depending on the position of the product and the resulting angle, the cutting lengths 

may differ.

Fig. 3

Fig. 4

HS9001SW_A5_130918.indb   24

17/9/13   3:58 PM

Summary of Contents for HS9001SW

Page 1: ...IPPER WITH CERAMIC BLADE HS9001SW 2 Kammaufs tze mit 18 Schnittl ngen herausnehmbare Schneideeinheit inklusive Ladestation 2 comb attachments with 18 cutting lengths removable cutting unit charger inc...

Page 2: ...size A5 HS9001SW_A5_130918 indb 2 17 9 13 3 58 PM...

Page 3: ...rauch 10 6 3 Vor dem ersten Gebrauch 10 6 4 Bedienung 11 7 Reinigung und Pflege 13 8 Entsorgung 13 9 Garantie 14 15 Allgemeine Sicherheitshinweise Lesen Sie diese Bedienungsanleitung vor dem ersten Ge...

Page 4: ...d Nieren testen Um hohe Qualit tsanspr che zu erf llen lassen wir zus tzlich zu der strengen REWE Qualit tsnorm Produkte mit dem Pr fzeichen des T V S D auszeichnen Konkret bedeutet das Produkte m sse...

Page 5: ...1 x Haar und Bartschneider 1 x Netzadapter 2 x Kammaufs tze 1 x Reinigungsb rste 1 x Scherkopf l 1 x Kamm 1 x Schere 1 x Ladestation 1 x Bedienungsanleitung 1 3 Symbole Wichtige Hinweise f r Ihre Sic...

Page 6: ...en einschlie lich Kinder mit eingeschr nkten physischen sensorischen oder geistigen F higkeiten oder mangels Erfahrung und oder mangels Wissen benutzt zu werden es sei denn sie werden durch eine f r i...

Page 7: ...ukt fallengelassen wurde etc Lassen Sie Wartungen und Reparaturen nur von einem autorisierten Kundendienst durchf hren Die Netzspannung muss mit den Angaben auf dem Typenschild des Produktes bereinsti...

Page 8: ...Reichweite von Kleinkindern auf Wurden Batterien verschluckt suchen Sie sofort rztliche Hilfe auf Nicht aufladbare Batterien d rfen nicht wieder aufgeladen werden Sollten Batterien einmal ausgelaufen...

Page 9: ...kernetzkabel 6 Kammaufsatz mit Schnittl ngen 3 4 5 6 7 5 9 10 5 12 13 5 15 mm 7 Kammaufsatz mit Schnittl ngen 18 19 5 21 22 5 24 25 5 27 28 5 30 mm 8 Reinigungsb rste 9 Scherkopf l 10 Steckernetzteil...

Page 10: ...shalt konzipiert Es ist nicht f r kommerziellen Gebrauch geeignet 6 3 Vor dem ersten Gebrauch Der Haar und Bartschneider kann als Akku oder als Netzger t ber Netzadapter betrieben werden Vor dem erste...

Page 11: ...schrittweise auf die gew nschte L nge 1 W hlen Sie einen Kammaufsatz 6 7 2 Schieben Sie diesen in die seitlichen F hrungsnuten 2 auf den Haar und Bartschneider Abb 4 bis er h rbar einrastet 3 Stellen...

Page 12: ...ine Schnittl ngen Stufe je nach gew nschter Bartl nge K rzen Sie Ihren Bart nun stufenweise Ohne Kammaufsatz kann der Bart auf unter 3 mm Haarl nge geschnitten werden Schneiden ohne Aufsatz Warnung Ve...

Page 13: ...eit und direkter Sonneneinstrahlung gesch tzten Ort aufbewahren Bewahren Sie das Produkt an einem f r Kinder unzug nglichen Ort auf 8 Entsorgung Dieses Produkt nicht im unsortierten Hausm ll entsorgen...

Page 14: ...h des Ger tes bzw des defekten Teiles oder Gutschrift erf llt wird Weitere Anspr che sind ausgeschlossen Sollten Sie Fragen zu VIVESS Produkten haben sparen Sie sich den zeitraubenden Weg zum H ndler...

Page 15: ...r ckzuf hren sind bei berm iger Nutzung insbesondere bei anderer als privater Nutzung bei Missachtung der Bedienungsanleitung und Installationsfehlern wenn das Ger t keinen technischen Defekt aufweist...

Page 16: ...cting the product 23 6 2 Intended use 23 6 3 Before the first use of the device 23 6 4 Operation 25 7 Cleaning and care 26 8 Disposal 26 9 Warranty 27 28 General safety instructions Read this user man...

Page 17: ...endent engineers Our products satisfy not only the strict requirements of REWE quality standards but were also awarded the T V S D s seal More specifically Our products have to undergo additional stri...

Page 18: ...ln 1 2 Delivery contents Delivery contents include 1 x Hair beard trimmer 1 x Mains adaptor 2 x Comb mounts 1 x Cleaning brush 1 x Blade oil 1 x Comb 1 x Scissors 1 x Charging station 1 x User manual...

Page 19: ...tended to be used by persons including children with reduced physical sensory or mental abilities or lack of experience and or lack of knowledge unless they are supervised by a person responsible for...

Page 20: ...pair the product yourself For servicing and repairs please consult an authorised service agent The mains voltage must match the information on the rating label of the product Avoid damages to the powe...

Page 21: ...Keep batteries out of reach of small children If batteries have been swallowed seek immediate medical attention Non rechargeable batteries must not be recharged If the batteries leak remove them with...

Page 22: ...l for plug in power cord 6 Comb mount with cutting lengths 3 4 5 6 7 5 9 10 5 12 13 5 15 mm 7 Comb mount with cutting lengths 18 19 5 21 22 5 24 25 5 27 28 5 30 mm 8 Cleaning brush 9 Blade oil 10 Powe...

Page 23: ...fore the first use of the device The hair beard trimmer can be used with a battery or mains power supply via the mains adaptor Before the first use of the device the battery of the product must be cha...

Page 24: ...and then make the hair shorter to the desired length step by step 1 Select a comb mount 6 7 2 Slide this into the lateral guide grooves 2 on the hair beard trimmer Fig 4 until it clicks audibly 3 Set...

Page 25: ...beard Select a cutting length grade depending on the desired beard length Then cut your beard step by step Without a comb mount the beard can be cut to less than 3 mm hair length Cutting without a mo...

Page 26: ...ry cool location which is protected against moisture and direct sunlight Keep this product out of the reach of children 8 Disposal Do not dispose of this product as unsorted municipal waste Return it...

Page 27: ...or defect component Other claims are excluded In case of questions regarding VIVESS products you no longer need to take the time to go to the seller but may call our service hotline or service centre...

Page 28: ...bility in case of excessive use in particular in case of non domestic use in case of disregard of the user instructions and installation errors if the appliance does not have a technical defect for tr...

Page 29: ...HS9001SW_A5_130918 indb 29 17 9 13 3 58 PM...

Reviews: