background image


Note: 

  On removing the batteries from the camera all photos and videos clips in limited built-in 

memory will be lost. 

  Limited internal memory is provided in order to test photos and videos 

  A SD Memory card is required for normal use. All the media in the built-in memory will 

be lost if no SD Memory Card has been inserted in the DVR when you change your 

batteries. 

  We strongly recommend downloading your photos and videos regularly to your 

computer.  

  Remove the batteries from the DVR camera when not in use for an extended period. 


Inserting an SD Memory Card 

An SD compatible memory card of up to 8GB (not included) is needed for normal use and 

should be inserted into your DV camera. SD Memory cards expand the amount of 

memory thus allowing an increase in the number of movies, photos and audio that can be 

captured before transferring them to a computer.  

Summary of Contents for DVR 810HD

Page 1: ...o Camcorder User s Manual 2009 Sakar International Inc All rights reserved Windows and the Windows logo are registered trademarks of Microsoft Corporation All other trademarks are the property of thei...

Page 2: ...ng Your Camera for Use 7 Inserting an SD Memory Card 8 DVR Function Control 10 Install the Vivitar Experience Image Manager Software 35 Connect your camera to the computer 39 Get photos and videos fro...

Page 3: ...le memory card of up to 8GB needs to be inserted for normal use in order to expand the memory of your DVR camera Key Features 5 dial modes Camera Video Audio Playback and Set Up Digital Video resoluti...

Page 4: ...our camera Vivitar Experience Image Manager software for uploading and managing photos and videos to or from the most popular photo sharing and social network websites What your digital video camera i...

Page 5: ...disk space 1024 x 768 Recommended screen resolution 16 bit color or higher display adaptor CD ROM Drive QuickTime 6 or higher Microsoft Internet Explorer 7 or higher Windows Media Player 10 or higher...

Page 6: ...kTime 6 or higher Microsoft Internet Explorer 7 or higher Internet connection required Computer System Requirements for Macintosh Macintosh with Intel processor running Mac OS X v10 4 6 or later 256 M...

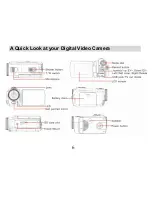
Page 7: ...6 A Quick Look at your Digital Video Camera...

Page 8: ...equires 4 AAA batteries not included It is recommended that alkaline batteries be used 1 Open the battery compartment on the side of the camera 2 Insert the batteries in accordance with the polarity i...

Page 9: ...the DVR when you change your batteries We strongly recommend downloading your photos and videos regularly to your computer Remove the batteries from the DVR camera when not in use for an extended peri...

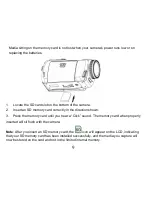
Page 10: ...correctly in the direction shown 3 Press the memory card until you hear a Click sound The memory card when properly inserted will sit flush with the camera Note After you insert an SD memory card the...

Page 11: ...tting as this may damage the card and render it unusable Be sure to format the card with the camera DVR Function Control To power on the camera you need to flip open the LCD Screen The Power button is...

Page 12: ...off a few moments later Capturing Videos In order to capture videos with audio using your camera you need to turn the dial to the Video mode This camera requires a compatible SD card of up to 8 GB fo...

Page 13: ...files only 5 Please insert an SD memory card of up to 8 GB for normal use 6 When the internal memory is full a Disk Full message will flash on the LCD screen when you attempt to shoot further videos I...

Page 14: ...t Left joystick button to select the Scene icon that appears on the bottom left of the LCD 3 Press the Up Down joystick button to select the desired scenery option from the menu that appears 4 Press t...

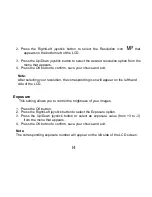
Page 15: ...your resolution the corresponding icon will appear on the left hand side of the LCD Exposure This setting allows you to control the brightness of your images 1 Press the OK button 2 Press the Right L...

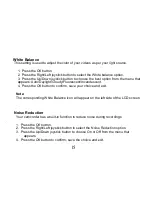
Page 16: ...y Fluorescent Incandescent 4 Press the OK button to confirm save your choice and exit Note The corresponding White Balance icon will appear on the left side of the LCD screen Noise Reduction Your camc...

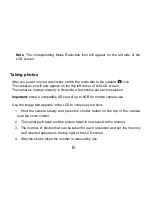
Page 17: ...each resolution Important Insert a compatible SD card of up to 8GB for normal camera use Use the image that appears in the LCD to compose your shot 1 Hold the camera steady and press the shutter butt...

Page 18: ...her SD card to continue taking more photos and videos 6 The number of photos that can be captured not only depends on the SD card s capacity but also on the resolution selected Better quality photos a...

Page 19: ...ng of the shutter button and when the photo is actually taken 1 Press the OK button 2 Press the Right Left joystick button to select the Self Timer icon on the bottom left of the LCD screen 3 Press th...

Page 20: ...automatically You will need an SD card inserted in order to use this feature 1 Press the OK button 2 Press the Right Left joystick button to select the Multi Snapshot option 3 Press the Up Down joyst...

Page 21: ...con option on the bottom left of the LCD 3 Press the Up Down joystick button to select the resolution size you choose 8M 7M 5M 3M 2M or 1 3M 4 Press the OK button to confirm Note The resolution icon a...

Page 22: ...t using the flash or tripod When you want to use ISO sensitization please choose the low ISO value to prevent blotches appearing on your photo 1 Press the OK button 2 Press the Right Left joystick but...

Page 23: ...utton to confirm save your choice and exit Anti Shake Your Digital Camcorder has a function that prevents blurry photos as a result of trembling when taking photos Due to this function you are not req...

Page 24: ...upplied with different scenes for you to take photos in almost every type of environment Auto Scenery Night Scenery Portrait Night Portrait Beach Sports and Party Select the scenery for the present li...

Page 25: ...Exposure option 3 Press the Up Down joystick button to select an exposure value from 3 to 3 from the menu that appears 4 Press the OK button to confirm save your choice and exit Note The corresponding...

Page 26: ...Note The corresponding White Balance icon will appear on the left side of the LCD screen Audio Mode An SD card needs to be inserted to use this mode Switch the mode dial to the position 1 Press the Sh...

Page 27: ...No FILE message will appear on the LCD screen Thumbnail display When the camcorder is in the Playback Mode 1 Press the Up button for the images to appear as thumbnails 2 Select a JPG file and press t...

Page 28: ...Press the Up Down joystick button to select one of Lock One Lock All Unlock One Unlock All 4 Press the OK button to confirm save and exit Note At step 3 select Unlock one Unlock all and press OK butt...

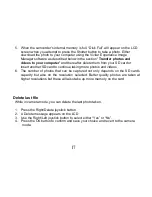
Page 29: ...ion 3 Press the Up Down joystick button to select either This Image This Video to delete the currently selected image or ALL delete all unprotect images 4 Press the OK button 5 A Delete message will a...

Page 30: ...d USB cable to allow for direct printing 7 If you wish to print the selected photo select the This Image option 8 Press the OK button to start Printing 9 If you want to print another photo select Sele...

Page 31: ...Time format Date Time setting Frequency TV out Auto power off and Buzzer Default setting 1 Press the OK button 2 Press the Right Left joystick button to select the Default Setting option 3 Press the U...

Page 32: ...the OK button to confirm save and begin the format Date Format You can set the date format that will appear on the LCD as well as in the metadata of the photo 1 Press the OK button 2 Press the Right...

Page 33: ...CD screen in both the camera mode and video mode If you selected Hide in step 3 it won t be displayed on the screen Date Time Setting Set the correct date and time via this function 1 Press the OK but...

Page 34: ...the U S and 50HZ for Europe and Japan The default setting is 60HZ 1 Press the OK button 2 Press the Right Left joystick button to select the Frequency option 3 Press the Up Down joystick button to sel...

Page 35: ...ess the OK button 2 Press the Right Left joystick button to select the Auto Power off option 3 Press the Up Down joystick button to select one of 1 Minute 2Minutes Off 4 Press the OK button to confirm...

Page 36: ...nd save your choice Install the Vivitar Experience Image Manager Software Warning Do not plug your camera into the computer until the software installation is complete You must be connected to the int...

Page 37: ...aunch the installer 3 On Macintosh Click the icon to install the Vivitar Experience Image Manager 4 If you do not have internet access at the time of inserting the CD ROM connect to the internet and t...

Page 38: ...ss the Choose your language window opens choose your language and click Next to open the next window 6 Select your camera model from the list and click Next to open the next window 7 Click Next to con...

Page 39: ...folder to where the program will be installed and then click Install 11 Please wait while the application continues the installation process on your computer 12 On PC Click the Close button when the...

Page 40: ...onnect the device to the computer you will have to wait a few seconds until the computer recognizes the device Get photos and videos from your camera to your computer An SD card needs to be inserted D...

Page 41: ...40 2 The Get media from device window opens...

Page 42: ...ad progress bar appears on the bottom left showing the number of media files downloading to your computer A message appears when the download is complete 9 The photo and video files that you selected...

Page 43: ...folder inside to view the media files 4 Select the media and copy the files from this folder into your computer Optionally select the files and choose Copy from the Edit menu Then select a folder and...

Page 44: ...es folder and the videos into the Movies folder 6 Do not disconnect the cable during transfer Doing so will cancel the transfer of any files on their way to your computer Maintenance of Your Digital C...

Page 45: ...Copy of original bill of sale 2 A detailed written description of the problem 3 Your return address and telephone number Daytime MAIL TO ADDRESS BELOW Sakar International Attention Service Department...

Page 46: ...4 7 0M 2592 1944 5 0M 2048 1536 3 0M 1600 1200 2 0M 1280 960 1 3M Video Resolution HD 1280 720p 20fps VGA 640 480 30fps QVGA 320 240 30fps LCD Display 2 7 TFT 4 3 LCD Swivel 90 Internal Memory 16MB Ex...

Page 47: ...ile Format JPEG Still Image AVI Video WAV Audio Anti Shake YES TV out YES Microphone YES Speaker YES Recorder YES Interface USB 2 0 System Requirements Windows XP VISTA or Mac OS X 10 4 6 or higher Ba...

Page 48: ...47 Trouble Shooting Q I have taken photos and selected the Get Images button I get a message that the images were successfully transferred but the photos do not appear on my computer What do I do...

Page 49: ...current to store your test photos Should your camera lose power for instance if the battery dies or run out of power all stored pictures will be lost This camera requires an SD card for normal use If...

Reviews: