background image


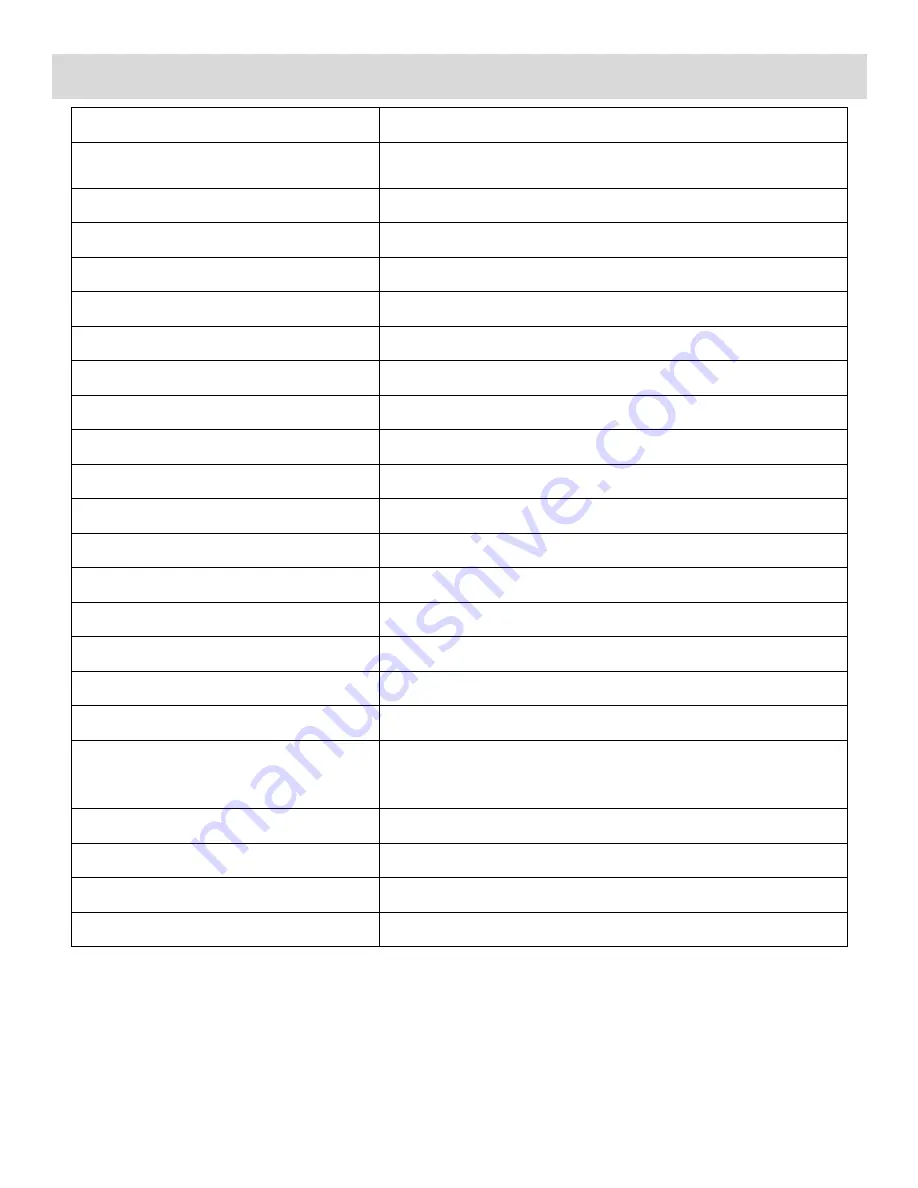
Camera Technical Specifications 


Image Sensor 

CMOS Sensor 

Photo Resolution 

1280X1024 (1.3MP) , 2048x1536 (3MP), 2592X1944 
(5.0MP)   

Video Resolution 

1280X720 (HD), VGA 640X480   

Focus Range 

120cm~infinite 

File Format 

JPEG (Photo) / AVI (Video) 

External Memory 

SD/MMC 128MB-16GB (Class 4 or higher) 

LCD Display 

2.0 Inch TFT 

Lens 

f=3.1mm, F2.8 

Zoom 

4X Digital Zoom 

Exposure 

Auto 

White Balance 

Auto, Daylight, Cloudy, Tungsten, Fluorescent 

ISO 

Auto, 50, 100, 200, 400, 800 

Scene 

Auto 

Language 

English, French, German, Spanish 

Flash 

2 LED Flash lamps 

Frequency 

60Hz 

Auto Power Off 

3 Minutes 

Interface 

USB 2.0 High Speed 

System Requirements 

Windows XP (SP 3), Vista (SP1) and Windows 7 ; 

Mac OSX v10.5.x and above     

Microphone 

Yes 

Speaker 

Yes 

Battery 

3.7V / 600mAh Lithium Battery (Rechargeable) 

Working Temperature 

0~40

Summary of Contents for DVR 880HD

Page 1: ...eo Camera User Manual 2009 2011 Sakar International Inc All rights reserved Windows and the Windows logo are registered trademarks of Microsoft Corporation All other trademarks are the property of their respective companies ...

Page 2: ...he Menus 9 Video Capture Mode 10 Video Playback Mode 13 Photo Capture Mode 18 Photo Playback Mode 22 General Camera Settings 25 Connecting the Digital Video Camera to a TV and HDTV 30 Installing the Software 32 Connecting the Camera to the Computer 34 Getting Photos and Videos from Your Camera to Your Computer 35 Getting Started 36 Transferring Images from my Camera to my Computer Manually 36 Came...

Page 3: ...mory cards are not included and need to be purchased separately SD SDHC Class 2 and 4 memory cards are compatible Using a different class of card may result in video distortion and skipping Please read this manual carefully first in order to get the most out of your digital video camera What s Included 1 Digital Camcorder with Built In USB Connector 2 Rechargeable Lithium Battery 3 USB cable 4 AV ...

Page 4: ...lay 2 0 Inch TFT Lens f 3 1mm F2 8 Zoom 4X Digital Zoom Exposure Auto White Balance Auto Daylight Cloudy Tungsten Fluorescent ISO Auto 50 100 200 400 800 Scene Auto Language English French German Spanish Flash 2 LED Flash lamps Frequency 60Hz Auto Power Off 3 Minutes Interface USB 2 0 High Speed System Requirements Windows XP SP 3 Vista SP1 and Windows 7 Mac OSX v10 5 x and above Microphone Yes Sp...

Page 5: ...24 X 768 recommended screen resolution CD ROM Drive QuickTime 6 or higher Microsoft Internet Explorer 7 or higher Windows Media Player 10 or higher DirectX 9 or higher Internet connection required Computer System Requirements Macintosh To be able to download photos and videos to your Macintosh you will need the following minimum configuration Intel processor running Mac OS X v10 5 x or later 256 M...

Page 6: ...Button 14 USB Connector 4 MENU Back Button 15 Microphone 5 Up Zoom In Button 16 Speaker 6 Down Zoom Out Button 17 Wrist Strap Connector 7 Right Button 18 Battery Compartment 8 Left LED Light On Off 19 AV Out Port 9 LED Indicator light 20 HDMI Port 10 LCD Screen 11 Lens 21 Tripod Mount 22 LED Light ...

Page 7: ...n the battery power is low the battery icon turns red and the camera will automatically turn off a few seconds later The energy status of the power is displayed on LCD as shown below Full battery power Medium battery power Low battery power Charging the Battery To Charge the Battery 1 Power off the camcorder 2 Connect the camcorder using the USB built in connector USB cable to the computer s USB p...

Page 8: ... Press the SD card until you hear a slight clicking sound This indicates that the SD card has been inserted correctly Note After the camera is powered on an SD icon will appear on the LCD display If you do not see the SD icon on the display please check if the card was inserted properly Make sure the SD card is not locked check the lock switch on the side of the SD card If the SD card is locked th...

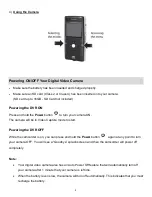
Page 9: ...ill be in Video Capture mode to start Powering the DVR OFF While the camcorder is on you can press and hold the Power button again at any point to turn your camera OFF You will see a Goodbye splash screen and then the camcorder will power off completely Note Your digital video camera also has an Auto Power Off feature that will automatically turn off your camera after 1 minute that your camera is ...

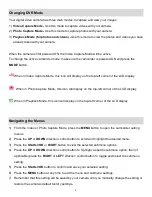
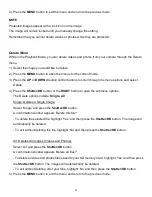
Page 10: ... left corner of the LCD display When in Playback Mode this icon will display on the top left corner of the LCD display Navigating the Menus 1 From the Video or Photo Capture Mode press the MENU button to open the camcorder setting menus 2 Press the UP or DOWN direction control button to scroll and highlight the desired menu 3 Press the Shutter OK or RIGHT button to view the selected submenu option...

Page 11: ...rner of the LCD screen A red Recording indicator will also appear on the LCD screen indicating that the record is in progress 5 To STOP the video record press the Shutter button again 6 The video will automatically be saved to the camera s SD memory card Note The amount of recording time available for the resolution selected appears on the top of LCD screen The lower the resolution setting the mor...

Page 12: ...uttons MODE Toggles between the Video Capture Mode Photo Capture Mode and Playback Mode LED Flash Option To increase the lighting in dark situations press the LEFT button to activate the 2 LED Flash Lights on the front of the camera A flash icon appears on the LCD indicating the LED Flash is on Press the LEFT button again to turn the LED Lights off Video Capture Mode Menus Movie Size Menu The Movi...

Page 13: ...of light source in the current environment Properly adjusting the White Balance setting to match your current environment will allow the camera to properly balance the colors in the images that are taken with your camera 1 Press the MENU button to open the menus for the current mode 2 Press the UP or DOWN direction control buttons to scroll through the menu options and select White Balance 3 Press...

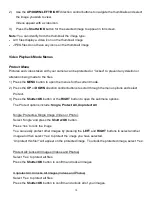
Page 14: ... Your Digital Video Recorder 1 Select your Video Once in Playback mode press the LEFT or RIGHT direction buttons to scroll through the images on your digital video recorder s memory card until you find the video you would like to view Each captured image video photo is displayed on the LCD screen 2 Playing your Selected Video Press the Shutter OK button to START playing the video The video playing...

Page 15: ... Stops the video playback Other Shutter OK Starts and pauses the video playback Confirms and saves your menu selection Opens selected image from the Thumbnail display MENU Opens and exits the Video Playback and Camera Settings Menu options Note To navigate through the Menus use the Left Up Right and Down directions control buttons MODE Toggles between the Video Capture Mode Photo Capture Mode and ...

Page 16: ...ntrol buttons to scroll through the menu options and select Protect 3 Press the Shutter OK button or the RIGHT button to open the submenu options The Protect options include Single Protect All Unprotect All Single Protects a Single Image Video or Photo Select Single and press the Shutter OK button Press Yes to lock the image You can easily protect other images by pressing the LEFT and RIGHT button...

Page 17: ...n to open the submenu options The Delete options include Single All Single Deletes a Single Image Select Single and press the Shutter OK button A confirmation window appears Delete this file To delete the selected file highlight Yes and then press the Shutter OK button The image will automatically be deleted To exit without deleting the file highlight No and then press the Shutter OK button All De...

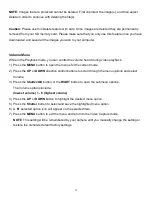
Page 18: ... MENU button to open the menus for the current mode 2 Press the UP or DOWN direction control buttons to scroll through the menu options and select Volume 3 Press the Shutter OK button or the RIGHT button to open the submenu options The Volume options include lowest volume 1 8 highest volume 4 Press the UP or DOWN button to highlight the desired menu option 5 Press the Shutter button to select and ...

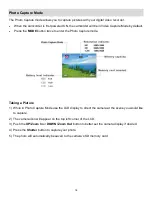
Page 19: ...to enter the Photo Capture mode Taking a Picture 1 While in Photo Capture Mode use the LCD display to direct the camera at the scene you would like to capture 2 The camera icon will appear on the top left corner of the LCD 3 Push the UP Zoom In or DOWN Zoom Out button to better set the camera display if desired 4 Press the Shutter button to capture your photo 5 The photo will automatically be save...

Page 20: ...increase the lighting in dark situations press the LEFT button to activate the 2 LED Flash Lights on the front of the camera A flash icon appears on the LCD indicating the LED Flash is on Press the LEFT button again to turn the LED Lights off Photo Capture Mode Menus Resolution Menu The Resolution menu allows you to choose the desired size of the images taken by your camera Keep in mind that image...

Page 21: ...ironment Properly adjusting the White Balance setting to match your current environment will allow the camera to properly balance the colors in the images that are taken with your camera 1 Press the MENU button to open the menus for the current mode 2 Press the UP or DOWN direction control buttons to scroll through the menu options and select White Balance 3 Press the Shutter OK button or the RIGH...

Page 22: ...menu option 6 A selected option icon will appear on the selected item 7 Press the MENU button to exit the menu and return to the Video Capture mode NOTE This setting will be remembered by your camera until you manually change the setting or restore the camera s default factory settings Exposure Menu The Light Exposure setting helps you control the amount of light that enters your camera s lens Thi...

Page 23: ...ars with the Playback icon appearing on the top left corner of the screen Videos appear with a video icon on the bottom left of the LCD screen Photos do not appear with an icon Viewing Captured Photos on Your Camcorder 1 Select and view your Image Once in Playback mode press the LEFT or RIGHT direction control button to scroll through the images on your digital video recorder s memory card until y...

Page 24: ...e Protect Menu Pictures and videos taken with your camera can be protected or locked to prevent any deletion or alteration being made to the files 1 Press the MENU button to open the menus for the current mode 2 Press the UP or DOWN direction control buttons to scroll through the menu options and select Protect 3 Press the Shutter OK button or the RIGHT button to open the submenu options The Prote...

Page 25: ...ou can delete videos and photos from your camera through the Delete menu 1 Select the image you would like to delete 2 Press the MENU button to open the menus for the current mode 3 Press the UP or DOWN direction control buttons to scroll through the menu options and select Delete 4 Press the Shutter OK button or the RIGHT button to open the submenu options The Delete options include Single All Si...

Page 26: ... have downloaded and saved all the images you wish to your computer General Camera Settings The General Camera Menu allows you to change the following camcorder settings Light Frequency Date Time Language TV Out USB Format Reset All To access the Menus for General Camera Settings 1 Press MENU button from all modes Video Photo Capture Mode Playback Mode 2 Press the RIGHT button to select the Camera...

Page 27: ...the capture images 1 Press the MENU button to open the menus for the current mode 2 Press the UP or DOWN direction control buttons to scroll through the menu options and select Date Time 3 Set the Date and Time as desired by pressing the RIGHT and LEFT buttons to choose the specific setting and the UP and DOWN buttons to change each setting 4 Once you have completed setting the time and date press...

Page 28: ... how to connect your digital video camera to your television The TV Out menu options include NTSC television and video standard used in America Canada default setting PAL television and video standard used in Europe 1 Press the MENU button to open the menus for the current mode 2 Press the UP or DOWN direction control buttons to scroll through the menu options and select TV Out 3 Press the Shutter...

Page 29: ... 4 Press the UP or DOWN button to highlight the desired menu option 5 Press the Shutter button to select and save the highlighted menu option 6 A selected option icon will appear on the selected item 7 Press the MENU button to exit the menu and return to the previous mode Format Menu You can use the Format menu to delete all of the content that is currently on your camera s memory card Keep in min...

Page 30: ...der to the default factory settings No exits without resetting your camcorder to the default factory settings 1 Press the MENU button to open the menus for the current mode 2 Press the UP or DOWN direction control buttons to scroll through the menu options and select Reset All 3 Press the Shutter OK button or the RIGHT button to open the submenu options 4 Press the UP or DOWN button to highlight t...

Page 31: ...t setting On plugging in the TV out cable a message will appear on the LCD screen to select NTSC or PAL for the type of TV you are using 5 Select the option as per the format of the TV set you are using and press the Shutter OK button 6 When the camera is set to Video or Photo Capture mode you can preview the subjects you want to record or photograph on the TV screen 7 When the camera is set to Pl...

Page 32: ...jects you want to record or photograph on the TV screen and view the recording on the TV 4 When the camera is set to Playback mode you can review all the stored photos and videos on the TV 5 In Playback Mode push the LEFT or RIGHT button to select the video file to view Press the Shutter button to play the selected video file Press it again to pause playing Press the UP button to stop the video ...

Page 33: ...cation s CD DVD drive and click on Setup exe to launch the installer 3 On Macintosh Click the icon that appears on the desktop to install the Vivitar Experience Image Manager 4 If you do not have internet access at the time of inserting the CD ROM connect to the internet and then click the Install Vivitar Experience Image Manager button to begin the installation Note If you do not have internet ac...

Page 34: ...reement and then click Next to continue 10 On PC only Let the Vivitar Experience Image Manager installer create the folder to where the program will be installed and then click Install 11 Please wait while the application continues the installation process on your computer 12 On PC Click the Close button when the installation is complete The application will automatically open 13 On Macintosh Clic...

Page 35: ...B connector 2 Power the camcorder on 3 Insert the camera s built in USB connector to the computer s USB port or use the supplied USB extension cable to make the connection 4 The first time you connect the device to the computer you will have to wait a few seconds until the computer recognizes the device ...

Page 36: ...en it will be selected automatically 5 Select a location on the computer where to place the new photo and video files 6 Add the new photo and video files to albums if desired 7 Select to remove the media files from the selected device removable disk after the import 8 Click the Get Media button to transfer the photos and videos from your camera to your computer 9 A media download progress bar appe...

Page 37: ...ally Transferring Photos and Videos WINDOWS 1 Slide the USB switch up to reveal and extend the built in USB connector 2 Insert the camera s built in USB connector to the computer s USB port or use the supplied USB extension cable to make the connection 3 Power on the camcorder 4 MSDC appears on the LCD 5 A window appears with a list of options select Open folder to view files and click OK 6 Open t...

Page 38: ...r computer Transferring Photos and Videos Apple iPad NOTE Please check your device packaging for compatibility with the iPad Apple iPad Camera Connection For models that are compatible with the iPad photos and videos can be imported from your digital camera to your iPad by following either one of the options below 1 Connecting your digital camera to your iPad using an iPad Camera Connector Plug th...

Page 39: ...conditions Never open the housing of the digital video camera as some parts may cause an electrical shock To clean the lens the first step is to blow away dust from the surface After doing so use a cloth or tissue to wipe the lens If necessary use lens cleanser Avoid touching the lens with your fingers When left idle for long periods remove the battery from your digital video camera and store it i...

Page 40: ...ailed written description of the problem 3 Your return address and telephone number Daytime MAIL TO ADDRESS BELOW Technical Support For technical support issues please visit our website at www vivitar com You can find manuals software and FAQ s at the website Can t find what you are looking for E mail us at support vivitar com and one of our technical support team members will answer your question...

Page 41: ...mage Manager The images were also deleted from my computer How do I recover images that I accidently deleted All images deleted using the Vivitar Experience Image Manager are sent to your computer s Recycle or Trash Bin and can be retrieved from there Waste Electrical and Electronic Equipment WEEE In accordance with European Directive 2002 96 EC on Waste Electrical and Electronic Equipment WEEE th...

Reviews: