Installation
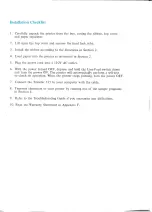
Checklist
1.
Carefully
unpack
the
printer
from
the
box,
noting
the
ribbon,
top
cover,
and
paper
separator.
2.
Lift
open
the
top
cover
and
remove
the
head
lock.
tube.
3.
Install
the
ribbon
according
to
the
directions
in
Section
2.
4.
Load
paper
into
the
printer
as
instructed
in
Section
2.
5.
Plug
the
power
cord
into
a
110V
AC
outlet.
6.
With
the
power
turned
OFF,
depress
and
hold
the
Line-Feed
switch
down
and
turn
the
power
ON.
The
printer
will
automatically
perform
a
self-test
to
check
its
operation.
When
the
printer
stops
printing,
turn
the
power
OFF.
7.
Connect
the
Transtar
315
to
your
computer
with
the
cable.
8.
Transmit
characters
to
your
printer
by
running
one
of
the
sample
programs
in
Section
4.
9.
Refer
to
the
Troubleshooting
Guide
if
you
encounter
any
difficulties.
10.
Read
the
Warranty
Statement
in
Appendix
F.

