background image

11

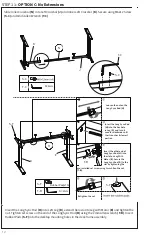
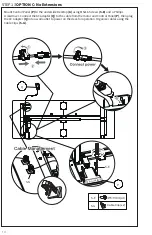
STEP 10 - OPTION C: No Extensions

Attach Left Crossbar (J) to Left Leg (D) and Inner Left Crossbar (K) to Leg With Motor (E) with M8x47 

Screws (S-A). Tighten using 5mm Allen Wrench (T-A).

Attach Side Brackets (B) to Left Leg (D) and Leg With Motor (E) using M6x10 Screws (S-B) and 4mm 

Allen Wrench (T-C). Mount Feet (C) to Left Leg (D) and Leg With Motor (E) using M6x35 Screws (S-D) and 

tighten using 5mm Allen Wrench (T-A). Attach Foot Pads (R) to Feet (C).

C

E

J

D

K

B

S-A

D

E

T-A

S-A

T-A

S=5mm

T-A

S-B

S=4mm

T-C

S-B

T-A

R

S-D

Foot (x4)

S-D

T-C

R

S=5mm

Summary of Contents for DESK-E3CTB

Page 1: ...ce or follow the link for helpful videos and specifications related to this product Instruction Manual https vivo us com products desk e3ctb SKU DESK E3CTB help vivo us com www vivo us com 309 278 5303 Chat live with an agent GET IN TOUCH Monday Friday from 7 00am 7 00pm CST ...

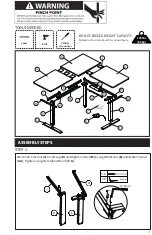
Page 2: ... IN ORDER TO AVOID BURNS FIRE AND ELECTRIC SHOCK PLEASE READ THE FOLLOWING INSTRUCTIONS CAREFULLY DO NOT CLEAN PRODUCT WHILE POWER IS CONNECTED DO NOT DISASSEMBLE OR REPLACE COMPONENTS WHILE POWER IS CONNECTED NEVER OPERATE THE SYSTEM WITH A DAMAGED CORD OR PLUG PLEASE CONTACT YOUR SELLER TO REPLACE DAMAGED PARTS NEVER OPERATE SYSTEM IN DAMP ENVIRONMENTS OR IF ANY ELECTRICAL COMPONENTS HAVE MADE C...

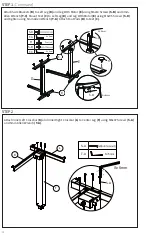
Page 3: ...o Leg With Motor E with M8x47 Screws S A Tighten using 5mm Allen Wrench T A 176lbs 80kg DO NOT EXCEED WEIGHT CAPACITY Failure to do so may result in serious injury TOOLS NEEDED Phillips Screwdriver Drill Level B G S 5mm B S 5mm A A A B B C C D E F G H I J K L M N O P Q T A M E D S A J ...

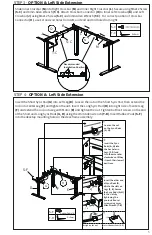
Page 4: ...o Left Leg D and Leg With Motor E using M6x35 Screws S D and tighten using 5mm Allen Wrench T A Attach Foot Pads R to Feet C Attach Inner Left Crossbar K and Inner Right Crossbar L to Center Leg F using M8x47 Screws S A and 5mm Allen Wrench T A S 4mm S 4mm C S 5mm A E Foot x4 S 5mm C B T C T A R R S B S D S D S B D E L K S A T A S 5mm S A S 5mm F ...

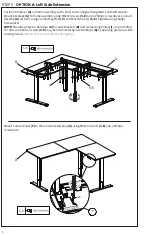
Page 5: ...d then extend the rod onto Center Leg F and tighten the nut Insert the Long Sync Rod H into right side of Center Leg F and extend the rod onto Leg with Motor E and tighten the nut Tighten both set screws on the end of the Short and Long Sync Rods G H using the 2mm Allen wrench T B Insert Rubber Pads S F into the desktop mounting holes in the desk frame assembly S F T B M L S C K J T C D F E S F Lo...

Page 6: ... Connecting Plates I and M5x16 Screws S E Tighten using Phillips Screwdriver NOTE Mounting holes in Desktops A for Side Brackets B and Connecting Plates I are pre drilled For other locations Screws S E may be driven directly into Desktops A by applying pressure while turning Screws Screws have sharp ends for self tapping F F S E P S E Mount Control Panel P to the underside Desktop A using M5x16 Sc...

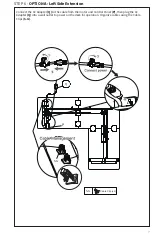
Page 7: ...xtension Connect the AC Adapter Q to the cable from the motor and Control Panel P then plug the AC Adapter Q into a wall outlet to power on the desk for operation Organize cables using the Cable Clips S G Cable Clip x2 Q S G S G P ...

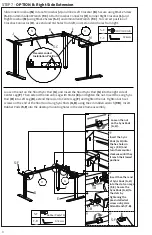
Page 8: ...en the nut on the Short Sync Rod G and Insert the Short Sync Rod G into the right side of Center Leg F Then extend the rod onto Leg with Motor E and tighten the nut Insert the Long Sync Rod H into Left Leg D extend the rod onto Center Leg F and tighten the nut Tighten both set screws on the end of the Short and Long Sync Rods G H using the 2mm Allen wrench T B Insert Rubber Pads S F into the deskt...

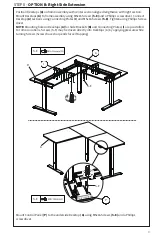
Page 9: ... sections using Connecting Plates I and M5x16 Screws S E Tighten using Phillips Screw driver NOTE Mounting holes in Desktops A for Side Brackets B and Connecting Plates I are pre drilled For other locations Screws S E may be driven directly into Desktops A by applying pressure while turning Screws Screws have sharp ends for self tapping I S E A S E P S E Mount Control Panel P to the underside Desk...

Page 10: ... STEP 9 OPTION B Right Side Extension Connect the AC Adapter Q to the cable from the motor and Control Panel P then plug the AC Adapter Q into a wall outlet to power on the desk for operation Organize cables using the Cable Clips S G Q S G S G P ...

Page 11: ...m Allen Wrench T A Attach Side Brackets B to Left Leg D and Leg With Motor E using M6x10 Screws S B and 4mm Allen Wrench T C Mount Feet C to Left Leg D and Leg With Motor E using M6x35 Screws S D and tighten using 5mm Allen Wrench T A Attach Foot Pads R to Feet C C E J D K B S A D E T A S A T A S 5mm T A S B S 4mm T C S B T A R S D Foot x4 S D T C R S 5mm ...

Page 12: ...hten set screw on the end of the Long Sync Rod H using the 2mm Allen wrench T B Insert Rubber Pads S F into the desktop mounting holes in the desk frame assembly T C K J D E S F Loosen the nut on the Long Sync Rod H Insert the Long Sync Rod H into the hex hole in Leg D and turn it counter clockwise until the it reaches its lowest postion Insert the other end of Long Sync Rod H into the slot on Leg...

Page 13: ... Position frame assembly upside down on Desktops A Mount frame assembly to Desktops A using M5x16 Screws S E and a Phillips screwdriver NOTE Mounting holes in Desktops A for Side Brackets B and Connecting Plates I are pre drilled For other locations Screws S E may be driven directly into Desktops A by applying pressure while turning Screws Screws have sharp ends for self tapping S E A B ...

Page 14: ...sing M5x16 Screws S E and a Phillips screwdriver Connect the AC Adapter Q to the cable from the motor and Control Panel P then plug the AC Adapter Q into a wall outlet to power on the desk for operation Organize cables using the Cable Clips S G F K Cable Clip x2 F K Q S G S E S G P S E ...

Page 15: ...perty damage and or personal injury Do not exceed desk weight limit Keep area of vertical motion free of obstacles Keep weight on desk balanced for correct operation and longer life of components Leave enough slack in cables to allow for full range of vertical motion ...

Page 16: ...ensure you have a fully functioning product FOR MORE VIVO PRODUCTS CHECK OUT OUR WEBSITE AT www vivo us com help vivo us com AVG RESPONSE TIME within office hrs 1HR 8M 23 within 15m 38 within 30m 61 within 1hr 83 within 2hr 92 within 3hr Love your new VIVO setup and want to share Tag us in your photo vivo_us AVG RESOLUTION TIME within office hrs 15 M www vivo us com Chat live with an agent AVG RES...

Reviews: