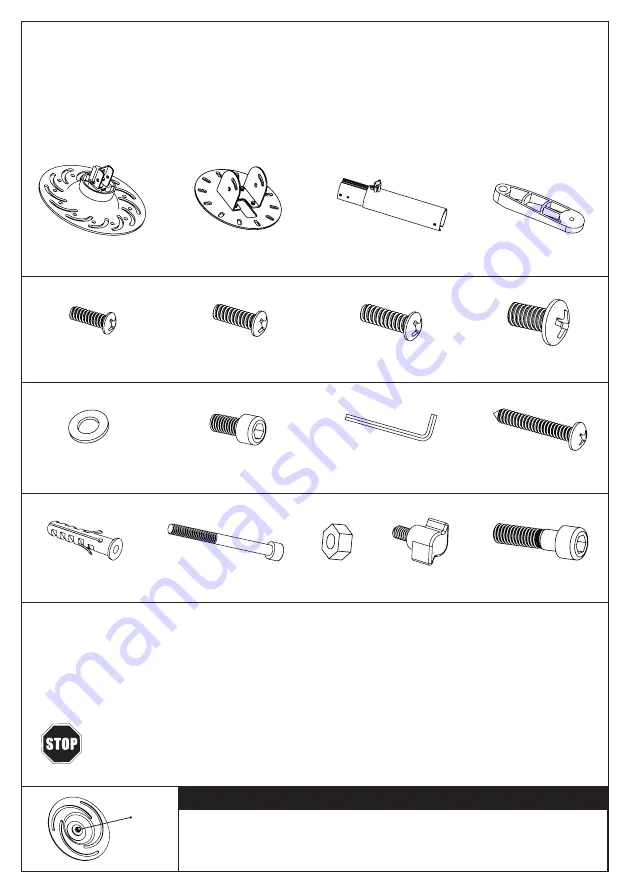
(1) Projector Plate – a
(1) Ceiling Plate – b
(1) Tube Set - c
(4) Mounting Legs – d
(3) Rawlplugs - m
(1) Longer Bolt (n)
(1) Nut - o
2) Plastic Knob - p (2) M6x22 Hexangular
(4) M3x16 Bolt - e
(4) M4x12 Bolt - f
(4) M5x12 Bolt - g
(4) M6x12 Bolt - h
(4) M3/M4 Washer - i
(4) M6x16 Hexangular
(1) Allen Wrench - k
(3) Philips Screw - l
Selecting the Proper Mounting Hardware
1. Invert the projector and locate the mounting points
2. Test each size of the screws provided
3. The correct screws should thread easily into the mounting point and not pull out when pressure
is applied
DO NOT OVER-TIGHTEN YOUR MOUNTING SCREWS TO THE PROJECTOR CHASIS.
USING THE INCORRECT SCREW DEPTH MAY CAUSE DAMAGE TO YOUR PROJECTOR.
ATTENTION
You can tighten this nut if you want to make the big tilting for your
projector. But please don’t over-tighten, otherwise you may have
problem to do the tilting.
nut
SUPPLIED PARTS LIST
ENGLISH
Head Bolt - j
Head Bolt - q
6


