background image


!

 Starting astrophotography 

       
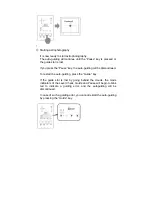
      It is now ready to start astrophotography. 

The auto-guiding will continue until the “Pause” key is pressed or 
the guide star is lost. 
 
If you press the “Pause” key, the auto-guiding will be discontinued. 
 
To restart the auto-guiding, press the “Guide” key. 
 
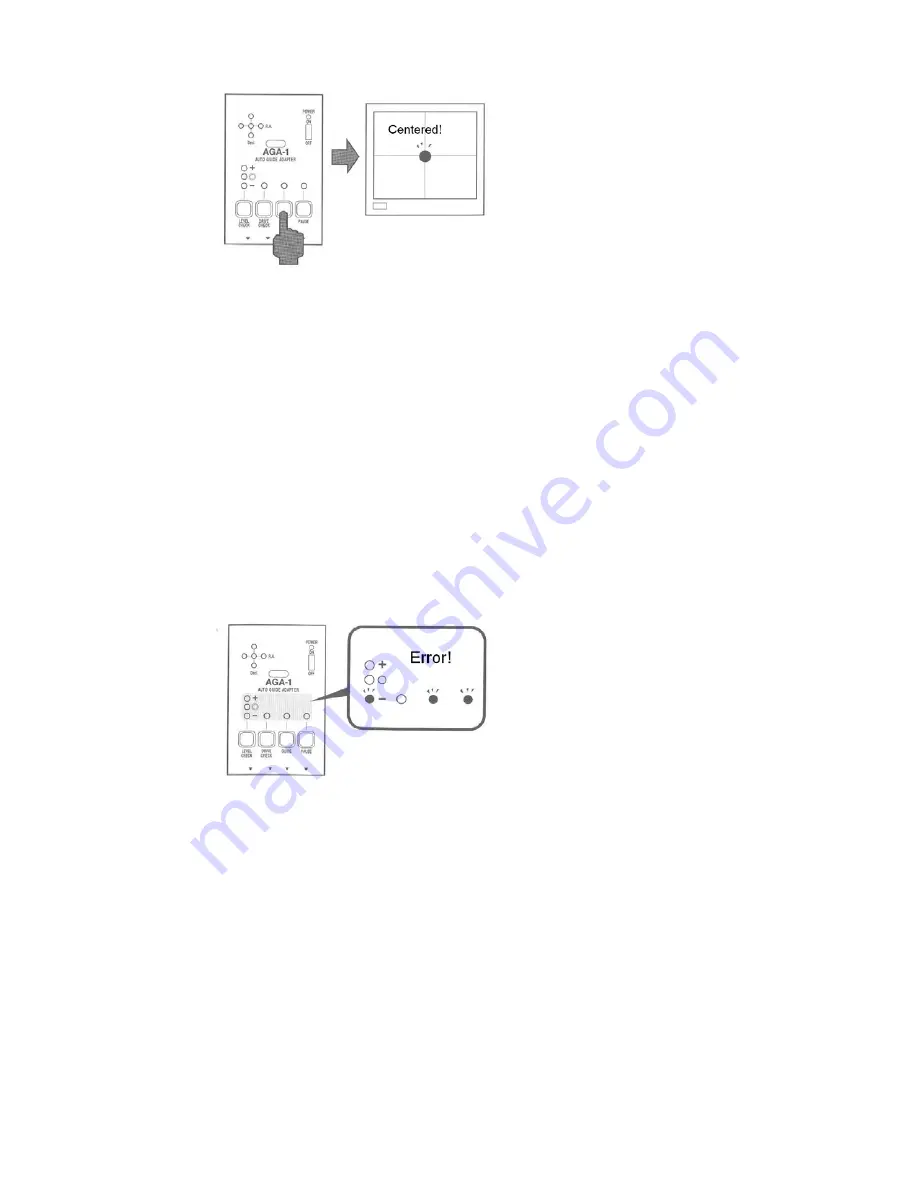
If the guide star is lost by going behind the clouds, the mode 
indicators of the Level Check, Guide and Pause will begin to blink 
red to indicate a guiding error, and the autoguiding will be 
discontinued. 
 
In case of such a guiding error, you cannot restart the auto-guiding 
by pressing the “Guide” key. 


Summary of Contents for AGA-1

Page 1: ...AGA 1 AUTO GUIDE ADAPTER Limited Instruction Manual...

Page 2: ...ONTENTS AGA 1 Auto guide Adapter Limited Battery Box for 8x D sized batteries AGS cord for STAR BOOK AGS cord for STAR BOOK S Velcro tapes Instruction manual This booklet AGA 1 AUTO GUIDE ADAPTER AGA...

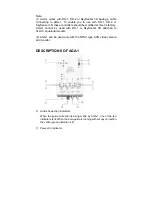
Page 3: ...GA 1 cannot be used with DD 1 or SkySensor 3D attached to ATLUX equatorial mounts 2 AGA 1 can be used only with the NTSC type CCD video camera and monitor DESCRIPTIONS OF AGA 1 Guide Correction Indica...

Page 4: ...eck if the guide star is bright enough to use This key is also used for resetting AGA 1 DRIVE CHECK Key If you press this key after checking the brightness of the guide star it will check the motor sp...

Page 5: ...A 1 detects deviation of the guide star imaged through the CCD video camera installed on a guide scope and it automatically corrects tracking errors in astrophotography Center the guide star on the sc...

Page 6: ...Guide mode will proceed to the auto guiding 4 The Pause mode will suspend the auto guiding temporarily The AGA 1 will go back to the auto guiding again if the Guide key is pressed CONNECTION DIAGRAM S...

Page 7: ...he photographic lens you use but it should be 1000mm to 2500mm If it is shorter the guiding accuracy will not be sufficient If it is longer the motor speed and turning direction check Drive Check Mode...

Page 8: ...R BOOK S Use the supplied AGS cord for STAR BOOK S 4 Switching on each instrument After making sure that each instrument is connected correctly turn on their power switches If AGA 1 receives signals c...

Page 9: ...e direction of the guide star movement is the right ascension Put the guide star upon the horizontal line of the cross by turning the CCD video camera 3 Select a motor drive speed which is appropriate...

Page 10: ...g AGA 1 For rechecking brightness of the guide star press the key and all the LED lights will go out If you press the key again AGA 1 will begin to check brightness b Avoid using a double star as the...

Page 11: ...ing conditions exist The right ascension and declination is set accurately on the monitor screen The motor drive speed is selected correctly The telescope is balanced properly on the right ascension a...

Page 12: ...r drive to center the guide star on the monitor screen During centering the guide star the green guide indicator will blink When the guide star is centered the indicator will become solid green Note A...

Page 13: ...y the auto guiding will be discontinued To restart the auto guiding press the Guide key If the guide star is lost by going behind the clouds the mode indicators of the Level Check Guide and Pause will...

Page 14: ...behind the clouds If you delay pressing the key the guiding error may occur Even if the auto guiding is discontinued by pressing the Pause key the motor drive will continue running at the normal guide...

Page 15: ...Connector Monitor Connector Motor Drive Connector About 15 arc seconds For a guiding scope with the focal length 1000mm to 4000mm Up to the magnitude 3 For a 60mm guiding scope with a 0 2 lux CCD vid...

Reviews: