background image

C

Limited Warranty

UNITED STATES AND CANADA

BY  USING  YOUR  VIZIO  PRODUCT  YOU  AGREE  TO  BE  BOUND  BY  ALL 
THE TERMS OF THIS WARRANTY. BEFORE USING YOUR VIZIO PRODUCT, 
PLEASE READ THIS WARRANTY CAREFULLY. IF YOU DO NOT AGREE TO 
THE TERMS OF THIS WARRANTY, DO NOT USE THE VIZIO PRODUCT AND, 
WITHIN THIRTY (30) DAYS OF THE DATE OF PURCHASE, RETURN IT FOR 
A REFUND TO THE AUTHORIZED RETAILER WHERE YOU PURCHASED IT.
This warranty contains a binding arbitration agreement and a class action 
waiver  for  United  States  residents.  If  you  live  in  the  United  States,  the 

ELQGLQJDUELWUDWLRQDJUHHPHQWDQGFODVVDFWLRQZDLYHUD΍HFW\RXUULJKWV

under this warranty. Please read the text under the section titled “Binding 
Arbitration  Agreement;  Class  Action  Waiver  (U.S.  Residents  Only)” 
carefully.

How Long This Warranty Lasts

For  non-commercial  use,  VIZIO  warrants  the  product  on  the  terms  set 
forth  below  for  one  (1)  year  from  the  date  of  original  purchase.  For 
commercial use, VIZIO warrants this product on the terms set forth below 
for ninety (90) days from the date of original purchase. 

What This Warranty Covers

VIZIO warrants the product against defects in materials and workmanship 
when the product is used normally in accordance with VIZIO’s user guides 
and manuals.
Except where restricted by law, this warranty applies only to the original 
purchaser of a new product. The purchase must have been made from an 
authorized retailer in the United States (including Puerto Rico) or Canada. 
The product must also be located in the country where it was purchased 
at the time of warranty service.

Zero Bright Pixel Defect Guarantee (Displays Only)

Your product may qualify for a warranty against “zero bright pixel” defects 
for  the  duration  of  the  warranty  on  select  new  product  purchases.  To 
determine if this guarantee applies to your product, refer to the model’s 
product  information  page  at  www.vizio.com,  look  for  the  “zero  bright 
pixel” guarantee on the box, or contact VIZIO Technical Support at the 
email address or telephone number below.

How to Get Service

Before  obtaining  warranty  service,  you  may  visit  www.vizio.com  for 
additional help and troubleshooting. To obtain warranty service, contact 
VIZIO  Technical  Support  via  email  at  TechSupport@VIZIO.com  or  via 

phone  at  877  MY  VIZIO  (877-698-4946).  The  VIZIO  Technical  Support 
hours  are  6:00AM  to  9:00PM  Monday  through  Friday  and  7:00AM  to 

306DWXUGD\DQG6XQGD\3DFLȴF7LPH

Your Obligations Before Service

You  must  obtain  pre-authorization  before  sending  your  product  to  a 
VIZIO service center. You may be required to supply a purchase receipt 
(or copy) to show that the product is within the warranty period.
When you return a product to a VIZIO service center, you must ship the 

SURGXFWLQLWVRULJLQDOSDFNDJLQJRULQSDFNDJLQJWKDWD΍RUGVDQHTXDO

degree of protection. VIZIO Technical Support will provide instructions for 
packing and shipping the product to the VIZIO service center.
ALL  USER  DATA  AND  DOWNLOADED  APPLICATIONS  STORED  ON  A 
PRODUCT WILL BE DELETED IN THE COURSE OF SOME IN-HOME AND ALL 
SHIP-IN WARRANTY SERVICE. If this occurs, your product will be restored 
to its original state. You will be responsible for restoring all applicable user 
data and downloaded applications. Recovery and reinstallation of user 
data and downloaded applications is not covered under this warranty. 
In order to protect your personal information, VIZIO recommends that 
you always clear all personal information from the product before it is 
serviced, regardless of the servicer.

VIZIO’s Responsibilities

If VIZIO determines that a product is covered by this warranty, VIZIO will 
(at its option) repair or replace it, or refund the purchase price to you. 
There  will  be  no  charge  for  parts  or  labor  during  the  warranty  period. 

5HSODFHPHQWSDUWVPD\EHQHZRUUHFHUWLȴHGDW9Ζ=Ζ2ȇVRSWLRQDQGVROH

discretion.  Replacement  parts  and  VIZIO’s  labor  are  warranted  for  the 
remaining portion of the original warranty or for ninety (90) days from 
warranty service, whichever is longer.

Types of Service

Displays  that  are  32  inches  or  larger  will  usually  be  serviced  in-home. 
In-home service requires complete and easy access to the product and 
does not include de-installation or re-installation of the product.  In-home 
service is subject to availability.  VIZIO will provide other service options 
when in-home service is not available.
All other VIZIO products must be sent to a VIZIO service center to obtain 
warranty service. VIZIO is not responsible for transportation costs to the 
service center, but VIZIO will cover return shipping to the customer. 

What This Warranty Does Not Cover

This warranty does not cover: (a) cosmetic damage; (b) normal wear and 
tear; (c) improper operation; (d) improper voltage supply or power surges; 
(e) signal issues; (f) damage from shipping; (g) acts of God; (h) customer 

PLVXVHPRGLȴFDWLRQVRUDGMXVWPHQWVLLQVWDOODWLRQVHWXSRUUHSDLUV

attempted  by  anyone  other  than  by  a  VIZIO  authorized  service  center; 
(j)  products  with  unreadable  or  removed  serial  numbers;  (k)  products 
requiring routine maintenance; or (l) products sold “AS IS”, “CLEARANCE”, 
“FACTORY RECERTIFIED”, or by a non-authorized reseller.

:KDWWR'RΖI<RX$UH1RW6DWLVȴHG:LWK6HUYLFH

If you feel VIZIO has not met its obligations under this warranty, you may 
attempt to resolve the issue informally with VIZIO. If you are unable to 

UHVROYHWKHLVVXHLQIRUPDOO\DQGZLVKWRȴOHDIRUPDOFODLPDJDLQVW9Ζ=Ζ2

and if you are a resident of the United States, you must submit your claim 
to  binding  arbitration  according  to  the  procedures  described  below, 
unless  an  exception  applies.  Submitting  a  claim  to  binding  arbitration 
means that you do not have the right to have your claim heard by a judge 
or jury. Instead your claim will be heard by a neutral arbitrator. 

Binding Arbitration Agreement; Class Action Waiver (U.S. Residents 
Only)

UNLESS  YOU  HAVE  BROUGHT  AN  ELIGIBLE  CLAIM  IN  SMALL  CLAIMS 
COURT OR HAVE OPTED OUT AS DESCRIBED BELOW, ANY CONTROVERSY 
OR CLAIM RELATING IN ANY WAY TO YOUR VIZIO PRODUCT, INCLUDING 
ANY CONTROVERSY OR CLAIM ARISING OUT OF OR RELATING TO THIS 
WARRANTY, A BREACH OF THIS WARRANTY, OR THE VIZIO PRODUCT’S 
SALE,  CONDITION  OR  PERFORMANCE,  WILL  BE  SETTLED  BY  BINDING 
ARBITRATION  ADMINISTERED  BY  THE  AMERICAN  ARBITRATION 
ASSOCIATION AND CONDUCTED BY A SINGLE ARBITRATOR APPOINTED 
BY THE AMERICAN ARBITRATION ASSOCIATION, IN ACCORDANCE WITH 
ITS  COMMERCIAL  ARBITRATION  RULES  AND  ITS  SUPPLEMENTARY 
PROCEDURES FOR CONSUMER-RELATED DISPUTES. You may learn more 
about the American Arbitration Association and its rules for arbitration 
by visiting www.adr.org or by calling 800-778-7879. Since this warranty 
concerns  a  transaction  in  interstate  or  international  commerce,  the 
Federal Arbitration Act will apply. 

7KHȴOLQJIHHVWREHJLQDQGFDUU\RXWDUELWUDWLRQZLOOEHVKDUHGEHWZHHQ

you  and  VIZIO,  but  in  no  event  will  your  fees  ever  exceed  the  amount 
allowable by the American Arbitration Association, at which point VIZIO 
will cover all additional administrative fees and expenses. VIZIO waives its 

66

Summary of Contents for D43-D2

Page 1: ...Models D43 D2 D55 D2 and D65 D2 USER MANUAL VIZIO...

Page 2: ...5 Setting Up Channels 36 Selecting a Channel Source 36 Scanning for Channels 36 Adding New Channels 36 Skipping Channels 37 Listening to Alternate Audio 38 Changing the Analog Audio Language 38 Settin...

Page 3: ...o blades and a third grounding prong The wide blade or the third prong are provided for your safety If the provided SOXJ GRHV QRW W LQWR RXU RXWOHW FRQVXOW DQ HOHFWULFLDQ IRU replacement of the obsole...

Page 4: ...or high humidity Operating your TV in environments with heavy GXVW RU KLJK KXPLGLW PD FDXVH UH RU HOHFWULF VKRFN Follow instructions for moving your TV Ensure that the power cord and any other cables...

Page 5: ...d to proper grounding of the mast and supporting structure grounding of the lead in wire to an antenna discharge unit size of the grounding conductors location of antenna discharge unit connection to...

Page 6: ...LPLWHG 76 WKH 6 PERO 76 DQG WKH 6 PERO WRJHWKHU DUH UHJLVWHUHG WUDGHPDUNV DQG 76 6WXGLR 6RXQG LV D WUDGHPDUN RI 76 QF k 76 QF OO 5LJKWV 5HVHUYHG 7KLV SURGXFW TXDOL HV IRU 1 5 67 5 LQ WKH IDFWRU defau...

Page 7: ...nt to inspect the package contents Use the images below to ensure nothing is missing or damaged Getting to Know Your TV PACKAGE CONTENTS Power Cord VIZIO LED UHDTV Remote Control with Batteries 2 x Qu...

Page 8: ...earthquake occurs and the TV is not properly secured 3ODFH WKH 79 VFUHHQ GRZQ RQ D FOHDQ DW VXUIDFH 7R SUHYHQW scratches or damage to the screen place the TV on a soft surface such as carpet rug or b...

Page 9: ...HEULV that can scratch or damage the TV 3 Remove the stands by loosening and removing the screws 4 Attach your TV and wall mount to the wall carefully following the instructions that came with your mo...

Page 10: ...When using the remote aim it directly at this sensor 7KH SRZHU LQGLFDWRU DVKHV RQ ZKHQ WKH 79 WXUQV RQ WKHQ JRHV RXW DIWHU VHYHUDO VHFRQGV To keep the power indicator on as long as the TV is on see 7X...

Page 11: ...as sound bar Component Composite Connect a component or composite device USB Connect a USB thumb drive to play photo music or video HDMI Connect an HDMI device HDMI Connect an HDMI device Power 3UHVV...

Page 12: ...anually enter a digital sub channel For example 18 4 or 18 5 ENTER RQ UP FKDQQHO RU SDVVFRGH entered using the Number Pad A V CONTROLS Control the USB media player and streaming video playback CLOSED...

Page 13: ...HDMI 1 HDMI 2 etc BETTER COMPONENT CABLE ANALOG HD VIDEO 1080p 1 STEREO AUDIO BEST HDMI HDMI 1 3 2 DIGITAL HDVIDEO 1080p 1 HD AUDIO GOOD AV CABLE ANALOG SD VIDEO 480i 1 STEREO AUDIO BETTER COAXIAL CA...

Page 14: ...NT CABLE Component cables are designed to carry high GH QLWLRQ YLGHR VLJQDOV DORQJ ZLWK DGGLWLRQDO audio connections Colors are delivered with color LQIRUPDWLRQ VSOLW XS WKUHH GL HUHQW ZD V RYHU three...

Page 15: ...luded to the TV and the device 4 Turn the TV and your device on Home Audio Receiver VIZIO Sound Bar BEST HDMI CABLE ARC 2 WAY COMMUNICATION 2 0 5 1 DIGITAL AUDIO PCM DTS DOLBY DIGITAL GOOD RCA CABLE A...

Page 16: ...DUH GLJLWDOO WUDQVPLWWHG between devices PCM Stream Lossless Dolby Digital 5 1 Channel DTS 5 1 Channel Digital Connection Audio Signal Only HDMI CABLE HDMI technology transmits crystal clear digital...

Page 17: ...HDMI Cable HDMI Cable Your Blu Ray Player RCA Audio Your Home Audio Receiver With HDMI ARC With an HDMI ARC setup the audio connection between your TV and Home Audio Receiver can be removed The HDMI...

Page 18: ...1HWZRUN 6HWXS WR FRQ JXUH WKH 79 6HH Using Guided Setup on page 48 Connecting to a Wireless Network 1 Ensure you have a router or modem broadcasting as high speed wireless signal 802 11n recommended...

Page 19: ...the Ethernet port on the TV Choose your mode Select Store Demo for in store display Select Home Use for in home use Seleccione Home Use para Modo de Casa o Store Demo para Demostraci n en la Tienda Ch...

Page 20: ...oard then highlight Connect and press OK Use the Arrow and OK buttons on the remote to review the Terms Of Service and Privacy Policy KHQ RX DUH QLVKHG KLJKOLJKW I Accept and press OK 7 8 Enter your E...

Page 21: ...w and OK buttons on the remote to select the input your TV source is connected to KHQ RX DUH QLVKHG WKH PHVVDJH Setup is complete will appear The First Time Setup is complete Use the Arrow buttons on...

Page 22: ...he on screen menu press the MENU button on the remote You can also open the on screen menu by pressing the VIA button and selecting HDTV Settings from the VIA Dock then pressing OK From this menu you...

Page 23: ...PDJH ZLOO OO WKH VFUHHQ LWK widescreen content RQH VL WK RI WKH LPDJH LV FXW R E the left and right sides of the screen S DQG L Not available 3DQRUDPLF stretches a 4 3 aspect ratio picture to the left...

Page 24: ...to cycle through the three display methods 3 Press the Up Arrow button on the remote to the menu VIZIO PICTURE Picture Mode Standard Auto Brightness Control Medium Backlight 85 Brightness 50 Contrast...

Page 25: ...o manually change each of the picture settings use the Up Down Arrow buttons on the remote to highlight that picture setting then use the Left Right Arrow buttons to adjust the setting Auto Brightness...

Page 26: ...al size of the displayed picture Use the Up Down Arrow buttons to adjust the vertical size of the displayed picture Press the OK EXWWRQ ZKHQ RX DUH QLVKHG Picture Position Adjust the vertical and hori...

Page 27: ...use the Arrow buttons to highlight Lock Picture Mode and then press OK The LOCK PICTURE MODE menu is displayed 2 Use the Number Pad on your remote to enter a unique 4 digit PIN 3 Highlight Save and pr...

Page 28: ...that has been edited can be restored to the factory default settings To reset a customized preset picture mode 1 From the PICTURE MODE EDIT menu use the Arrow buttons to highlight Reset Picture Mode a...

Page 29: ...w buttons to adjust the value When RX DUH QLVKHG SUHVV WKH OK button to save the setting 3 KHQ RX DUH QLVKHG SUHVV WKH EXIT button 11 Point White Balance Gain Red Green Blue 5 0 0 0 Adjusting the Colo...

Page 30: ...ess the Left Right Arrow buttons until the Ramp Test Pattern menu is displayed 2 Use the Arrow buttons on the remote to highlight 2 Use the Left Right Arrow buttons to select the color for the ramp te...

Page 31: ...tem Select Variable if you are controlling the volume with the TV s volume controls or select Fixed if an external audio device sound bar or AV receiver will control the volume Equalizer GMXVWV WKH ER...

Page 32: ...nu is displayed 2 Use the Arrow buttons on the remote to highlight Audio and press OK The AUDIO menu is displayed 3 Use the Arrow buttons to highlight Delete Audio Mode and press OK The TV displays To...

Page 33: ...WR WXUQ R when there is no signal change the setting to 2 Otherwise select 10 minutes 3 KHQ RX KDYH QLVKHG VHWWLQJ WKH DXWR SRZHU R WLPH SUHVV the EXIT button on the remote Enabling the Screen Saver I...

Page 34: ...t Manual Setup and press OK The MANUAL SETUP menu is displayed 2 To change the settings manually use the Arrow buttons on the remote to highlight DHCP and then use the Left Right Arrow buttons to chan...

Page 35: ...n highlight Connect and press OK 4 Press the EXIT button on the remote VIZIO ENTER ACCESS POINT NAME Enter your access point name This is used to connect to an access point with a hidden SSID a b c d...

Page 36: ...annel Scan Manually Add Channels Select channels to skip VIZIO CHANNELS Channels not searched Channel Source Cable Find Channel Partial Channel Search Add Analog Channel Skip Channel Analog Audio Ster...

Page 37: ...view You can remove these channels from the TV s memory with the Skip Channel feature Channels that have been removed with the Skip Channel feature can still be viewed if the channel is entered using...

Page 38: ...roadcast with Secondary Audio Programming To use the Analog Audio feature 1 From the CHANNELS menu highlight Analog Audio and press OK The ANALOG AUDIO menu is displayed 2 Select Stereo SAP secondary...

Page 39: ...ns 1 From the CLOSED CAPTIONS menu use the Arrow buttons to highlight Digital Style and press OK 2 Use the Left Right Arrow buttons on the remote to select Custom The DIGITAL STYLE menu appears as sho...

Page 40: ...text appears This is the typical As Broadcast mode Opaque background and window in the same color When WH W DSSHDUV WKH HQWLUH OLQH OOV ZLWK FRORU DW RQFH In the example below the closed caption text...

Page 41: ...light the input device that you want to rename and press OK 4 To use a preset input name a Highlight the Input Port row and press OK b Highlight the input name you want to use and press OK or To enter...

Page 42: ...n the remote The on screen menu is displayed 2 Use the Arrow buttons on the remote to highlight System and press OK The SYSTEM menu is displayed 3 Highlight System Information and press OK 4 Use the U...

Page 43: ...MENU button on the remote The on screen menu is displayed 2 Use the Arrow buttons on the remote to highlight System and press OK The SYSTEM menu is displayed 3 Use the Arrow buttons on the remote to h...

Page 44: ...u may not want to block the channel completely using a channel lock but you may wish to block certain programs from being viewed When this is the case you can use the TV s Rating Block feature to bloc...

Page 45: ...79 V VFUHHQ black bars are added to the left and right of the display image S DQG L Fills a 720p or 1080p screen S DQG L Fills a 720p or 1080p screen Stretch H SDQGV D ZLGHVFUHHQ LPDJH WR OO WKH VFUHH...

Page 46: ...the remote to highlight System and press OK The SYSTEM menu is displayed 5 Use the Arrow buttons on the remote to highlight CEC and press OK The CEC menu is displayed 6 Highligh CEC and press OK Selec...

Page 47: ...s To restore the TV to its factory default settings 1 Press the MENU button on the remote The on screen menu is displayed 2 Use the Arrow buttons on the remote to highlight System and press OK The SYS...

Page 48: ...THE INFO WINDOW The Info Window can be displayed by pressing the INFO or GUIDE button on the remote Press the INFO or GUIDE button one time to display channel input and display information Press the...

Page 49: ...IURP WKH OLVW DQG SUHVV OK 8VH WKH Arrow EXWWRQV WR KLJKOLJKW WKH W SH RI PHGLD WR GLVSOD Music Video RU Photo DQG SUHVV OK 8VH WKH Arrow EXWWRQV WR KLJKOLJKW WKH OH RX ZDQW WR GLVSOD 3UHVV OK 0XVLF...

Page 50: ...86 GHYLFHV Current Folder Playback Controls 8VH WR FRQWURO DXGLR SOD EDFN LJKOLJKW 3OD 3DXVH 3UHYLRXV RU 1H W DQG SUHVV OK Toggle Music Photos Toggle between viewing all content and only viewing folde...

Page 51: ...86 GHYLFHV Current Folder View All or View Folders VIDEO PLAYER Folders File Date Duration Family Vacation California 00 23 43 1 26th Birthday Party 00 38 18 2 Summer 2012 00 41 08 3 Greatest Trip Eve...

Page 52: ...Thumbnails Folders Adjust Slideshow Settings Start Fullscreen Slideshow PHOTO VIEWER Browse Music View Music Files Back Button LJKOLJKW WKLV EXWWRQ DQG SUHVV OK WR UHWXUQ WR WKH SUHYLRXV VFUHHQ Folder...

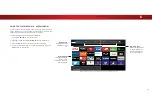
Page 53: ...V I A Plus App Dock is where all of your V I A Apps are accessed To launch an App from the Dock 1 Press the V Button on the remote 2 Highlight a V I A Plus App by scrolling left and right using the L...

Page 54: ...w allows you to add and store SSV 7KH SSV RQ WKH UVW SDJH DUH GLVSOD HG LQ WKH RFN DQG Apps on additional pages can be moved to the Dock To open the Fullscreen V I A Plus Apps Window 1 Press the V But...

Page 55: ...t Displays apps that were most recently added to the library of apps All Apps Displays every app that is available for download Categories Displays apps sorted into categories Spotlight Yahoo Weather...

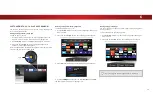
Page 56: ...ere you want To move the Apps on your My Apps tab 1 Use the Arrow buttons on the remote to highlight the app you wish to move 2 Press and hold the OK button The following options appear Star Note App...

Page 57: ...to the desired location and press OK to place the app When you can move the app it appears as shown below Note App location appearance and availability subject to change without notice Cursor showing...

Page 58: ...hnical Problems Product Updates And More You can also contact our award winning support team at Phone 877 698 4946 TOLL FREE Hours Of Operation Monday Friday 7 AM TO 11 PM CST Saturday Sunday 9 AM TO...

Page 59: ...ISTER YOUR VIZIO PRODUCT NOW Customized Support Get assistance quickly with your information on hand News Offers Take advantage of the latest news and special offers from VIZIO Safety Satisfaction Sta...

Page 60: ...look right Adjust the Color and Tint settings in the Picture menu See Adjusting the Picture Settings on page 25 Select a pre set picture mode See Adjusting the Picture Settings on page 25 VIZIO recomm...

Page 61: ...enna the signal strength of the channel may be low Ensure your antenna is connected securely to the TV and move the antenna around the room or close to a window for the best signal When I change input...

Page 62: ...5DWLR 2 000 000 1 3L HO 3LWFK 0 4902mm H x 0 4902mm V 9LHZLQJ QJOH 178 H 178 V 0 QSXWV 3 RPSRQHQW 9LGHR QSXWV 1 RPSRVLWH QSXWV 1 Shared with Component 5 QWHQQD QSXW 1 86 3RUW 1 WKHUQHW 1 XGLR 2XWSXWV...

Page 63: ...W 5DWLR 5 000 000 1 3L HO 3LWFK 0 6300 H x 0 6300 V 9LHZLQJ QJOH 178 H 178 V 0 QSXWV 3 RPSRQHQW 9LGHR QSXWV 1 RPSRVLWH QSXWV 1 Shared with Component 5 QWHQQD QSXW 1 86 3RUW 1 WKHUQHW 1 XGLR 2XWSXWV RC...

Page 64: ...5DWLR 5 000 000 1 3L HO 3LWFK 0 744mm H x 0 744mm V 9LHZLQJ QJOH 178 H 178 V 0 QSXWV 3 RPSRQHQW 9LGHR QSXWV 1 RPSRVLWH QSXWV 1 Shared with Component 5 QWHQQD QSXW 1 86 3RUW 1 WKHUQHW 1 XGLR 2XWSXWV RC...

Page 65: ...VVO DSSURYHG E WKH SDUW responsible for compliance with the FCC Rules could void the user s authority to operate this equipment Caution Always use an AC DC power adapter that is properly grounded Use...

Page 66: ...you always clear all personal information from the product before it is serviced regardless of the servicer VIZIO s Responsibilities If VIZIO determines that a product is covered by this warranty VIZI...

Page 67: ...binding arbitration agreement and class action waiver In addition you may pursue a claim in small claims court in your county of residence if in the United States or in Orange County California In suc...

Page 68: ...and downloaded applications Recovery and reinstallation of user data and downloaded applications is not covered under this warranty In order to protect your personal information VIZIO recommends that...

Page 69: ...without notice but any change will not D HFW RXU RULJLQDO ZDUUDQW KHFN ZZZ YL LR P IRU WKH PRVW current version INFORMATION EXCLUSIVELY FOR MEXICO To make a warranty claim or to obtain parts component...

Page 70: ...LQIRUPDWLRQ described herein are subject to change without notice VIZIO Inc is not responsible for typographical technical or descriptive errors VIZIO the VIZIO logo the V logo and other terms and phr...

Page 71: ...2015 VIZIO INC ALL RIGHTS RESERVED 10272015AD US NC...

Reviews: