background image

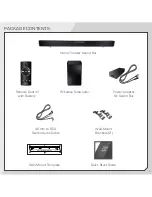
PACKAGE CONTENTS

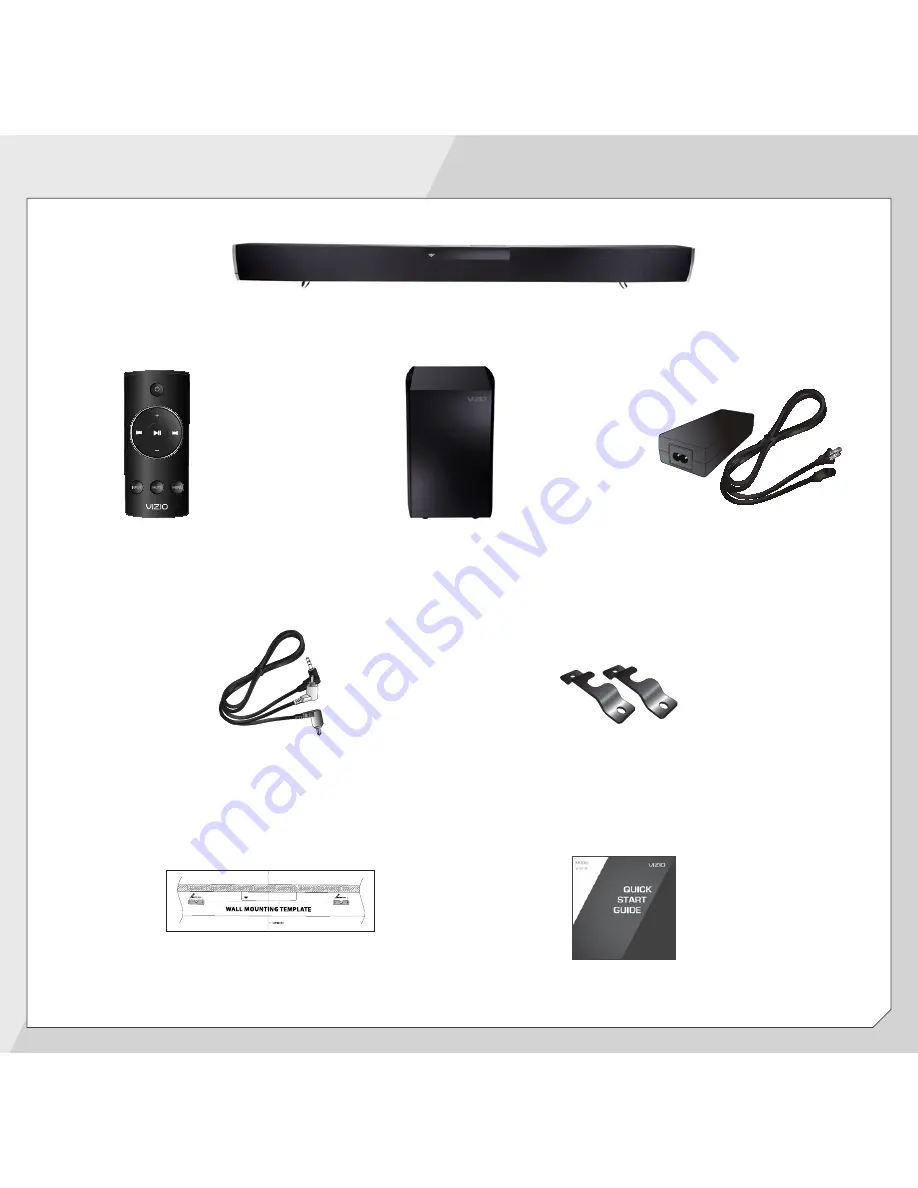
Home Theater Sound Bar 

Wireless Subwoofer

Quick Start Guide

Power Adapter  

for Sound Bar

1

Wall Mount  

Brackets (2)

3.5mm to RCA  

Stereo Audio Cable

Remote Control  

with Battery

Wall Mount Template

Summary of Contents for SB4021M-A1

Page 1: ...MODEL SB4021M A1 VIZIO QUICK START GUIDE ...

Page 2: ...s on your Unit enclosure Do not place any objects on the top of your Unit Doing so could short circuit parts causing a fire or electric shock Never spill liquids on your Unit The power cord must be replaced when using different voltage than the voltage specified For more information contact your dealer When connected to a power outlet power is always flowing into your Unit To totally disconnect po...

Page 3: ...KAGE CONTENTS Home Theater Sound Bar Wireless Subwoofer Quick Start Guide Power Adapter for Sound Bar 1 Wall Mount Brackets 2 3 5mm to RCA Stereo Audio Cable Remote Control with Battery Wall Mount Template ...

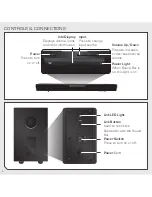
Page 4: ...ecrease overall volume Input Press to change input source 2 Info Display Displays volume input and other information Link Button Used to re link the Subwoofer with the Sound Bar Power Switch Press to turn on or off Power Cord Link LED Light Power Light When Sound Bar is on this light is on ...

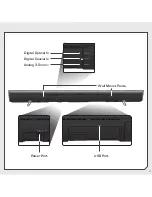
Page 5: ...Digital Optical In Power Port 3 USB 1 85 Wall Mount Posts USB 1 85 USB 1 85 USB Port 1 85 Digital Coaxial In Analog 3 5mm In ...

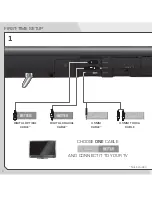
Page 6: ...FIRST TIME SETUP 1 4 1 85 DIGITAL COAXIAL CABLE BETTER DIGITAL OPTICAL CABLE BETTER 3 5MM CABLE GOOD GOOD 3 5MM TO RCA CABLE Not Included AND CONNECT IT TO YOUR TV BETTER GOOD CHOOSE ONE CABLE ...

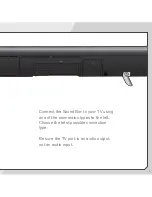
Page 7: ...5 Connect the Sound Bar to your TV using one of the connection types to the left Choose the best possible connection type Be sure the TV port is an audio output not an audio input USB ...

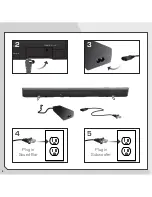
Page 8: ...4 6 USB 1 85 1 85 2 3 5 Plug in Sound Bar Plug in Subwoofer ...

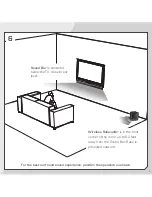
Page 9: ...d sound experience position the speakers as shown Wireless Subwoofer is in the front corner of the room up to 60 feet away from the Sound Bar Bass is projected outward Sound Bar is centered below the TV close to ear level 7 ...

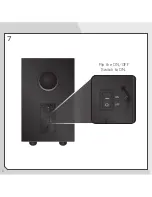
Page 10: ...7 8 Flip the ON OFF Switch to ON ...

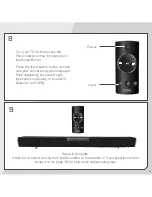
Page 11: ...he remote until your connection type is displayed Push repeatedly to cycle through input sources Analog In Coaxial In Optical In and USB 9 9 Setup is complete If there is no sound coming from the Sound Bar or Subwoofer or if you experience other issues turn to page 18 for help and troubleshooting tips Input Power ...

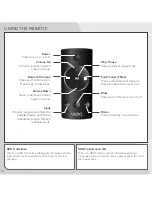
Page 12: ... fast forward Press to advance to next track Play Pause Press to play or pause track Input Press to output audio from the selected device port Press repeatedly to cycle through available inputs Menu Press to display menu options SRS TruVolume When on SRS TruVolume intelligently normalizes volume fluctuations due to television commercials or channel changes SRS TruSurround HD When on SRS TruSurroun...

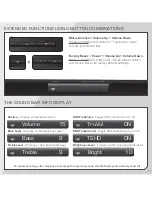
Page 13: ...fault settings 11 THE SOUND BAR INFO DISPLAY Volume Increase or decrease volume Volume Bass Level Increase or decrease bass level Bass Treble Level Increase or decrease treble level Treble SRS TruVolume Toggle SRS TruVolume on or off TruVol SRS TruSurround Toggle SRS TruSurround on or off TSHD 15 9 9 ON ON Brightness Level Increase or decrease brightness level Bright 10 To conserve energy after di...

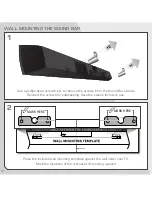
Page 14: ... Sound Bar stands Reinsert the screws for safekeeping Save the stands for future use Place the included wall mounting template against the wall under your TV Mark the locations of the 4 bracket holes using a pencil LEAVE THIS SPACE BETWE MARK HERE WALL MO NE OUND BAR AND YOUR TV TEMPLATE MARK HERE ...

Page 15: ...rackets using the wall mount posts on the back of the Bar The screws and anchors depicted are not included The appropriate screws and anchors will depend on the material of your wall Be sure that the screws and or anchors you use are securely fastened and can support the weight of the Sound Bar Recommended screw diameter 4mm Recommended screw length 8mm or greater ...

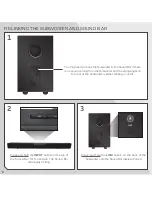
Page 16: ...oming from the Subwoofer and the orange light on the rear of the Subwoofer is either blinking or not lit 14 1 Press and hold the INPUT button on the top of the Sound Bar for 5 seconds The Sound Bar will display Pairing 2 Press and hold the LINK button on the back of the Subwoofer until the Sound Bar displays Paired 3 ...

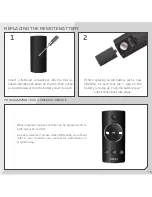
Page 17: ...ently you should refer to your remote s user manual for instructions on programming Insert a flat head screwdriver into the slot as shown Gently push down on the tab then press and pull downward on the battery cover to open 1 When replacing an old battery with a new CR2032 be sure that the sign on the battery is facing up Push the battery cover until it clicks back into place 2 ...

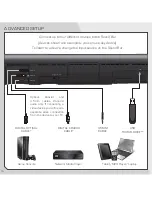
Page 18: ...ar devices shown are examples you can use any device To listen to a device change the input source on the Sound Bar DIGITAL OPTICAL CABLE 3 5MM CABLE DIGITAL COAXIAL CABLE Optical Coaxial and 3 5mm cables transmit audio only If connecting a video device you will need a separate video connection from the device to your TV USB THUMB DRIVE ...

Page 19: ...al surround sound It s stylishly slim with an easy slot load design so there s no waiting for a tray to eject Built in Wi Fi delivers easy wireless access to on demand movies TV shows music and more It s all at the push of a button on the enhanced 2 sided remote with full keyboard 3D BLU RAY PLAYER WITH WIRELESS INTERNET APPS Sold separately Available at www VIZIO com ONE POWERFUL MOVIE MACHINE ...

Page 20: ...nnect your device to a different input on the Sound Bar There is no sound coming from the Subwoofer If the lights on the Subwoofer are in a slow blink pattern you will need to pair the Subwoofer with the Sound Bar See Re Linking the Subwoofer and Sound Bar on page 14 Move the Subwoofer closer to the Sound Bar Turn the Subwoofer power switch to ON To conserve power the Subwoofer will automatically ...

Page 21: ...VIZIO com www VIZIO com support Hours of operation Monday Friday 5 AM TO 9 PM PST Saturday Sunday 8 AM TO 4 PM PST The VIZIO support team is highly trained and is based in the United States We can help with New Product Setup Connecting Your Devices Technical Problems And More We speak English Se habla Español Nous parlons Français 19 ...

Page 22: ...es or any repairs attempted by anyone other than by a VIZIO authorized service center Products with unreadable or removed serial numbers or requiring routine maintenance are not covered This one year limited warranty does not cover Products sold AS IS FACTORY RECERTIFIED or by a non authorized reseller THERE ARE NO EXPRESS WARRANTIES OTHER THAN THOSE LISTED OR DESCRIBED ABOVE ANY IMPLIED WARRANTIE...

Page 23: ...à la norme NMB 003 du Canada IC Radiation Exposure Statement This equipment complies with IC RSS 102 radiation exposure limits set forth for an uncontrolled environment This equipment should be installed and operated with minimum distance 20cm between the radiator your body Disposal and Recycling You must dispose of this product properly according to local laws and regulations Because this product...

Page 24: ... 2012 VIZIO INC ALL RIGHTS RESERVED 120629OC NC ...

Reviews: