background image

www.modellmarkt24.ch

Y OD A                                                                                                     

R ecommendations for assembly                                           


1


1.


T he list of parts and materials to build: 

                        A ccessory kit:                                                          Parts set: 


1.    R ear short screws for fixing wing ( M3x10 , 1 spare 

screw) ; 

2.    F orward long screws for fixing wing ( M3x14, 1 spare 

screw) ; 

3.    F uselage part of the wire for aileron servos with J ST  

battery connector; 

4.    Y oda aileron servo hatches ( left and right) ; 

5.    Y oda aileron rods ( 2pcs) ; 

6.    Y oda aileron horns ( 2 pcs) ; 

7.    Y oda aluminum flap horns ( S nipe 2 aileron horns)  ( left 

and right) ; 

8.    A ileron horn  pins ( D 1x10, 2 pcs) ; 

9.    Y oda ( Snipe 2) B all link skrews; (2 pcs) ; 

10. Y oda aileron rods (2 pcs) ; 

11. A ileron clevises ( with M2.5 thread) ; 

12. C arboline SC  78 4/30 carbon for fixing aileron pins( 1 pcs; 

50x50 mm) ; 

13. Y oda ( Snipe 2)  wing throwing peg; 

14. Stabilizer fixing screws ( M3x8, A luminum, 1 pc spare) ; 

15. E levator and rudder torsion springs; 

16. E levator and rudder control horns; 

17. Pipes for the fixing control cables ( 1 spare) ; 

18. Y oda ( Snipe 2)  ballast fixing part; 

1.    Y oda wing; 

2.    Y oda fuselage; 

3.    Y oda ( Snipe 2)  horizontal stabilizer; 

4.    Y oda vertical stabilizer; 

5.    Y oda nose cone; 

6.    Y oda accessoires kit; 


T he list of material s needed to build the model: 

1)  

 Supergl ue and liquid medium, the accelerator 

2)  

 C utter 

3)  

 Masking tape 

4) 

 Pen and ruler 

5) 

 Pliers 

6) 

 Sandpaper number 240-320 


www.modellmarkt24.ch

Summary of Contents for 36083

Page 1: ...link skrews 2 pcs 10 Y oda aileron rods 2 pcs 11 Aileron clevises withM2 5 thread 12 Carboline SC 78 4 30 carbon for fixing aileron pins 1 pcs 50x50 mm 13 Y oda Snipe 2 wing throwing peg 14 Stabilizer fixing screws M3x8 Aluminum 1 pc spare 15 Elevator andrudder torsion springs 16 Elevator andrudder control horns 17 Pipes for the fixing control cables 1 spare 18 Y oda Snipe 2 ballast fixing part 1 ...

Page 2: ... installation This is very important sequenceto follow for successful control installation Place a small piece of tape on bottomof flap over control horn and makesmall holein flap withpin for glue hole CAUTION Gluing zoneof aluminiumhornis covered with primer for epoxy and CA www modellmarkt24 ch ...

Page 3: ...www modellmarkt24 ch Y ODA Recommendations for assembly 3 Glue pins in groves at bottomof wing Reinforce aileron s pins by 2 3 layers of Carboline SC 39 2 45 8x14 mm www modellmarkt24 ch ...

Page 4: ...www modellmarkt24 ch Y ODA Recommendations for assembly 4 www modellmarkt24 ch ...

Page 5: ...ontrol horn on pin and push horn to inside edgeof hole toward center of wing Leave just enoughclearancebetween horn and hole so thehorn does not scrape edge of hole Use some thin CA and drip glueinto pinhole When CA is dry removetape Pull flap down and fill space around control horn with CA www modellmarkt24 ch ...

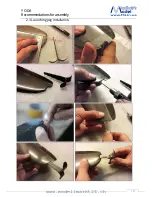
Page 6: ...www modellmarkt24 ch Y ODA Recommendations for assembly 6 2 2 Y oda aileron servo and horn installation Y ou must insert the rod fromthe outsideof thewing and rotateit 90 degrees www modellmarkt24 ch ...

Page 7: ...orn to theminimumsize In the middleposition of theservo install the horn at an angle of 90 degrees to the servo Spread epoxy on thesides of theservos and thesides of servo spot Put the servo horn to therod and insert the servo into theplace It is necessary to fix theservo until theresin cures with thick super glue www modellmarkt24 ch ...

Page 8: ...ommendations for assembly 8 After resin polymerization put on the aileron hornto therod Set theneutral position of the servo and aileron and fix thehorn in theaileron withthin superglue in this neutral position www modellmarkt24 ch ...

Page 9: ...www modellmarkt24 ch Y ODA Recommendations for assembly 9 www modellmarkt24 ch ...

Page 10: ...www modellmarkt24 ch Y ODA Recommendations for assembly 10 2 3 L aunching peg installation www modellmarkt24 ch ...

Page 11: ...www modellmarkt24 ch Y ODA Recommendations for assembly 11 Please rewind the baseof throwing peg by Kevlar thread to avoid peg delamination likefig 2 4 Fuselage servo accomodation www modellmarkt24 ch ...

Page 12: ...www modellmarkt24 ch Y ODA Recommendations for assembly 12 www modellmarkt24 ch ...

Page 13: ...www modellmarkt24 ch Y ODA Recommendations for assembly 13 www modellmarkt24 ch ...

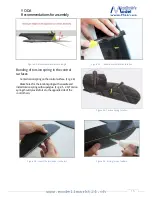
Page 14: ...or front and shorter to the back side 2 5 Rudder and Elevator installation With a knife cut the slots in the elevator and rudder in these locations Fig 2 1 2 2 Elevator hornis exactly in the center along the axis of the stabilizer mounting holes as the position must coincide with the slot inthe pylon and tail boom Horns must be glued full depthto elevator Liquid superglue Glue Horns inelevator and...

Page 15: ... control surfaces Center torsion spring onthe control surface Fig 2 4 Makeholes for thetorsionspring witha needleand install torsion spring with superglue Fig 2 5 2 6 Torsion spring should provide force to theopposite sideof the control horn Figure 2 5 Insert thetorsion bar in the tail Figure 2 4 Torsion spring location Figure 2 6 Sizing torsion feathers www modellmarkt24 ch ...

Page 16: ... removable now It is the samefor left and right hander becausetheY odafin is symmetrical Important Put on Y odafin to thefuselage until stop and fix it by tape before flight ATTENTION Y ou must put on thefin to thefuselage until it stops and fixed with tape Masking tape will do www modellmarkt24 ch ...

Page 17: ...f pliers to crimp the cable as photo 2 11 To make a draft of the stabilizer of a cable loop and crimp its tubefor fixing the rope Fig 2 12 For assistance in assembly attacha 100 mmthread to the elevator cable Y ou can lock the thread onthe tail boomwith tape and pull it out of the slot in the fuselage for assembly of the model Figure 2 11 Crimping tube cable Figure 2 12 Preparation for the cable s...

Page 18: ...www modellmarkt24 ch Y ODA Recommendations for assembly 18 3 Radio control installation www modellmarkt24 ch ...

Page 19: ...www modellmarkt24 ch Y ODA Recommendations for assembly 19 www modellmarkt24 ch ...

Reviews: