EXTRACTOR HOOD INSTALLATION INSTRUCTIONS
•
Select the operating mode and the location for the installation of the cooker hood
•
Take the extractor hood out of the packaging.
•
Check the operation of the extractor hood, connect it to the mains and check all of its functions.
•
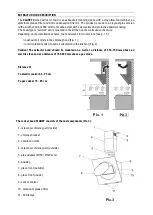
Mark the mounting holes for the housing on the wall. To do this, put the paper shape with the
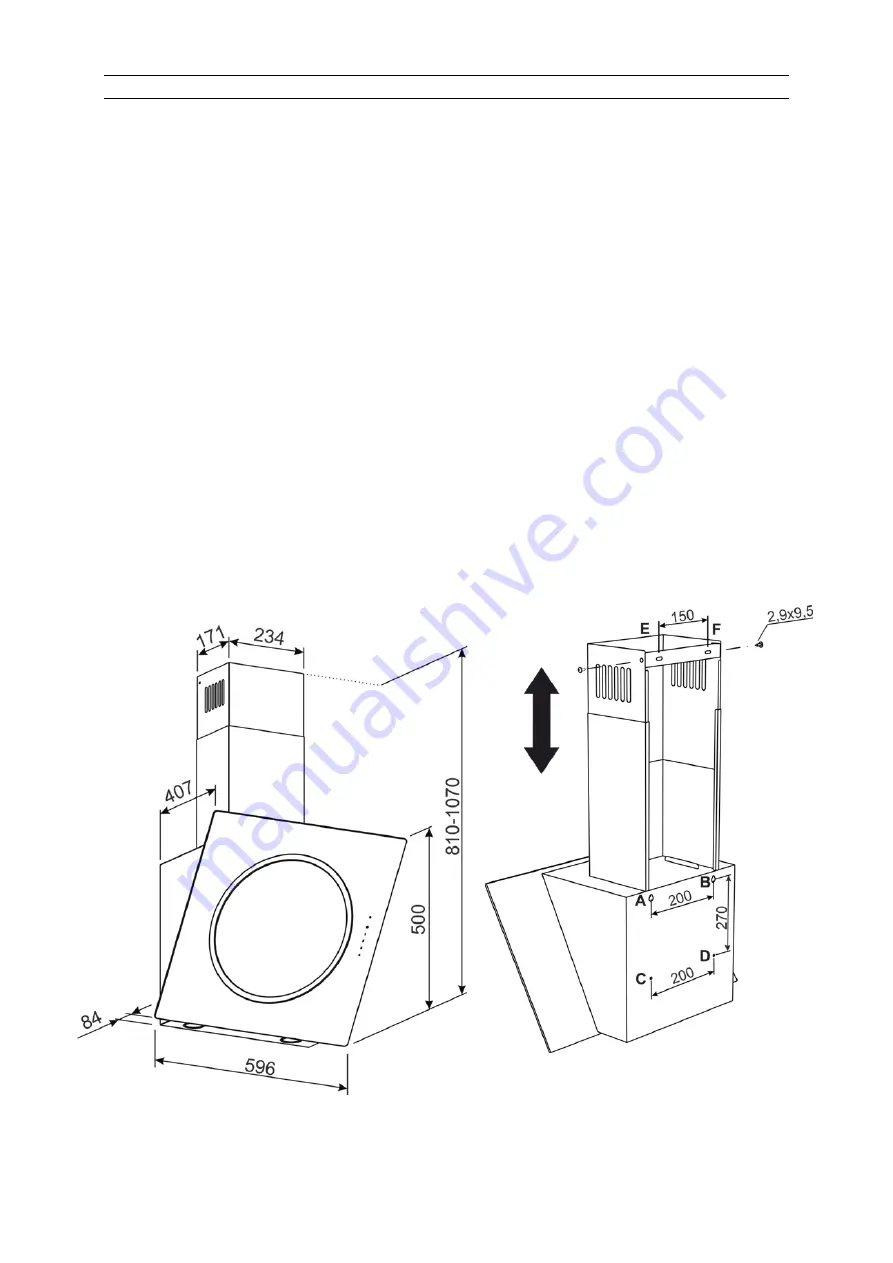
marks of 4 holes in the back wall of the case (points A, B, C, D, see installation diagram), put the
shape on the wall at the required height indicated above and align it on the plane out.
•
Mark and drill holes at points A, B, C, D with a 7 mm drill bit 40 mm deep.
•
Insert the dowels in the perforated holes and turn two PTG 4.5x40 screws at points A and B so
that the distance between the wall and the screw head is 5mm.
•
Hang the body through the curved grooves in points A, B on the screw heads, and then fix it in
points C, D, body with 2 PTH 4.5x40 screws.
•
Mount the air duct adapter (Ø150 / 120) on the exhaust air outlet and mount the air duct.
•
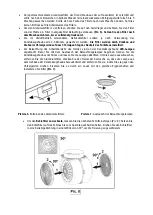
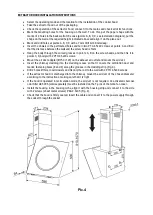
Insert the chimney cladding into the cladding recess so that it covers the ventilation duct and
mark 2 fastening holes (E and F) along the grooves in the cladding strip (Fig. 4).
•
Drill 2 holes Ø7mm, insert dowels and fix only the rod to the wall with 2 PTH 4.5x40 screws.
•
If the extractor hood is discharged into the chimney, mount the air duct of the chosen diameter
according to the instructions, making sure that it is tight.
•
If the hood is operated in recirculation mode, the air duct is not required. An activated charcoal
odor filter AKF-006 (sold separately) must be installed on the T-pins of the turbo fan cover.
•
Install the housing in the housing niche, align it with the housing strip and connect it to the side
with 2 screws (sheet metal screws) PKG 2.9x9.5 (Fig. 4).
•
Check that the hood is firmly seated, insert the cable and connect it to the power supply through
the socket through the socket.
Pic.4

