ENGLISH
22
•
unscrew the nuts (fig. P, ref. 2);
•
extract the two blade retainers (fig. P, ref. 3);
•
remove the blades (fig. P, ref. 5-6)
•
reuse the same blade by reversing the edge in contact with the floor until both edges
are worn out, or replace with a new blade, fitting it onto the screws on the body of the
squeegee;
•
replace the two blade retainers (fig. P, ref. 3) and screw up the nuts (fig. P, ref. 2).
Replace the squeegee in its support following the instructions in paragraph 6.2.
9.2.7 Fuses: replacement
The fuses protecting the electrical and electronic components are at the front of the
machine under the front guard (fig. Q, ref. 1) and near the battery compartment (fig. Q,
ref. 2).
To replace the fuses:
•
make sure the machine is disconnected from the batteries;
•
lift the fuse holder lid and remove the blown fuse;
•
fit a new fuse and close the fuse holder cover.
Fuse table
: for the complete fuse table, see the spare parts catalogue.
IMPORTANT
Never use a fuse with a higher amperage than specified.
If a fuse continues to blow, the fault in the wiring, boards (if present) or motors must be
identified and repaired. Have the machine checked by qualified personnel.
9.3.
Routine maintenance
9.3.1. Daily operations
After each day's work, proceed as follows:
•
disconnect the machine from the power supply;
•
empty the dirty water tank and clean if necessary;
•
clean the squeegee blades and check for wear. If necessary, replace;
•
check that the suction hole in the squeegee is not blocked, if necessary remove
encrusted dirt;
•
charge the batteries according to the procedure described;
•
Models with roller brushes: empty the debris bin (fig. S, ref. 5) at the back of the head
by rotating it backwards to free it from the head then extracting it sideways. Empty the
debris and wash. Replace on the machine repeating the operation in reverse.
9.3.2. Weekly operations
•
clean the dirty water tank float switch and make sure it is working correctly;
•
clean the suction air filter and make sure it is undamaged, if necessary, replace;
•
clean the detergent filter (fig. M, ref. 1) and check that it is not damaged (replace if
necessary);
•
clean the suction hose;
•
clean the dirty water tank and detergent tank;
•
check the level of battery electrolyte and top up with distilled water if necessari;
•
check operation of the service brake.
9.3.3. Six monthly operations
Have the electrical circuit checked by qualified personnel.
Summary of Contents for 3814SR
Page 2: ...A 1 2 3 4 5 B 1 2 3 4 5 6 7 8 9 10 11 12 13 14 15 16 17 18 CT 230 CT 160 3 2 1 4 5 ...
Page 3: ...C 1 2 D 1 2 3 3 CT 230 CT 160 5 4 2 ...
Page 4: ...E 1 2 3 4 5 F 1 ...
Page 5: ...G 1 2 CT 230 2 CT 160 OLD VERSION ...
Page 6: ...H 1 2 1 2 3 4 I CT 230 CT 160 5 ...
Page 7: ...L 1 2 M 1 CT 230 CT 160 3 4 5 CT 230 CT 160 1 ...
Page 8: ...N 1 2 3 4 4 5 O 1 2 3 4 ...
Page 9: ...P 1 2 2 3 3 5 6 ...
Page 10: ...Q 1 2 ...
Page 11: ...R 1 S 1 2 3 4 5 CT 160 ...
Page 12: ...T CT 230 U 1 2 3 4 CT 230 ...
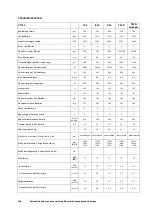
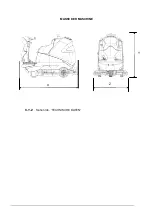
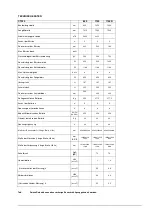
Page 14: ...MACHINE SIZE X Y Z See table TECHNICAL SPECIFICATIONS X Y Z ...
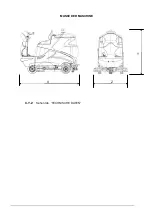
Page 16: ...MACHINE SIZE X Y Z See table TECHNICAL SPECIFICATIONS X Y Z ...
Page 17: ...ENGLISH Translation of original instructions ...
Page 45: ...MASSE DER MASCHINE X Y Z Sehen tab TECHNISCHE DATEN X Y Z ...
Page 47: ...MASSE DER MASCHINE X Y Z Sehen tab TECHNISCHE DATEN X Y Z ...
Page 48: ...DEUTSCH Übersetzung der Original Bedienungsanleitung ...
Page 80: ...WYMIARY URZĄDZENIA X Y Z Patrz tabela SPECYFIKACJA TECHNICZNA X Y Z ...
Page 82: ...WYMIARY URZĄDZENIA X Y Z Patrz tabela SPECYFIKACJA TECHNICZNA X Y Z ...
Page 83: ...POLSKI Tłumaczenie oryginalnej instrukcji ...
Page 115: ...MASINA MÕÕTMED X Y Z Vaadake tabelit TEHNILISED ANDMED X Y Z ...
Page 117: ...MASINA MÕÕTMED X Y Z Vaadake tabelit TEHNILISED ANDMED X Y Z ...
Page 118: ...EESTI Algupärase kasutusjuhendi tõlge ...
Page 146: ...MAŠINOS DYDŽIAI X Y Z Žr lentelę TECHNINĖS SPECIFIKACIJOS X Y Z ...
Page 148: ...MAŠINOS DYDŽIAI X Y Z Žr lentelę TECHNINĖS SPECIFIKACIJOS X Y Z ...
Page 149: ...LIETUVIŲ Originalių instrukcijų vertimas ...
Page 178: ...IEKĀRTAS IZMĒRI X Y Z Skatiet tabulu TEHNISKĀS SPECIFIKĀCIJAS X Y Z ...
Page 180: ...IEKĀRTAS IZMĒRI X Y Z Skatiet tabulu TEHNISKĀS SPECIFIKĀCIJAS X Y Z ...
Page 181: ...LATVIEŠU Instrukciju tulkojums no oriģinālvalodas ...
Page 211: ...ROZMĚRY STROJE X Y Z X Y Z Viz tabulka TECHNICKÉ SPECIFIKACE X Y Z ...
Page 213: ...ROZMĚRY STROJE X Y Z X Y Z Viz tabulka TECHNICKÉ SPECIFIKACE X Y Z ...
Page 214: ...ČEŠTINA Překlad originálního návodu ...
Page 243: ...ROZMERY STROJA X Y Z Pozrite tabuľku TECHNICKÉ CHARAKTERISTIKY X Y Z ...
Page 245: ...ROZMERY STROJA X Y Z Pozrite tabuľku TECHNICKÉ CHARAKTERISTIKY X Y Z ...
Page 246: ...SLOVENČINA Preklad pôvodného návodu ...
Page 272: ...SLOVENČINA27 akumulátor bol nabitý nad maximálny limit odporúčaný výrobcom vymeňte akumulátor ...
Page 276: ...GÉP MÉRETEI X Y Z Lásd MŰSZAKI SPECIFIKÁCIÓ táblázat X Y Z ...
Page 278: ...GÉP MÉRETEI X Y Z Lásd MŰSZAKI SPECIFIKÁCIÓ táblázat X Y Z ...
Page 279: ...MAGYAR Az eredeti utasítások fordítása ...
Page 310: ...DIMENSIUNEA MAȘINII X Y Z A se vedea tabelul SPECIFICAȚII TEHNICE X Y Z ...
Page 312: ...DIMENSIUNEA MAȘINII X Y Z A se vedea tabelul SPECIFICAȚII TEHNICE X Y Z ...
Page 340: ...DIMENZIJE UREĐAJA X Y Z Pogledajte tablicu TEHNIČKE SPECIFIKACIJE X Y Z ...
Page 342: ...DIMENZIJE UREĐAJA X Y Z Pogledajte tablicu TEHNIČKE SPECIFIKACIJE X Y Z ...
Page 343: ...HRVATSKI Prijevod izvornih uputa ...
Page 373: ...MERE STROJA X Y Z Glejte tabelo TEHNIČNE KARAKTERISTIKE X Y Z ...
Page 375: ...MERE STROJA X Y Z Glejte tabelo TEHNIČNE KARAKTERISTIKE X Y Z ...
Page 376: ...SLOVENŠČINA Prevod originalnih navodil ...
Page 404: ...ΔΙΑΣΤΑΣΕΙΣ ΜΗΧΑΝΗΜΑΤΟΣ X Y Z Βλ πίνακα ΤΕΧΝΙΚΕΣ ΠΡΟΔΙΑΓΡΑΦΕΣ X Y Z ...
Page 406: ...ΔΙΑΣΤΑΣΕΙΣ ΜΗΧΑΝΗΜΑΤΟΣ X Y Z Βλ πίνακα ΤΕΧΝΙΚΕΣ ΠΡΟΔΙΑΓΡΑΦΕΣ X Y Z ...
Page 407: ...ΕΛΛΗΝΙΚΑ Μετάφραση πρωτότυπων οδηγιών ...
Page 441: ...РАЗМЕРИ НА МАШИНАТА X Y Z Вж таблица ТЕХНИЧЕСКИ ХАРАКТЕРИСТИКИ X Y Z ...
Page 443: ...РАЗМЕРИ НА МАШИНАТА X Y Z Вж таблица ТЕХНИЧЕСКИ ХАРАКТЕРИСТИКИ X Y Z ...
Page 444: ...БЪЛГАРСКИ Превод на оригиналните инструкции ...
Page 476: ...РАЗМЕРЫ МАШИНЫ X Y Z См таблицу ТЕХНИЧЕСКИЕ ХАРАКТЕРИСТИКИ X Y Z ...
Page 478: ...РАЗМЕРЫ МАШИНЫ X Y Z См таблицу ТЕХНИЧЕСКИЕ ХАРАКТЕРИСТИКИ X Y Z ...
Page 479: ...РУССКИЙ Перевод оригинальных инструкций ...
Page 512: ...DIMENSIONS DE LA MACHINE X Y Z Voir tab DONNEES TECHNIQUES X Y Z ...
Page 514: ...DIMENSIONS DE LA MACHINE X Y Z Voir tab DONNEES TECHNIQUES X Y Z ...
Page 515: ...FRANÇAIS Traduction du mode d emploi original ...
Page 545: ...DIMENSÕES DA MÁQUINA X Y Z Ver a tabela CARACTERÍSTICAS TÉCNICAS X Y Z ...
Page 547: ...DIMENSÕES DA MÁQUINA X Y Z Ver a tabela CARACTERÍSTICAS TÉCNICAS X Y Z ...
Page 548: ...PORTUGUÊS Tradução das instruções originais ...
Page 580: ...MAKİNENİN BOYUTLARI X Y Z TEKNİK ÖZELLİKLER tablosuna bakın X Y Z ...
Page 582: ...MAKİNENİN BOYUTLARI X Y Z TEKNİK ÖZELLİKLER tablosuna bakın X Y Z ...
Page 583: ...TÜRKÇE Orijinal talimatların çevirisi ...
Page 611: ...РОЗМІРИ МАШИНИ X Y Z Див таблицю ТЕХНІЧНІ ХАРАКТЕРИСТИКИ X Y Z ...
Page 613: ...РОЗМІРИ МАШИНИ X Y Z Див таблицю ТЕХНІЧНІ ХАРАКТЕРИСТИКИ X Y Z ...
Page 614: ...УКРАЇНСЬКОЮ Переклад оригінальних інструкцій ...

