GB
HANDLING AND INSTALLATION
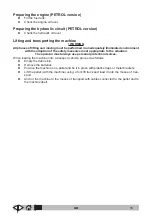
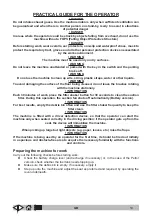
Lifting and transporting the palletized machine
! WARNING
'XULQJDOOOLIWLQJRSHUDWLRQVPDNHFHUWDLQWKHSDOOHWL]HGPDFKLQHLV¿UPO\VHFXUHGWRSUHYHQW
LWWLSSLQJRYHURUEHLQJDFFLGHQWDOO\GURSSHG
Always load/unload lorries in adequately illuminated areas.
The machine is palletized by the Manufacturer, and must be loaded onto the transport vehicle using
suitable lifting equipment (see EC Directive 2006/42/EEC and subsequent amendments and/or ad-
ditions); on reaching the destination, it must be unloaded using similar equipment.
A fork lift truck must always be used to lift the packaged body of the machine. Handle with care to
avoid knocking or overturning the machine.
Delivery checks
When the carrier delivers the machine, make sure the packaging and machine are both whole and
undamaged. If the machine is damaged, make sure the carrier is aware of the damage and before
accepting the goods, reserve the right (in writing) to request compensation for the damage.
Unpacking
! WARNING
:KHQXQSDFNLQJWKHPDFKLQHWKHRSHUDWRUPXVWEHSURYLGHGZLWKWKHQHFHVVDU\SHUVRQDO
protection devices (gloves, goggles, etc.) to limit the risk of injury.
When unpacking the machine, proceed as follows:
Ź
Cut and remove the plastic straps using scissors or nippers;
Ź
Remove the cardboard packaging;
Ź
Remove the bags from the battery compartment and check their contents:
RSHUDWRULQJDQGPDLQWHQDQFHPDQXDOGHFODUDWLRQRIFRQIRUPLW\FHUWL¿FDWHRIZDUUDQW\
battery bridges with terminals;
1 x connector for battery charger;
Depending on the model, remove the metal brackets or cut the plastic straps with which the machi-
ne is secured to the pallet.
8VLQJDUDPSSXVKWKHPDFKLQHRႇWKHSDOOHWLQWKHUHYHUVLQJGLUHFWLRQ
Unpack the brushes from their packaging.
Clean the outside of the machine, taking care to respect safety regulations.
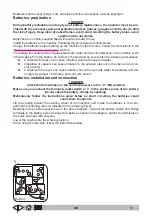
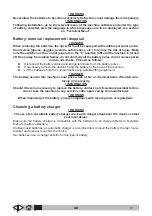
Once the machine is clear of all the packaging materials, proceed to install the batteries — see
sections on “
Battery: preparation
“ and “
Battery: installation and collegamento
´²DQG¿WWKHVLGH
brushes: see section on “
Replacing/installing the side brushes
”.
The packaging may be kept and reused to protect the machine if it is moved to another site or to a
repair workshop.
Otherwise it must be disposed of in compliance with current regulations.
Batteries (Battery version)
7ZRGLႇHUHQWW\SHVRIEDWWHU\PD\EHLQVWDOOHGRQWKHVHPDFKLQHV
Ź
Wet/lead-acid batteries: these require regular checks on electrolyte level. When neces-
VDU\WRSXSZLWKGLVWLOOHGZDWHUXQWLOWKHSODWHVDUHFRYHUHG'RQRWRYHU¿OOPPPD[
above the plates).
Ź
Gel batteries: this type of battery requires no maintenance.
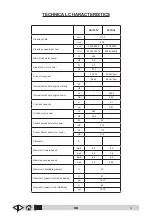
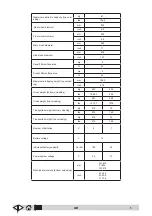
Battery technical characteristics must correspond to those listed in the
Technical characteristics
section. The use of higher capacity batteries could seriously jeopardise manoeuvrability and lead to
the drive motor overheating. Batteries with a lower capacity and weight will require charging more
frequently.
15
Summary of Contents for 838R
Page 2: ...IT IT ITALIANO Istruzioni originali 2 ...
Page 42: ...IT GB ENGLISH Translated instructions 2 ...
Page 47: ...IT GB X Y Z See TECHNICAL CHARACTERISTICS table MACHINE DIMENSIONS X Y1 Y2 Z X Y Z 7 ...
Page 82: ...IT FR FRANÇAIS Traduction du mode d emploi original 2 ...
Page 87: ...IT FR 9RLU WDEOHDX 5 7e5 67 48 6 7 1 48 6 ª DIMENSIONS MACHINE X Y1 Y2 Z X Y Z 7 ...
Page 122: ...IT DE DEUTSCH Übersetzung der Original Be dienungsanleitung 2 ...
Page 127: ...IT DE X Y Z Siehe Tabelle TECHNISCHE DATEN ABMESSUNGEN DER MASCHINE X Y1 Y2 Z X Y Z 7 ...
Page 162: ...IT ES ESPAÑOL Traducción de las instrucciones originales 2 ...
Page 167: ...IT ES 9pDVH OD 7DEOD 5 7 5Ë67 6 7e 1 6 DIMENSIONES DE LA MÁQUINA X Y1 Y2 Z X Y Z 7 ...
Page 202: ...IT NO NORSK Oversettelse av originalinstruksjonene 2 ...
Page 207: ...IT NO 6H WDEHOOHQ 7 1 6 16 3 5 MASKINDIMENSJON X Y1 Y2 Z X Y Z 7 ...
Page 242: ...IT NL NEDERLANDS Vertaling van de originele instructies 2 ...
Page 247: ...IT NL LH WDEHO 7 1 6 16 33 1 AFMETINGEN MACHINE X Y1 Y2 Z X Y Z 7 ...
Page 282: ...IT PT PORTUGUÊS Tradução das instruções originais 2 ...
Page 287: ...IT PT 9HU D WDEHOD 5 7 5Ë67 6 7e 1 6 DIMENSÃO DA MÁQUINA X Y1 Y2 Z X Y Z 7 ...
Page 322: ...IT SE SVENSKA Översättning av originalinstruktioner 2 ...
Page 327: ...IT SE 6H WDEHOOHQ 7 1 6 16 3 5 MASKINENS DIMENSIONER X Y1 Y2 Z X Y Z 7 ...
Page 362: ...IT RU ɊɍɋɋɄɂɃ ɩɟɪɟɜɨɞ ɨɪɢɝɢɧɚɥɶɧɵɯ ɢɧ ɫɬɪɭɤɰɢɣ 2 ...
Page 367: ...IT RU ɋɦ ɬɚɛɥɢɰɭ ɌȿɏɇɂɑȿɋɄɂȿ ɏȺɊȺɄɌȿɊɂɋɌɂɄɂª ɊȺɁɆȿɊɕ ɆȺɒɂɇɕ X Y1 Y2 Z X Y Z 7 ...
Page 402: ...IT BG ȻɔɅȽȺɊɋɄɂ ɉɪɟɜɨɞ ɧɚ ɨɪɢɝɢɧɚɥɧɢɬɟ ɢɧɫɬɪɭɤɰɢɢ 2 ...
Page 407: ...IT BG ȼɠ ɬɚɛɥɢɰɚ ɌȿɏɇɂɑȿɋɄɂ ɏȺɊȺɄɌȿɊɂɋɌɂɄɂ ɊȺɁɆȿɊɂ ɇȺ ɆȺɒɂɇȺɌȺ X Y1 Y2 Z X Y Z 7 ...
Page 442: ...IT DK DANSK Oversatte instruktioner 2 ...
Page 447: ...IT DK 6H WDEHOOHQ 7 1 6 63 7 21 5 MASKIN DIMENSIONER X Y1 Y2 Z X Y Z 7 ...
Page 482: ...IT FI SUOMI Käännetyt ohjeet 2 ...
Page 487: ...IT FI X Y Z Katso TEKNISET TIEDOT taulukkoa KONEEN MITAT X Y1 Y2 Z X Y Z 7 ...
Page 522: ...IT CN ѝ᮷ 䈤 Җ䈁᮷ 2 ...
Page 527: ...IT CN 㿱Āᢰᵟ ᙗā㺘 ᵪಘቪረ X Y1 Y2 Z X Y Z 7 ...
Page 558: ...CN ᰐ ᤱ 䟿 㕪 3 ཀྵᆀᶮᔰ 3 ᤗ 38 ...

