VMAC
– Vehicle Mounted Air Compressors
Toll Free:
1-800-738-8622 Local: 1-250-740-3200
Fax: 1-250-740-3201
48
8.4.2
Changing Compressor Oil Filter
Follow all safety precautions.
Clean debris and dust from the area around the air/oil separator
tank and the filter to prevent contamination.
Remove the filter by turning it counterclockwise using a suitable
filter wrench.
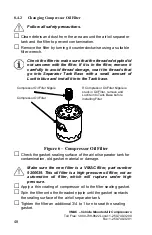
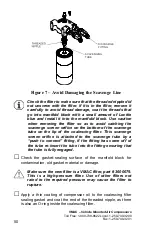
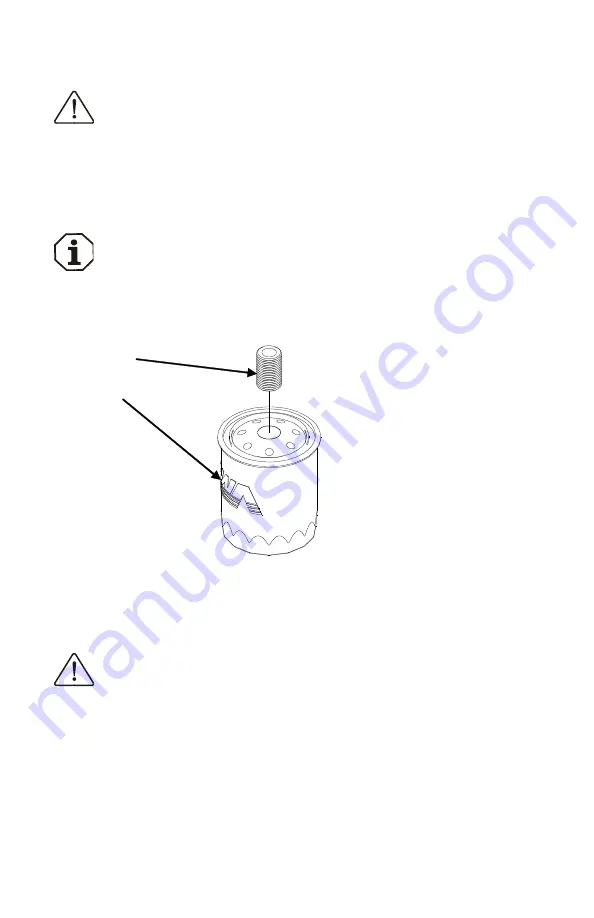
Check the filter to make sure that the threaded nipple did
not unscrew with the filter. If it is in the filter, remove it
carefully to avoid thread damage, coat the threads that
go into Separator Tank Base with a small amount of
Loctite blue and install it into the Tank base.
If Compressor Oil Filter Nipple is
stuck in Oil Filter, remove and
Loctite into Tank Base before
installing Filter
Compressor Oil Filter
Compressor Oil Filter Nipple
Figure 6 – Compressor Oil Filter
Check the gasket-sealing surface of the air/oil separator tank for
contamination, old gasket material or damage.
Make sure the new filter is a VMAC filter, part number
9200039. This oil filter is a high pressure oil filter, not an
automotive oil filter, which will rupture under high
pressure.
Apply a thin coating of compressor oil to the filter sealing gasket.
Spin the filter onto the threaded nipple until the gasket contacts
the sealing surface of the air/oil separator tank.
Tighten the filter an additional 3/4 to 1 turn to seat the sealing
gasket.
Summary of Contents for RAPTAIR-MF D600007
Page 2: ......
Page 62: ...This page intentionally left blank...
Page 64: ...This page intentionally left blank...
Page 65: ...This page intentionally left blank...
Page 66: ...This page intentionally left blank...
Page 67: ......
Page 68: ......

