Installation Instructions,
Revised 02/11/14
4
PART 2 Range Hood Mounting
Important Installation Note
Removal of the front panel
Before removing the stainless steel front panel on the unit, you must first remove the aluminum knob on the dimmer
switch. This is accomplished by loosening the set screw located on the side of the knob, by means of an allen
wrench (not supplied). Loosen the set screw slowly, until you can slide the knob off the shaft of the switch.
Proceed in removing the screws that hold up the front panel. Hold the front panel in place as you loosen the
screws so that the front panel does not fall onto the cook top.
When putting back on the front panel and aluminum knob, DO NOT over tighten the set screw as this can cause
damage to the threads in the knob.
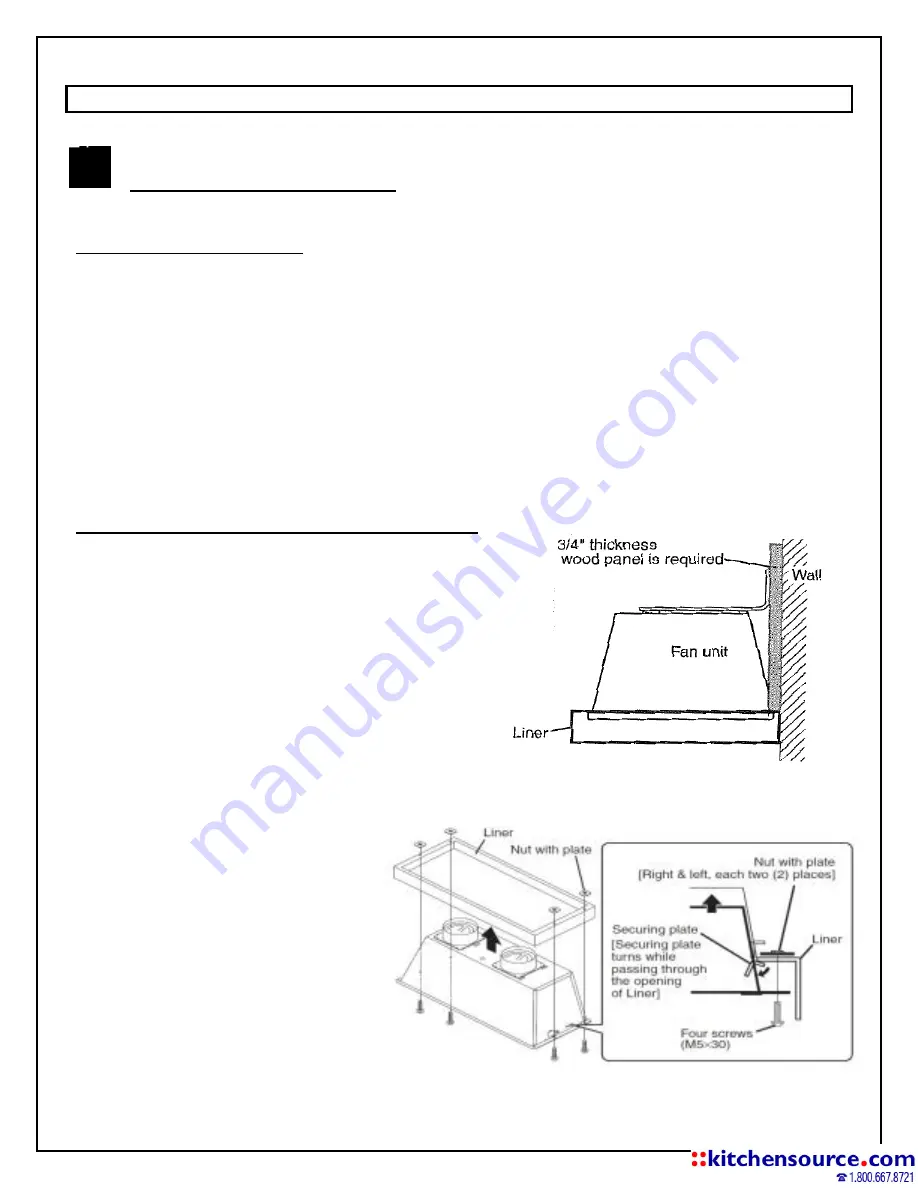
Mounting procedure for 08E W (Wall Mounting)
Before mounting, make sure that a wood panel for
mounting the range hood is fixed on the wall where
the range hood is installed.
Note:
If no wood panel is found on the wall, be sure to
prepare one referring to the figure.
Align 4 screw holes
of the liner and
range hood, then
fix securely using
the supplied screws
(M5×30) and nuts.
Note:
Fasten all the screws and nuts evenly.


