8
Calibration
lost!
Battery
too low
Shut-off
in 5 sec
3 Warning messages
The following message may appear in normal operation:
This message may appear if the calibration data is lost from the permanent FRAM memory
or if the calibration data are corrupted. In such cases, the instrument must be re-calibrated;
otherwise it will measure incorrectly. The message appears only
once,
and
then
default calibration data is used.
When this message appears, the battery voltage is too low to ensure a correct running
condition. The measurements may be invalid! The instrument battery pack must be charged
immediately, using the external charger. In order to temporarily decrease the power
consumption, the backlight will be switched
OFF
. The instrument can still work, but only
for a short while. If even in this condition the voltage remains low, the instrument will shut
off in 20 sec.
This message appears only if the
Auto-shut off
setting is enabled. The user may cancel the
shut-off condition, pressing any key
except ON/OFF
. If no key is pressed the instrument
will shut off in 5 seconds.
This message appears only if the
Transducer power
setting
is enabled and indicates that the
transducer is missing or is out of order.
When the
Transducer power
setting is disabled, the user has the possibility to use another external source for
the vibration input (a signal generator or a buffered output from another device).
When the instrument starts, the
Transducer power
is always
ENABLED
. When this message appears, it will
remain on the screen, even if the transducer is plugged-in. To continue the normal running mode in such a
condition, switch the screen temporarily to another menu. When you come back, the message disappears.
Missing
transducer
Summary of Contents for VIBER X2 Pro
Page 1: ...VIBER X2 Pro An instrument for analysing and trending Manual Ver 1 0 English...
Page 2: ...2...
Page 6: ...6...
Page 15: ...15 You can also click on the symbol that shows a white sheet of paper to create a new project...
Page 17: ...17 Assign the project a name by clicking on the green W...
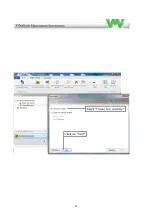
Page 20: ...20 Enter a name for the department proceed with a click on Next...
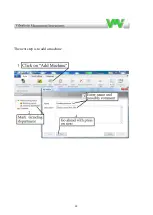
Page 22: ...22 The next step is to add a machine...
Page 23: ...23...
Page 24: ...24...
Page 28: ...28 Temperature is not measured with VIBER X2 Pro...
Page 29: ...29...
Page 31: ...31...
Page 32: ...32...
Page 33: ...33...
Page 34: ...34 Now we need to assign Grinding machine 2 slot number Storage locations...
Page 35: ...35...
Page 43: ...43 Wait a while and the transfer procedure will start...


