Vibraon Measurement Instruments
26
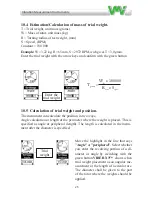
10.6 Calculating length of the arc
Measure the diameter and scroll down to ”Dia” (diameter) and press the green
button. Enter the value of the line: ”Dia =?”.
Choose numbers with the up / down arrow keys. If the diameter is 130 mm enter
the value and confirm with the green button.
VIBER X3™
now calculates the distance to the periphery of
the three test points. Remember these three points on the machi
-
ne part with a pencil or marking tape. Mark the positions in
the direction of zero (0) as (position 1) and others (Item 2) and
(Item 3) in the direction towards the rotation.
10.7 Calculating the angle
The instrument calculates the angle of the balancing weight. The runs to 0°,
120°, 240°, indicated that the test weight should be placed at these angles
Measure the diameter and scroll down to "Dia" (diameter) and press the green button. Enter
the value of the line: "Dia =?". Choose numbers with the up / down arrow keys. If the
diameter is 130 mm enter the value and confirm with the green button.
Viber-X3 ™ now calculates the distance to the periphery of the three test points.
Remember these three points on the machine part with a pencil or marking tape. Mark
the positions in the direction of zero (0) as (position 1) and others (Item 2) and (Item 3)
in the direction towards the rotation.
.
Calculating the angle
The instrument calculates the angle of the balancing weight. The runs to 0 °, 120 °, 240
°, indicated that the test weight should be placed at these angles
Preparations of first test drive
Scroll to the bar at the bottom that has
a left and right arrow symbol, t jerk the right arrow
key * to display the screen for measurement.
the left arrow key, allowing you
provide ongoing balancing, if it happens, you can go back through the menu to the ongoing.
2. Balancing
1)
Start the machine, initial run
Preparations of first test drive
Move the cursor to the field at the
bottom that has a left and right
arrow symbol, press the right arrow
key * to display the screen for mea
-
surement.
*The left and right arrow key, provides a means to jump back and forward
between the steps in the balancing procedure.
Type
diameter
Left and
right arrow
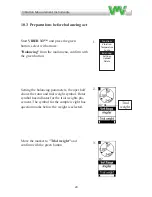
1. Preparations before balancing act
1.
Start Viber-X3 and press the green button, select with arrows:
"Balancing" from the main menu, confirm with the green button..
2.
Setting the balancing parameters, the upper half shows the rotor
and trial weight symbol. Rotor symbol has indicator for the trial
weights placement. The symbol for the sample weight has
question marks before the weight is selected
.
3.
Move the marker to
”Trial weight”
and confirm with the green
button
Summary of Contents for VIBER X3
Page 2: ......
Page 38: ...Vibra on Measurement Instruments 36...
Page 39: ...Vibra on Measurement Instruments 37...
Page 41: ...Vibra on Measurement Instruments 39...
Page 43: ...Vibra on Measurement Instruments 41...
Page 46: ...Vibra on Measurement Instruments 44 Click on next...
Page 48: ...Vibra on Measurement Instruments 46 Click on next...
Page 58: ...Vibra on Measurement Instruments 56...
Page 59: ......

