Vibraon Measurement Instruments
42
Create Route Plan and editing database
Measuring
Try to make the database with machines you want to measure within the same interval (weekly,
monthly etc).
The machines to be included in the program provided by VIBER X3 and Trend View, PC program,
must be fit with a measuring point/direction documented similar to the proposals contained in this
manual.
When working with this route measurement, we recommend marking each point with a number that
is always used in these measurements.
If measurements are made in 3 directions, the measurements will be saved at each measuring point,
which normally are the bearings.
When you press the measurements on the save key a proposal where the data should be saved is
showed on the display, it can be accepted or moved to another measuring figure by arrows. Up and
down Arrows moves the slot one number, side Arrows moves 10 numbers (all seen in the display).
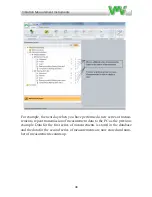
If you need to edit anything in your
database, mark the issue and click
with the right button on your mouse
and choose “properties”. All properties
can be changed or renamed in the
coming menus.
You can extract a list (Route Plan) from
the program to use as an orientation and
reminder where the measuring points
are located.
Right click in the Measurement Project
at the actual location, Department,
Building i.e. and
choose “Route Plan”
print out a list, this helps a lot when
measuring the route.
When you have done this a part of your
database are ready and can be stored in
the computer.
11.4 Create Route Plan and editing database
11.5 Measuring
Try to make the database with machines you want to measure within the
same interval (weekly, monthly etc).
The machines to be included in the program provided by
VIBER X3™
and
Trend View, PC program, must be fit with a measuring point/direction do
-
cumented similar to the proposals contained in this manual.
When working with this route measurement, we recommend marking each
point with a number that is always used in these measurements.
If measurements are made in 3 directions, the measurements will be saved
at
each measuring point, which normally are the bearings.
When you press the measurements on the Hold for SAVE key a proposal
slot, where the data should be saved is showed, it can be accepted or moved
to another measuring figure by arrows. Up and down Arrows moves the slot
one number, side Arrows moves 10 numbers (all seen in the display).
When the is pressed, the measurement is saved and the instrument conti-
nues to measure. If you not want to save, press the Hold for SAVE key once
more and you get back to measure mode.
Summary of Contents for VIBER X3
Page 2: ......
Page 38: ...Vibra on Measurement Instruments 36...
Page 39: ...Vibra on Measurement Instruments 37...
Page 41: ...Vibra on Measurement Instruments 39...
Page 43: ...Vibra on Measurement Instruments 41...
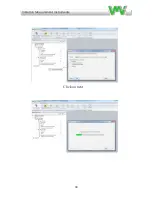
Page 46: ...Vibra on Measurement Instruments 44 Click on next...
Page 48: ...Vibra on Measurement Instruments 46 Click on next...
Page 58: ...Vibra on Measurement Instruments 56...
Page 59: ......


