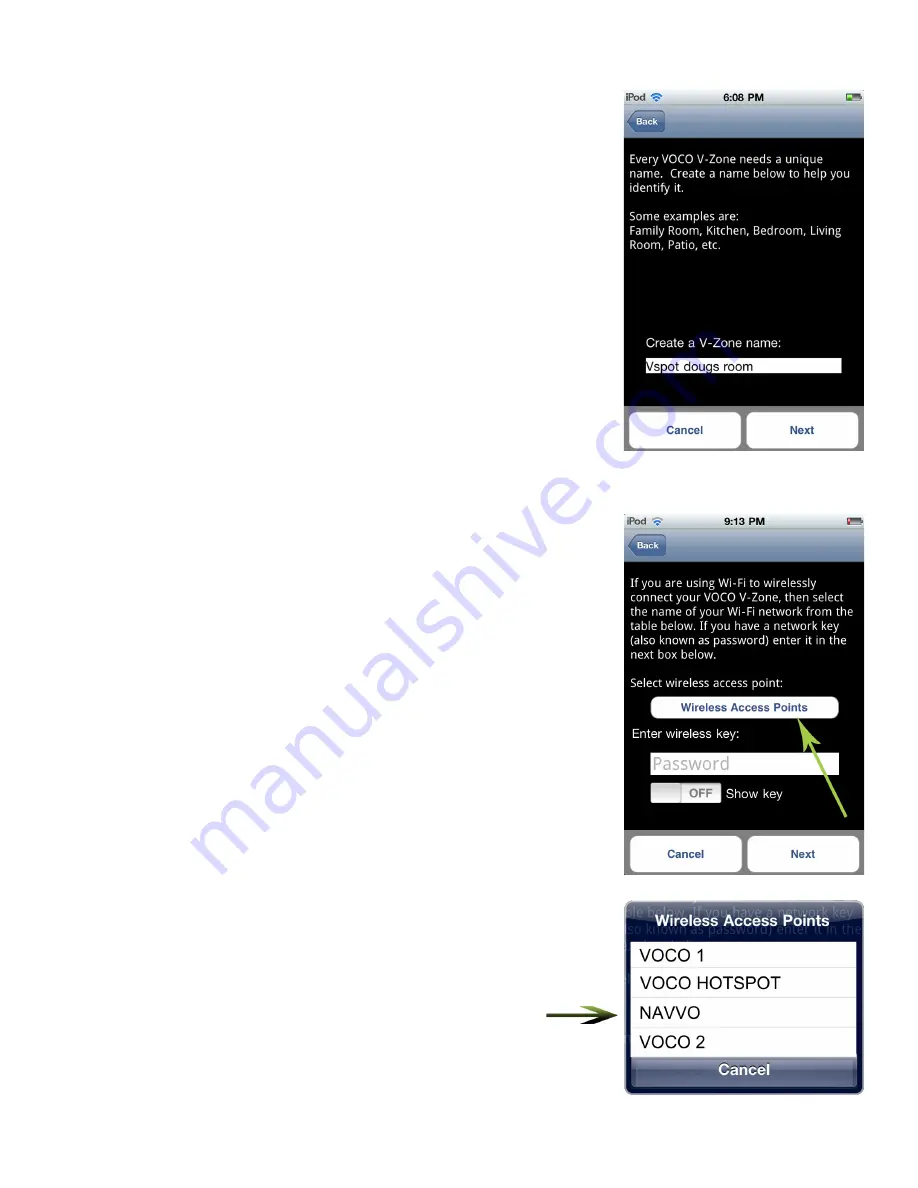
Step 4:
Every VOCO media player that is setup on your network
needs to have a unique name, this makes it easy to identify
which VOCO media player you are currently streaming media
from or other available VOCO players on your network.
In this screen simply name your VOCO media player. You can
name your VOCO media player anything that you would like,
just not the name of an existing VOCO media player on your
network. Once you enter the name press the “Next” button.
Step 5:
In this screen tap on the box that says “Wireless Access
Points” and you will receive a pop-up window listing all of the
available wireless networks you have available.
Just select the wireless network that you want to connect
your VOCO media player to. (For a later example we would
select “NAVVO”) If it is a secure network, you will then need
to enter the network password and tap on the “Next” button.
*Please Note that if you have multiple, available networks,
remember which one that you selected because you will
need to know this later on in the configuration process.
Then follow the rest of the on screen instructions.


