3
Installing the InnoMedia MTA 3328-2R
(continued)
Connecting the MTA
(continued)
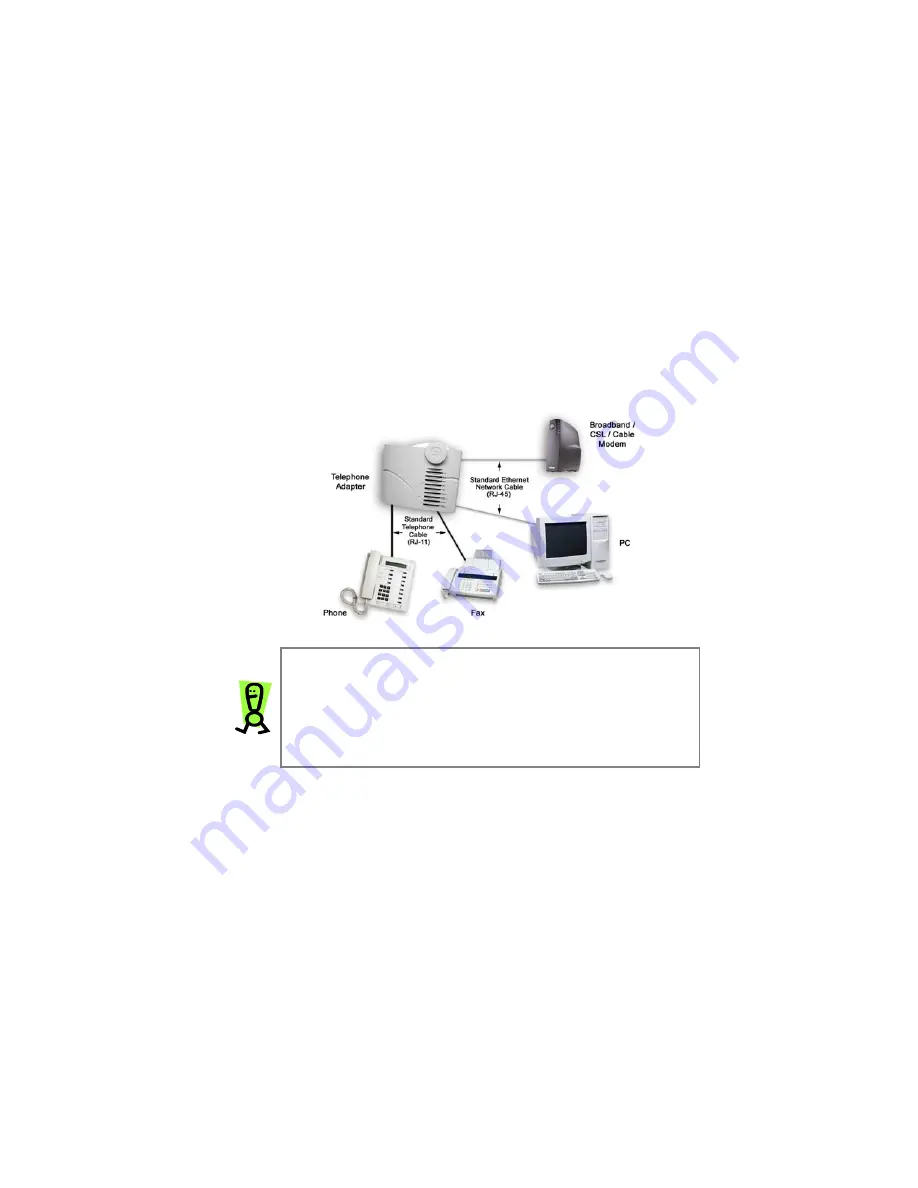
2. Using the standard Ethernet network cable (RJ-45) included with the
MTA device, connect the
LAN
port on the back of the MTA to your PC’s
Ethernet port.
3. Using the standard telephone wire (RJ-11) included with the device,
connect the
Phone 1
port on the back of the device to your telephone.
4. Using the standard Ethernet network cable (RJ-45) supplied by your
Internet Service Provider, connect the
WAN
port on the back of the
MTA to your broadband/DSL/cable modem or existing LAN broadband
connection (i.e., office network).
5. Plug in the broadband/DSL/cable modem’s power cord.
Wait about two minutes for the modem to initialize
.
6. Connect the D/C power adapter (included with the device) to the
PWR
port on the back of the MTA, and then plug in the power cord.
Wait several minutes for the device to initialize. It may take up to fifteen
(15) minutes for the device to download the configuration files.
The MTA is ready when the RUN light is steady.
7. Turn on your PC.
Your PC will obtain an IP address from the MTA. Your PC will now
have Internet connectivity.
Figure 2
:
The MTA Configuration
(For DHCP users with a single PC.)
IMPORTANT: After you set up the MTA for the first time, it
may take up to fifteen (15) minutes for the automatic download
of the configuration files to complete. During the download
process, the device’s RUN LED blinks quickly (one second on,
one second off). When the RUN LED stops blinking and
remains steady, the download process is complete -- you will
now hear a dial tone.
For more information on the MTA device’s LED indicators, refer to the
MTA LED
STATUS INDICATORS
table on the following page.
Summary of Contents for InnoMedia MTA 3328-2R
Page 1: ......
Page 2: ...VoiceLine Getting Started Guide InnoMedia MTA 3328 2R June 2005 ...
Page 6: ......


