Page 3
A. Initial Start
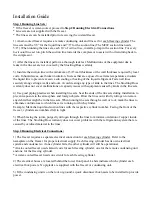
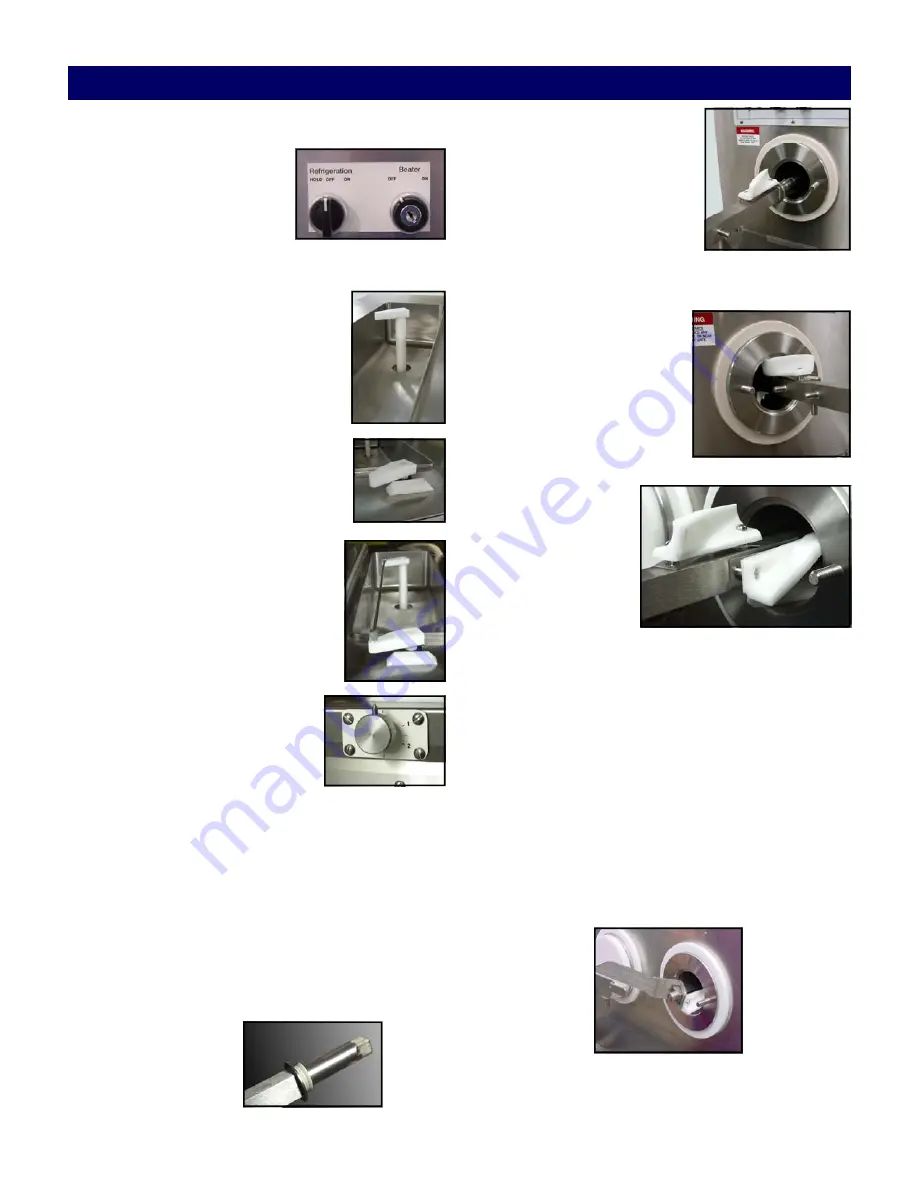
1. Make sure the refrigeration
and beater switches on the
front of the machine are
turned “OFF” and the beater
key is removed.
IMPORTANT: Wash hands and, if required, wear
disposable gloves to assemble and sani-
tize the machine.
B. Flow Control Valve Assem-
bly and Insertion
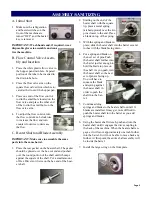
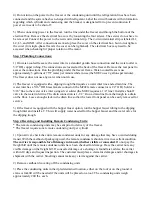
1. Place the white plastic flow valve in
the hopper pan drain hole. Tapered
portion of the tube to be inserted in
the drain tube hole.
2. Place the flow valve arm on the
square flow valve drive which is lo-
cated at the front of the hopper pan.
3. Place one end of the flow control
rod in the small hole located on the
flow valve and place the other end
of the rod in the small hole on the
flow valve arm.
4. To adjust the flow control, turn
the flow control knob clockwise
to increase the flow and turn
counter clockwise to decrease
the flow.
C. Beater Shaft and Blade Assembly
IMPORTANT: Make sure to assemble the same
parts into the same barrel.
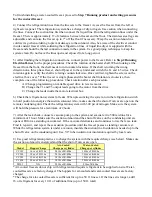
1. Place the rear gasket on the beater shaft. The gasket
should be placed over the hex cut end and pushed
over the round portion of the shaft until it bumps
against the square of the shaft. Put a small amount
of Hex Drive Anti Seize on the hex end of the beat-
er shaft.
2. Starting on the end of the
beater shaft with the square
tip, place a metal spring
(arched upward) over the two
pins closest to the end. Place
a blade on top of the spring.
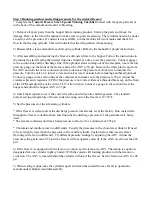
3. With the spring and blade in
place, slide the beater shaft into the barrel several
inches with the blade facing down.
4. Put a spring and blade on
the next set of pins. Push
the beater shaft further into
the barrel just far enough to
hold the blade in place on
the shaft. As you push, turn
the beater shaft so the next
set of pins is facing up.
You will have to
squeeze the blade
and spring against
the beater shaft in
order to push the
shaft into the bar-
rel.
5. Continue
adding
springs and blades to the beater shaft until all 12
blades are installed. It may get more difficult to
push the beater shaft into the barrel as you add
springs and blades.
6. Using the beater shaft wrench, push and turn the
beater shaft until it engages the drive coupling in
the back of the machine. When the beater shaft en-
gages, it will move approximately one inch further
into the barrel. It will not be able to move back any
further. At this point, the entire shaft assembly will
be inside the barrel.
7. Install the large o-ring on the front plate .
Assembly/Sanitizing
Summary of Contents for Stoelting CC101A
Page 1: ...Model CC101A OPERATORS MANUAL Manual No 513616 Rev 6 ...
Page 2: ......
Page 14: ......
Page 16: ...001 1332808 2 ...
Page 26: ......
Page 30: ......
Page 32: ......
Page 36: ......
Page 37: ......
Page 38: ......


